Introduction
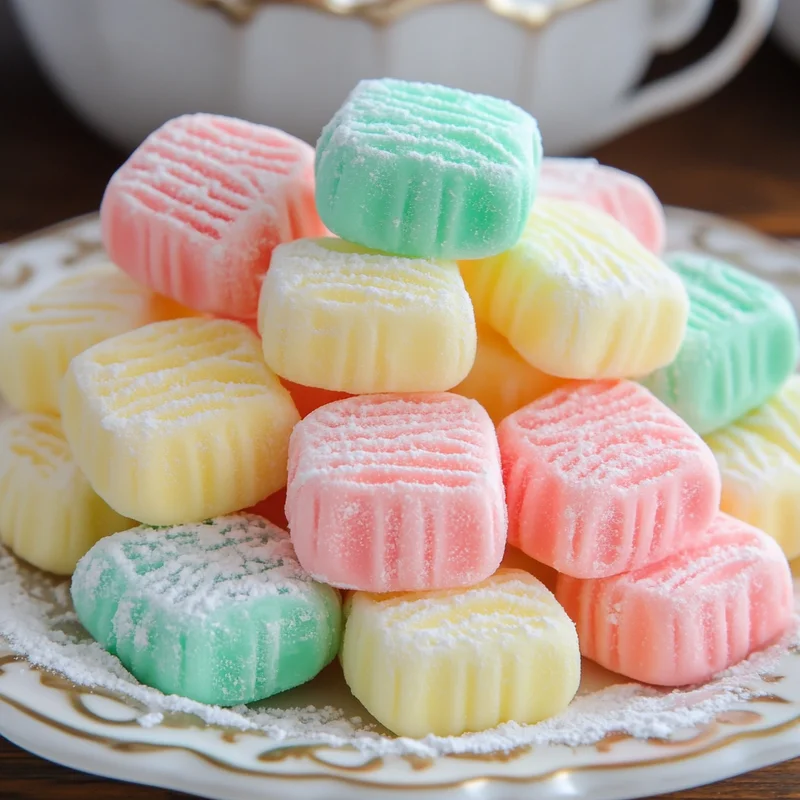
Oh, sweet friend, pull up a chair and let’s talk about memories! Do you remember those delightful, melt-in-your-mouth little mints? The kind you’d find at church bazaars, baby showers, or nestled in candy dishes during the holidays? They just scream simple, sweet nostalgia, don’t they?
Well, guess what? Making them yourself is ridiculously easy, incredibly fun, and brings all those cozy feelings right into your own kitchen. These Old-Fashioned Cream Cheese Mints require no baking, no fancy equipment, and just a handful of simple ingredients. Get ready to make some sweet magic!
Why You’ll Love This Recipe
Seriously, these mints are a winner for so many reasons. Here’s why you’ll fall head over heels for this recipe:
- Fast: Whip up a batch in under 30 minutes (plus chilling time!).
- Easy: No complicated steps, perfect for beginners or getting kids involved.
- Giftable: Package them up prettily, and you have the sweetest homemade gift.
- Crowd-pleasing: Who can resist a tender, minty bite? They disappear fast!

Ingredients
Gather ’round, let’s look at what you’ll need. The beauty of these mints is the simple ingredient list. You probably have most of this stuff already!
- 1 (8-ounce) package cream cheese, softened: Make sure it’s nice and soft, like spreadable butter! It helps everything mix smoothly.
- 4 tablespoons salted sweet cream butter, softened: Again, softened is key! Adds richness and helps bind the dough. Salted gives a nice balance to the sweetness.
- 2 teaspoons pure peppermint extract: This is where the magic mint flavor comes from! Use pure extract for the best taste.
- ½ teaspoon pure vanilla extract: Just a touch of vanilla rounds out the flavor and adds a little warmth.
- 1 (2-pound package or 7½ cups) powdered sugar: This is the bulk of the mints! You’ll need a good amount, so grab a fresh bag.
- Gel food coloring (yellow, blue, green, and red), 3-6 drops for desired color: Gel colors are best as they are concentrated and won’t add too much liquid. Have fun making pastel shades!
- 1 cup powdered sugar, for rolling: This prevents sticking and gives them that classic matte finish.
How to Make It
Alright, let’s get our hands a little sugary! Follow these simple steps, and you’ll have a platter of beautiful mints in no time.
First things first, make sure your cream cheese and butter are properly softened. You can leave them on the counter for an hour or two, or carefully soften them in the microwave for just a few seconds.
In a large bowl, using an electric mixer (or a sturdy spoon and some arm power!), beat together the softened cream cheese and softened butter until they are smooth and creamy. No lumps allowed!
Now, add the pure peppermint extract and pure vanilla extract. Give it another quick mix to combine those lovely flavors.
Next comes the powdered sugar. Add it in batches, mixing well after each addition. Start with about half the bag, mix until combined, then add the rest. The mixture will become very thick, like a stiff dough.
Once all the powdered sugar is incorporated, you should have a thick, slightly sticky dough. Now’s the fun part – dividing and coloring! Divide the dough into as many portions as you want colors. I usually go for 3 or 4 colors.
Take one portion and place it in a separate bowl. Add just a few drops (start with 1-2) of gel food coloring. Knead the color into the dough with your hands until the color is uniform. Add more color drop by drop if you want a deeper shade. Repeat with the other portions, using different colors.
Now it’s time to shape them! Pour the extra cup of powdered sugar onto a plate or shallow dish for rolling. Pinch off small pieces of colored dough, about the size of a marble or a little smaller. Roll each piece into a smooth ball.
Dip each little ball into the powdered sugar, coating it completely. Then, place it on a plate or baking sheet lined with parchment paper or wax paper.
To get that classic flat mint shape, you can gently press down on each sugar-coated ball with the bottom of a glass or a fork. Some people use specific mint molds for fancy shapes – totally up to you!
Once they are all shaped, place the plate or baking sheet in the refrigerator to chill for at least 30 minutes. This helps them firm up and makes them easier to handle and store.
That’s it! You’ve made beautiful, homemade cream cheese mints. Give yourself a pat on the back and maybe sample one (or two!).
Substitutions & Additions
While the classic peppermint is divine, feel free to get creative!
- Flavor Swap: Instead of peppermint, try almond extract, orange extract, or even lemon extract! Vanilla bean paste instead of extract adds pretty speckles.
- Extra Texture/Flavor: You could try adding a tiny pinch of salt (like sea salt flakes) at the end, though it’s not traditional.
- Decorations: Before they set, you could press a tiny sprinkle or nonpareil into the top of each mint for extra sparkle.
Tips for Success
Here are a few little pointers I’ve picked up along the way to make sure your mints turn out perfectly every time:
- Soften Ingredients Properly: I can’t stress this enough! Cold cream cheese and butter make for lumpy mints.
- Measure Powdered Sugar: While 2 pounds is standard, humidity can affect how much you need. If your dough feels too sticky after adding the full amount, add a tiny bit more powdered sugar until it’s manageable but still soft. If it feels too dry, add a drop or two of milk or cream cheese (softened!) until it comes together.
- Don’t Over-Color: A little gel color goes a long way! Start with just a drop or two and add more gradually.
- Prep Ahead: You can make the dough, divide and color it, and store the colored portions wrapped tightly in plastic wrap in the fridge for a day or two. Shape and roll them when you’re ready.
How to Store It
Once your mints are chilled and firm, transfer them to an airtight container. You can layer them with wax paper or parchment paper to prevent sticking.
Store them in the refrigerator. They will keep well for 2-3 weeks. They can also be frozen in an airtight container for several months; just let them thaw in the fridge before serving.
FAQs
Got questions? I’ve got answers!
Why are my mints sticky?
This usually means you didn’t use enough powdered sugar, or your cream cheese/butter wasn’t softened enough initially. Make sure you incorporate the full 2 pounds, adding a little more if needed until the dough is manageable. Rolling them generously in the extra powdered sugar also helps!
Can I use liquid food coloring?
You can, but liquid food coloring adds more moisture to the dough, which might make it stickier and require adding even more powdered sugar. Gel coloring is concentrated and works best for candy making.
Do I have to use a mold?
Absolutely not! The classic method is simply pressing them with a glass or fork. Molds are fun if you have them, but not necessary.
Can I make these sugar-free?
Unfortunately, traditional cream cheese mints rely heavily on powdered sugar for structure and texture. Substituting with a sugar substitute won’t give you the same result.
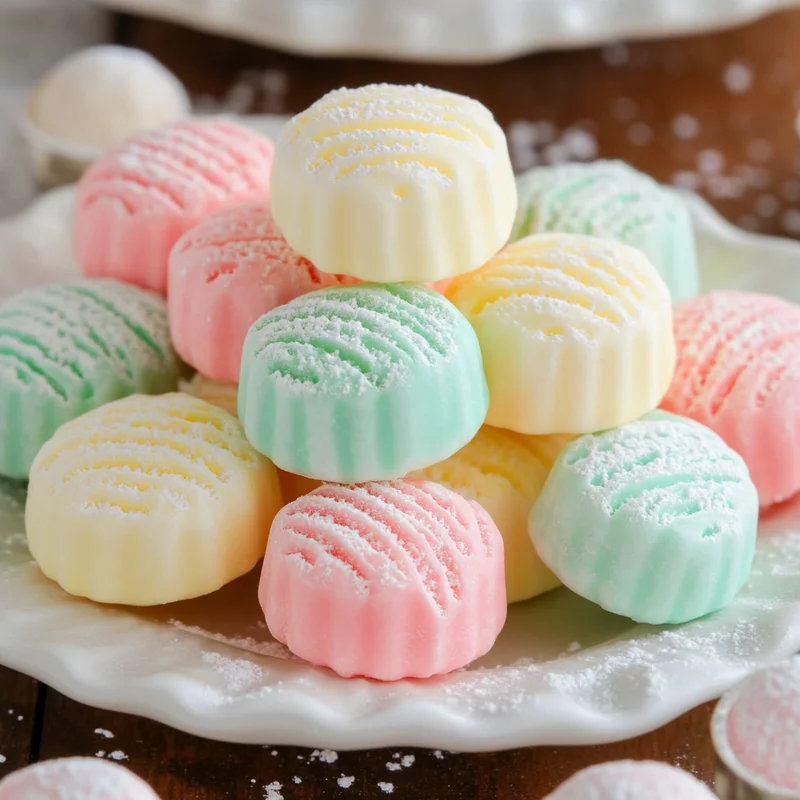
PrintGrandma’s Secret Old-Fashioned Cream Cheese Mints

These delightful, melt-in-your-mouth cream cheese mints are an old-fashioned treat that’s incredibly easy to make at home with no baking required. Perfect for holidays, parties, or simple sweet nostalgia.
- Prep Time: 30 minutes
- Total Time: 30 minutes
- : Lara
Ingredients
Main Ingredients
- 8 oz package cream cheese (softened)
- 4 tablespoons salted sweet cream butter (softened)
- 2 teaspoons pure peppermint extract
- 0.5 teaspoon pure vanilla extract
- 2 pound package powdered sugar (or 7.5 cups)
- 3 drops Gel food coloring (or 6, yellow, blue, green, and red, for desired color)
- 1 cup powdered sugar (for rolling)
Instructions
- First things first, make sure your cream cheese and butter are properly softened. You can leave them on the counter for an hour or two, or carefully soften them in the microwave for just a few seconds.
- In a large bowl, using an electric mixer (or a sturdy spoon and some arm power!), beat together the softened cream cheese and softened butter until they are smooth and creamy. No lumps allowed!
- Now, add the pure peppermint extract and pure vanilla extract. Give it another quick mix to combine those lovely flavors.
- Next comes the powdered sugar. Add it in batches, mixing well after each addition. Start with about half the bag, mix until combined, then add the rest. The mixture will become very thick, like a stiff dough.
- Once all the powdered sugar is incorporated, you should have a thick, slightly sticky dough. Now’s the fun part – dividing and coloring! Divide the dough into as many portions as you want colors. I usually go for 3 or 4 colors.
- Take one portion and place it in a separate bowl. Add just a few drops (start with 1-2) of gel food coloring. Knead the color into the dough with your hands until the color is uniform. Add more color drop by drop if you want a deeper shade. Repeat with the other portions, using different colors.
- Now it’s time to shape them! Pour the extra cup of powdered sugar onto a plate or shallow dish for rolling. Pinch off small pieces of colored dough, about the size of a marble or a little smaller. Roll each piece into a smooth ball.
- Dip each little ball into the powdered sugar, coating it completely. Then, place it on a plate or baking sheet lined with parchment paper or wax paper.
- To get that classic flat mint shape, you can gently press down on each sugar-coated ball with the bottom of a glass or a fork. Some people use specific mint molds for fancy shapes – totally up to you!
- Once they are all shaped, place the plate or baking sheet in the refrigerator to chill for at least 30 minutes. This helps them firm up and makes them easier to handle and store.
- That’s it! You’ve made beautiful, homemade cream cheese mints. Give yourself a pat on the back and maybe sample one (or two!).
Notes
Substitutions & Additions:
– Flavor Swap: Instead of peppermint, try almond extract, orange extract, or even lemon extract! Vanilla bean paste instead of extract adds pretty speckles.
– Extra Texture/Flavor: You could try adding a tiny pinch of salt (like sea salt flakes) at the end, though it’s not traditional.
– Decorations: Before they set, you could press a tiny sprinkle or nonpareil into the top of each mint for extra sparkle.
Tips for Success:
– Soften Ingredients Properly: Cold cream cheese and butter make for lumpy mints.
– Measure Powdered Sugar: While 2 pounds is standard, humidity can affect how much you need. If your dough feels too sticky after adding the full amount, add a tiny bit more powdered sugar until it’s manageable but still soft. If it feels too dry, add a drop or two of milk or cream cheese (softened!) until it comes together.
– Don’t Over-Color: A little gel color goes a long way! Start with just a drop or two and add more gradually.
– Prep Ahead: You can make the dough, divide and color it, and store the colored portions wrapped tightly in plastic wrap in the fridge for a day or two. Shape and roll them when you’re ready.
Storage:
– Store chilled and firm mints in an airtight container, layered with wax paper or parchment paper, in the refrigerator for 2-3 weeks.
– Can be frozen in an airtight container for several months; thaw in the fridge before serving.
FAQs:
– Why are my mints sticky? Usually means not enough powdered sugar or ingredients weren’t soft enough. Incorporate the full 2 pounds, add more if needed, and roll generously in extra powdered sugar.
– Can I use liquid food coloring? Yes, but it adds more moisture, potentially requiring more powdered sugar. Gel coloring is recommended.
– Do I have to use a mold? No, pressing with a glass or fork is traditional.
– Can I make these sugar-free? Unfortunately, the texture relies heavily on powdered sugar; substitutes won’t yield the same result.