
Introduction
Oh friends, gather ’round! Does anything bring you back to carefree summer days quite like the creamy, dreamy flavor of an Orange Creamsicle? That iconic swirl of tangy orange and smooth vanilla… pure nostalgia! Well, I’m absolutely thrilled to share a recipe that captures that magical feeling in cake form. This Orange Creamsicle Poke Cake is ridiculously easy, bursting with sunshine flavor, and honestly, it disappears faster than you can say “popsicle”! It’s the perfect dessert for potlucks, picnics, birthdays, or just because you need a little sweet joy in your life.
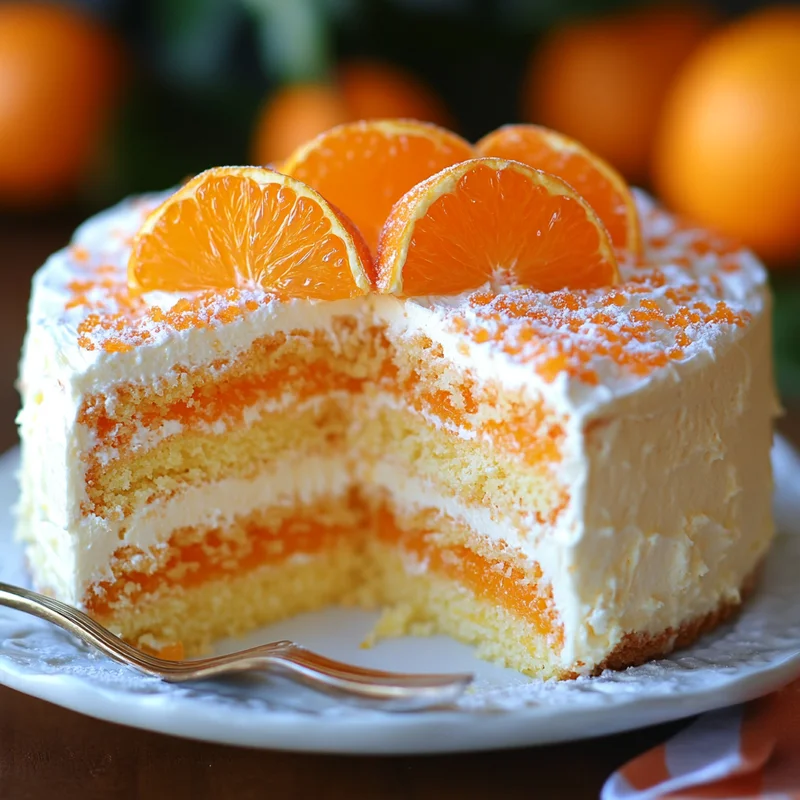
It all starts with a simple cake mix base (shhh, it’s our little secret!), gets infused with a vibrant orange burst, and is topped with a luscious, creamy, pudding-whipped topping studded with juicy mandarin oranges. It’s a no-fuss, maximum-flavor kind of dessert, and trust me, everyone who tries it will be asking for the recipe!
Why You’ll Love This Recipe
- Fast: Quick to mix up, bake, and assemble.
- Easy: Uses simple ingredients and straightforward steps – perfect for any skill level!
- Giftable: Makes a beautiful, transportable dessert for sharing.
- Crowd-pleasing: That classic creamsicle flavor is universally loved!
Ingredients
Here’s what you’ll need to whip up this ray of sunshine:
- 15.25 ounces vanilla cake mix: Your favorite box mix works perfectly here! It’s our easy shortcut base.
- 3 large eggs, room temperature: Room temp eggs mix better and help your cake bake more evenly.
- 1 cup milk or vanilla almond milk: Adds moisture and richness. Almond milk keeps it dairy-free if needed.
- ½ cup vegetable oil: For tenderness and moisture.
- 1 tablespoon orange zest: Don’t skip this! It adds a bright, fragrant punch of fresh orange flavor.
- 3.4 ounces orange gelatin mix (such as JELL-O): This is where that iconic orange color and flavor really come from!
- 1 ¼ cups boiling water: To dissolve the gelatin magic.
- ⅓ cup fresh squeezed orange juice: Enhances the orange flavor even more and adds a touch of tanginess.
- 15 ounces canned mandarin oranges, undrained: We’ll use the oranges in the topping, and maybe a little of that lovely juice!
- 3.5 ounces vanilla instant pudding mix: The base for our creamy, dreamy topping. Make sure it’s instant pudding.
- 8 ounces frozen whipped topping, thawed (such as Cool Whip): Folds into the pudding for that light, airy, creamsicle-like creaminess. Make sure it’s fully thawed!
How to Make It
Let’s get this deliciousness started! Follow these steps, and you’ll have a glorious cake in no time.
First, preheat your oven according to the cake mix package directions (usually around 350°F or 175°C). Grease and flour a 9×13 inch baking pan. This size pan is perfect for a poke cake!
Step 1: Make the Cake Batter. In a large bowl, combine the vanilla cake mix, room temperature eggs, milk (or almond milk), vegetable oil, and fresh orange zest. Beat with an electric mixer on medium speed for about 2 minutes, until everything is well combined and the batter is smooth. Scrape down the sides of the bowl as needed.
Step 2: Bake the Cake. Pour the batter evenly into your prepared 9×13 inch pan. Bake for the time recommended on your cake mix box, or until a toothpick inserted into the center comes out clean. This usually takes around 28-35 minutes.
Step 3: Prepare the Gelatin Mixture. While the cake is baking, or immediately after it comes out of the oven, get your gelatin ready. In a medium bowl, whisk together the orange gelatin mix and the boiling water until the gelatin is completely dissolved. Stir in the fresh squeezed orange juice. Set this aside.
Step 4: Poke the Cake. As soon as the cake comes out of the oven, while it’s still warm (but not piping hot), grab a fork or the round handle of a wooden spoon. Poke holes all over the top of the cake. Make the holes about an inch apart and go down about halfway into the cake. Don’t be shy! More holes mean more delicious orange juice infusion.
Step 5: Pour the Gelatin. Carefully and slowly pour the warm gelatin mixture evenly over the entire surface of the poked cake. Try to get it into all those glorious holes! The warm cake will absorb the liquid beautifully. Let the cake cool on a wire rack for about 30-60 minutes, then transfer it to the refrigerator to chill for at least 2 hours, or until the gelatin is fully set and firm.
Step 6: Make the Creamy Topping. While the cake is chilling, prepare the topping. Drain the mandarin oranges well, reserving the juice if you like (you can use it in a drink!). In a medium bowl, whisk together the vanilla instant pudding mix and 1 ½ cups of cold milk (or use the milk amount specified on the pudding box for “pie filling” consistency, which is usually slightly less liquid than for pudding). Whisk for 1-2 minutes until thickened. Gently fold in the thawed whipped topping until no streaks remain. Be careful not to overmix – we want it light and fluffy!
Step 7: Add the Oranges. Carefully fold the well-drained mandarin oranges into the pudding/whipped topping mixture. Be gentle so you don’t break up the orange segments too much.
Step 8: Assemble and Chill. Once the cake is fully chilled and the gelatin is set, spread the creamy mandarin topping evenly over the top of the cake. Cover the cake with plastic wrap or foil and refrigerate for at least another 2-4 hours (or ideally longer, like overnight) to allow the flavors to meld and the topping to set completely. This is crucial for the best texture!
Step 9: Serve! Slice and enjoy your incredible Orange Creamsicle Poke Cake! It’s pure sunshine in every bite.
Substitutions & Additions
- Cake Mix: While vanilla is classic, you could try a white cake mix, or even a lemon cake mix for an extra citrusy kick!
- Gelatin Flavor: Swap orange gelatin for peach, strawberry, or even lemon if you want to experiment, though orange is key for the creamsicle vibe!
- Fresh Fruit: While mandarin oranges are traditional for this recipe, you could also fold in drained canned pineapple pieces or fresh berries into the topping.
- Extracts: Add a teaspoon of vanilla extract or a few drops of orange extract to the cake batter or the topping for an extra flavor boost.
- Dairy-Free: Use vanilla almond milk in the cake batter. Ensure your cake mix and pudding mix are dairy-free (most are, but check labels). Use a dairy-free whipped topping alternative.

Tips for Success
- Room Temperature Eggs: I know it’s an extra step, but letting your eggs come to room temp really does help them incorporate better into the batter for a lighter cake. Just set them out on the counter for 30-60 minutes before you start.
- Don’t Overmix: For the cake batter, mix until just combined and smooth. Overmixing can lead to a tough cake.
- Poke While Warm: Poking the cake while it’s still warm allows the gelatin mixture to soak in more effectively.
- Chill, Chill, Chill!: Don’t rush the chilling process. It’s essential for the gelatin to set and the topping to firm up, giving you that perfect texture.
- Clean Slices: For neat slices, run your knife under hot water and wipe it clean between cuts.
How to Store It
This cake needs to be stored in the refrigerator due to the gelatin and pudding topping. Cover the pan tightly with plastic wrap or aluminum foil. It will keep well in the fridge for 3-4 days. While it’s technically safe to eat longer, the texture is best within this timeframe.
I don’t recommend freezing this cake, as the texture of the gelatin and the topping can become watery or grainy once thawed.
FAQs
Q: Can I use sugar-free cake mix or pudding mix?
A: Yes, you can absolutely substitute sugar-free versions of the cake mix, gelatin, and pudding mix if you prefer.
Q: Can I make this cake ahead of time?
A: This cake is perfect for making ahead! In fact, it’s even better on day two after the flavors have fully melded and everything has set properly. Just make sure it’s covered and refrigerated.
Q: Do I have to use fresh orange juice?
A: While fresh squeezed gives the best flavor, you can use store-bought 100% orange juice in a pinch.
Q: What if I don’t have a 9×13 pan?
A: You could potentially make this in two 8-inch or 9-inch round pans, adjusting the baking time slightly. You’d just need to poke and top both layers, maybe stacking them or serving them separately.

Easy & Sunshine-Filled Orange Creamsicle Poke Cake
Equipment
- 9x13 inch baking pan Grease and flour
- Electric mixer
- Large bowl
- Medium bowl (for gelatin and topping)
- Wire rack
- Fork or wooden spoon handle (for poking holes)
- Plastic wrap or foil
- Knife (for slicing)
Ingredients
Hauptzutaten
- 15.25 ounces vanilla cake mix Your favorite box mix works perfectly here! It's our easy shortcut base.
- 3 large eggs room temperature
- 1 cup milk or vanilla almond milk Adds moisture and richness. Almond milk keeps it dairy-free if needed.
- 0.5 cup vegetable oil For tenderness and moisture.
- 1 tablespoon orange zest Don't skip this! It adds a bright, fragrant punch of fresh orange flavor.
- 3.4 ounces orange gelatin mix such as JELL-O
- 1.25 cups boiling water To dissolve the gelatin magic.
- cup fresh squeezed orange juice Enhances the orange flavor even more and adds a touch of tanginess.
- 15 ounces canned mandarin oranges undrained
- 3.5 ounces vanilla instant pudding mix Make sure it's instant pudding.
- 8 ounces frozen whipped topping thawed (such as Cool Whip)
- 1.5 cups cold milk for topping
Instructions
- First, preheat your oven according to the cake mix package directions (usually around 350°F or 175°C). Grease and flour a 9x13 inch baking pan. This size pan is perfect for a poke cake!
- Step 1: Make the Cake Batter. In a large bowl, combine the vanilla cake mix, room temperature eggs, milk (or almond milk), vegetable oil, and fresh orange zest. Beat with an electric mixer on medium speed for about 2 minutes, until everything is well combined and the batter is smooth. Scrape down the sides of the bowl as needed.
- Step 2: Bake the Cake. Pour the batter evenly into your prepared 9x13 inch pan. Bake for the time recommended on your cake mix box, or until a toothpick inserted into the center comes out clean. This usually takes around 28-35 minutes.
- Step 3: Prepare the Gelatin Mixture. While the cake is baking, or immediately after it comes out of the oven, get your gelatin ready. In a medium bowl, whisk together the orange gelatin mix and the boiling water until the gelatin is completely dissolved. Stir in the fresh squeezed orange juice. Set this aside.
- Step 4: Poke the Cake. As soon as the cake comes out of the oven, while it's still warm (but not piping hot), grab a fork or the round handle of a wooden spoon. Poke holes all over the top of the cake. Make the holes about an inch apart and go down about halfway into the cake. Don't be shy! More holes mean more delicious orange juice infusion.
- Step 5: Pour the Gelatin. Carefully and slowly pour the warm gelatin mixture evenly over the entire surface of the poked cake. Try to get it into all those glorious holes! The warm cake will absorb the liquid beautifully. Let the cake cool on a wire rack for about 30-60 minutes, then transfer it to the refrigerator to chill for at least 2 hours, or until the gelatin is fully set and firm.
- Step 6: Make the Creamy Topping. While the cake is chilling, prepare the topping. Drain the mandarin oranges well, reserving the juice if you like (you can use it in a drink!). In a medium bowl, whisk together the vanilla instant pudding mix and 1 ½ cups of cold milk (or use the milk amount specified on the pudding box for "pie filling" consistency, which is usually slightly less liquid than for pudding). Whisk for 1-2 minutes until thickened. Gently fold in the thawed whipped topping until no streaks remain. Be careful not to overmix – we want it light and fluffy!
- Step 7: Add the Oranges. Carefully fold the well-drained mandarin oranges into the pudding/whipped topping mixture. Be gentle so you don't break up the orange segments too much.
- Step 8: Assemble and Chill. Once the cake is fully chilled and the gelatin is set, spread the creamy mandarin topping evenly over the top of the cake. Cover the cake with plastic wrap or foil and refrigerate for at least another 2-4 hours (or ideally longer, like overnight) to allow the flavors to meld and the topping to set completely. This is crucial for the best texture!
- Step 9: Serve! Slice and enjoy your incredible Orange Creamsicle Poke Cake! It's pure sunshine in every bite.