Introduction
Remember those holiday baking memories? The smell of warm cookies filling the kitchen, the excitement of decorating, and of course, that first glorious bite? Well, get ready to relive all that magic because today we’re whipping up a batch of Peppermint Chocolate Chip Cookies that are so easy and so incredibly delicious, they’re sure to become your new go-to holiday (or anytime!) treat. These aren’t just cookies; they’re little bites of pure, festive joy!
Why You’ll Love This Recipe
- Fast: Whip up a batch in no time, perfect for last-minute cravings or gatherings.
- Easy: Simple steps that anyone can follow, even if you’re new to baking.
- Giftable: Package these beauties up with a pretty ribbon for the perfect homemade present.
- Crowd-pleasing: The classic combination of chocolate and peppermint is a guaranteed hit with everyone.
Ingredients
Gather ’round, bakers! Here’s what you’ll need to create these festive delights. Don’t worry, these are all pantry staples or easy to find!
- 1 cup unsalted butter, softened: Make sure it’s nice and soft, not melted. This helps with creaming!
- 1 cup brown sugar: For that lovely chewy texture and caramel-y flavor.
- 1/2 cup granulated sugar: A little sweetness and helps with crisp edges.
- 2 large eggs: The binder that holds all the deliciousness together.
- 1 teaspoon vanilla extract: A classic flavor enhancer we all know and love.
- 1/2 teaspoon peppermint extract: This is where the magic happens! Adjust to your preference – more for a bolder minty kick!
- 2 1/4 cups all-purpose flour: The foundation of our cookie dough.
- 1 teaspoon baking soda: Our leavening agent, giving the cookies that perfect lift.
- 1/2 teaspoon salt: Balances the sweetness and enhances all the other flavors.
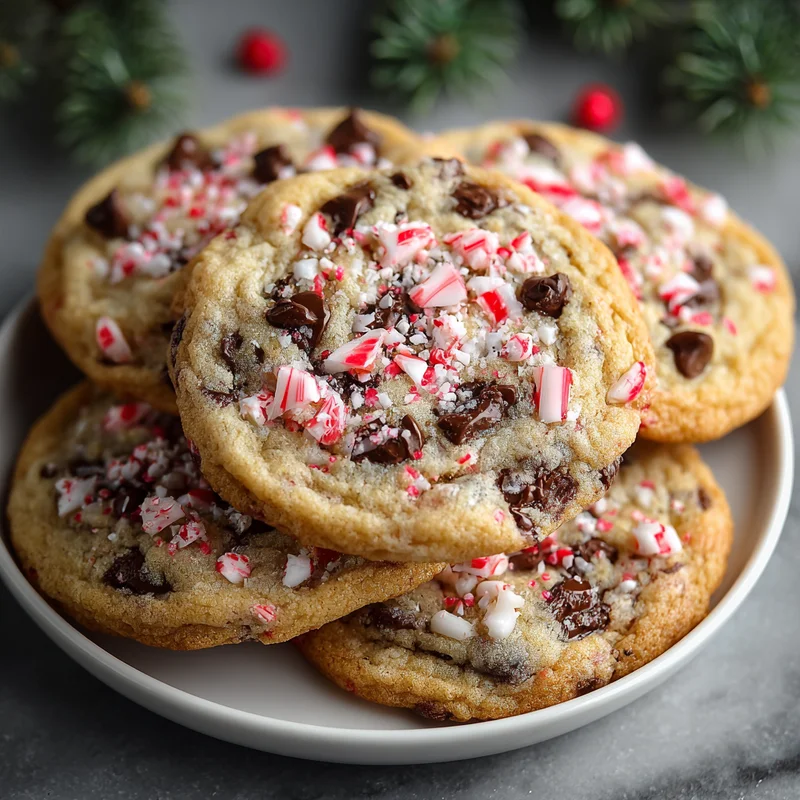
- 1 cup semisweet chocolate chips: Because what’s a cookie without chocolate chips?
- 1/2 cup crushed candy canes: The festive sparkle and extra pop of peppermint flavor!
How to Make It
Alright, let’s get our hands a little floury! This is where the fun really begins. Follow these easy steps, and you’ll be enjoying warm, pepperminty goodness in no time.
- Cream it Up: In a big mixing bowl, grab your softened butter, brown sugar, and granulated sugar. Beat them together until the mixture is light, fluffy, and looks like a cloud. This is a crucial step for a good cookie texture!
- Wet Ingredients Unite: Now, crack in your eggs, one at a time, beating well after each addition. Then, swirl in the vanilla extract and our star, the peppermint extract. Give it a good mix until everything is beautifully combined.
- Dry Ingredients Together: In a separate, medium-sized bowl, whisk together your all-purpose flour, baking soda, and salt. This ensures everything is evenly distributed.
- Marry the Mixtures: Gradually add the dry ingredients to your wet ingredients. Mix on low speed (or stir with a spoon) until just combined. Be careful not to overmix – that can make your cookies tough!
- The Fun Stuff: Now for the best part! Gently fold in those delicious semisweet chocolate chips and the festive crushed candy canes. Make sure they’re evenly distributed throughout the dough.
- Scoop and Drop: Grab a spoon or a cookie scoop and drop rounded tablespoons of dough onto ungreased baking sheets. Leave a little space between them as they’ll spread.
- Bake to Perfection: Pop those baking sheets into a preheated oven at 375°F (190°C). Bake for 9-11 minutes, or until you see those lovely edges turning golden brown. The centers might still look a little soft – that’s okay, they’ll finish setting up as they cool.
- Cool Down: Once they’re out of the oven, let the cookies hang out on the baking sheets for a few minutes. This helps them firm up. Then, carefully transfer them to a wire rack to cool completely. The hardest part is waiting!
Substitutions & Additions
Feeling creative? I love how adaptable this recipe is! Here are a few ideas to make it your own:
- Chocolate Lover’s Dream: Swap the semisweet chips for dark chocolate chips or even white chocolate chips for a different flavor profile.
- Minty Upgrade: For an extra burst of mint, you could add a few drops of green food coloring to the dough, or drizzle melted white chocolate over the cooled cookies and sprinkle with more crushed candy canes.
- Nutty Crunch: If you’re a fan of nuts, a handful of chopped pecans or walnuts would be a delightful addition.
- Different Extract: While peppermint is key here, you could experiment with other extracts in a pinch, though it would change the festive feel!
Tips for Success
I’ve learned a few tricks along the way that I’m happy to share! These will help you achieve cookie perfection every time.
- Don’t Overmix: Seriously, this is the number one tip for tender cookies. Mix the flour in until just combined. A few streaks of flour are okay!
- Soften, Don’t Melt: Make sure your butter is softened, not melted. Melted butter can lead to cookies that spread too much.
- Preheat Your Oven: A properly preheated oven is essential for consistent baking.
- Cooling is Key: Letting the cookies cool on the baking sheet for a few minutes before transferring them prevents them from falling apart.
- Prep Ahead: You can totally make the dough a day in advance! Just cover it tightly and store it in the refrigerator. You might need to let it soften for about 10-15 minutes before scooping.
How to Store It
Once your delicious creations have cooled completely, you’ll want to store them so they stay fresh and yummy. Airtight is key!
- Store cooled cookies in an airtight container at room temperature for up to 3-4 days.
- You can also freeze the baked cookies for up to 3 months. Place them in a single layer on a baking sheet until firm, then transfer to a freezer-safe bag or container.
- Unbaked cookie dough balls can be frozen on a baking sheet until solid, then transferred to a freezer bag. Bake directly from frozen, adding a minute or two to the baking time.
FAQs
Got a few lingering questions? I’ve got you covered!
Q: Can I make these cookies without candy canes?
A: Absolutely! They’ll still be delicious peppermint chocolate chip cookies. You’ll just miss out on the extra festive crunch and color.
Q: How do I get my cookies to be chewy instead of crispy?
A: For chewier cookies, try baking them for a minute or two less, so the centers are slightly underbaked. Also, using more brown sugar than granulated sugar can contribute to chewiness.
Q: Can I use mint extract instead of peppermint extract?
A: Mint extract can have a stronger, sometimes more medicinal flavor than peppermint. Peppermint extract is generally preferred for a classic, sweet mint flavor in baking.
Peppermint Chocolate Chip Cookies

Easy and festive peppermint chocolate chip cookies that are perfect for the holidays or anytime you crave a delicious treat.
- Cook Time: 11 minutes
- Total Time: 11 minutes
- : Lara
Ingredients
Main ingredients
- 1 cup unsalted butter (softened)
- 1 cup brown sugar
- 0.5 cup granulated sugar
- 2 large eggs
- 1 teaspoon vanilla extract
- 0.5 teaspoon peppermint extract (adjust to preference)
- 2.25 cups all-purpose flour
- 1 teaspoon baking soda
- 0.5 teaspoon salt
- 1 cup semisweet chocolate chips
- 0.5 cup crushed candy canes
Instructions
- In a big mixing bowl, beat softened butter, brown sugar, and granulated sugar together until light and fluffy.
- Add eggs one at a time, beating well after each. Stir in vanilla extract and peppermint extract.
- In a separate bowl, whisk together flour, baking soda, and salt.
- Gradually add dry ingredients to wet ingredients, mixing on low speed or stirring until just combined. Do not overmix.
- Gently fold in chocolate chips and crushed candy canes.
- Drop rounded tablespoons of dough onto ungreased baking sheets, leaving space between them.
- Bake at 375°F (190°C) for 9-11 minutes, or until edges are golden brown.
- Let cookies cool on baking sheets for a few minutes before transferring to a wire rack to cool completely.
Notes
Store cooled cookies in an airtight container at room temperature for up to 3-4 days. Cookies can also be frozen for up to 3 months. Unbaked dough balls can be frozen and baked from frozen, adding a minute or two to baking time.