Introduction
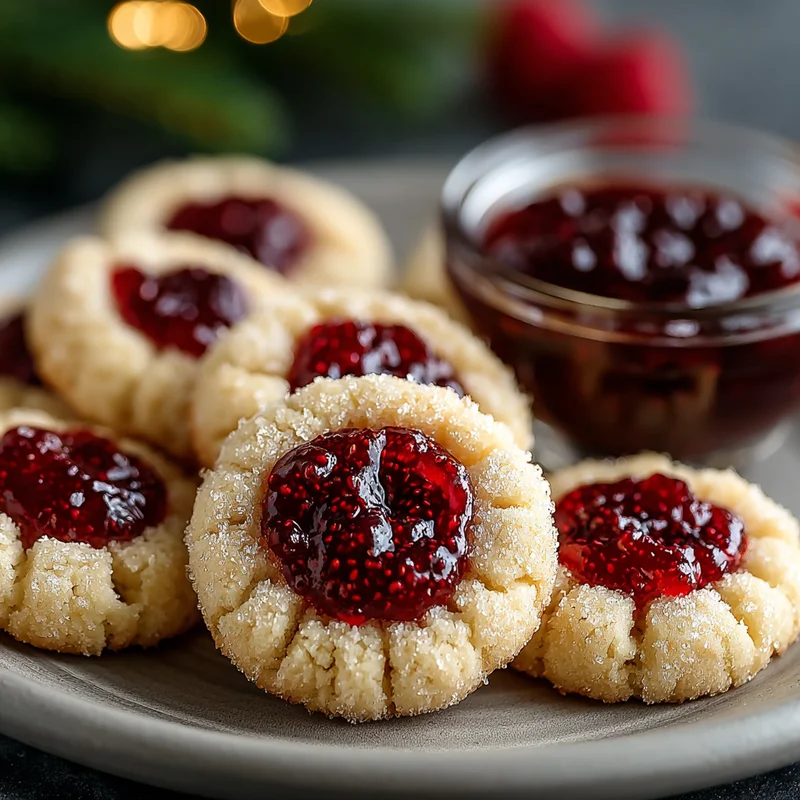
Oh, these cookies! Just thinking about them takes me back to cozy afternoons, the smell of baking filling the air, and the sheer delight of biting into a sweet, fruity little gem. Raspberry Thumbprint Cookies are more than just a treat; they’re a little piece of childhood joy, a hug in cookie form. And the best part? They’re ridiculously easy to make, meaning you can whip up a batch of happiness whenever the craving strikes, or even surprise someone with a thoughtful homemade gift.
Why You’ll Love This Recipe
- Fast: You’ll have a batch of these beauties ready to enjoy in under an hour, from start to finish!
- Easy: Seriously, if you can cream butter and sugar, you can make these. No fancy skills required!
- Giftable: Package these up in a pretty tin or box, and you have an instant, heartfelt gift that’s always a hit.
- Crowd-pleasing: From little ones to grown-ups, everyone adores the sweet burst of raspberry jam nestled in a tender cookie.
Ingredients
Gathering your ingredients is half the fun! Think of it as your pre-baking ritual.
- 1 cup unsalted butter, softened: Make sure your butter is nice and soft, almost like really thick frosting. This is key for that light and fluffy texture.
- 1/2 cup granulated sugar: Just your everyday sugar will do the trick. It adds that perfect sweetness and helps the cookies spread just right.
- 1 large egg yolk: This little guy is our binder and makes the cookies wonderfully tender.
- 1 teaspoon vanilla extract: A splash of vanilla makes everything taste more like home. Use the good stuff if you have it!
- 2 cups all-purpose flour: Your trusty all-purpose flour is the backbone of these cookies.
- 1/4 teaspoon salt: Don’t skip the salt! It balances the sweetness and brings out all the other flavors.
- 1/2 cup raspberry jam: This is where the magic happens! Choose your favorite raspberry jam, a good quality one will make all the difference.
How to Make It
Alright, let’s get our aprons on and make some cookie magic!
- Creamy Dreamy Start: In a large bowl, grab your electric mixer (or a whisk and some muscle power!) and cream together that softened butter and granulated sugar. You’re looking for a light and fluffy mixture – like pale yellow clouds. This usually takes about 2-3 minutes.
- Add the Good Stuff: Now, beat in the egg yolk and vanilla extract until everything is beautifully combined and smooth.
- Dry Ingredients Unite: In a separate, medium-sized bowl, give your flour and salt a little whisk together. This makes sure the salt is evenly distributed throughout the flour.
- Bring It All Together: Gradually add the dry ingredients to your wet ingredients, mixing on low speed or stirring with a spatula. Mix only until the dough just comes together. We don’t want to overwork it – that can make cookies tough!
- Roll ‘Em Up: Now for the fun part! Take small portions of the dough (about 1 inch in diameter) and roll them into little balls between your palms. They don’t need to be perfect spheres, a little rustic charm is lovely!
- Cookie Lineup: Place your little dough balls onto a baking sheet that you’ve lined with parchment paper. Parchment paper is your best friend here – it prevents sticking and makes cleanup a breeze. Give them a little space, about 2 inches apart.
- The Thumbprint Moment: This is the signature step! Gently press your thumb (or the back of a small spoon, if you prefer) into the center of each cookie dough ball, creating a little well. Don’t go all the way through to the bottom, just a nice indentation.
- Jammy Centers: Spoon about 1/2 teaspoon of raspberry jam into each little indentation. Don’t overfill, or the jam might bubble out too much.
- Bake to Golden Perfection: Pop your baking sheet into a preheated oven at 350°F (175°C). Bake for about 12-15 minutes, or until the edges of your cookies are just starting to turn a lovely light golden brown. Keep an eye on them – ovens can be sneaky!
- Cool Down: Let the cookies hang out on the baking sheet for a few minutes after they come out of the oven. This helps them set up. Then, carefully transfer them to a wire rack to cool completely. They’ll be a little fragile when hot, so patience is key here!
Substitutions & Additions
Feeling a little adventurous? Here are some ways to make these cookies your own!
- Jam Lovers: Don’t have raspberry? Strawberry, apricot, or even a good quality cherry jam are fantastic swaps!
- Nutty Goodness: Before baking, you can lightly press some chopped pecans or walnuts into the rim of the cookie. It adds a delightful crunch.
- Citrus Zest: For a little brightness, add 1 teaspoon of lemon or orange zest to the dough along with the egg yolk and vanilla.
- Spice It Up: A tiny pinch of cinnamon or nutmeg in the dry ingredients can add a subtle warmth.
- Jam Alternatives: Think beyond fruit jam! A dollop of caramel sauce or even a chocolate ganache in the center can be divine.
Tips for Success
A few little tricks can ensure your cookies turn out perfectly every time!
- Soft Butter is Key: I know I said it before, but it’s worth repeating! Butter that’s too cold won’t cream properly, leading to a denser cookie.
- Don’t Overmix: Once you add the flour, mix just until combined. Overmixing develops the gluten too much, making your cookies tough instead of tender.
- Uniform Size: Try to make your cookie balls roughly the same size so they bake evenly.
- The Thumbprint Depth: Make sure your indentation is deep enough to hold the jam, but not so deep that it breaks through the cookie dough.
- Prep Ahead: You can absolutely make the dough a day in advance! Store it wrapped tightly in the refrigerator. Let it sit at room temperature for about 15-20 minutes before rolling into balls.
How to Store It
Keeping these cookies fresh is a breeze.
Once completely cooled, store your Raspberry Thumbprint Cookies in an airtight container at room temperature. They’ll stay wonderfully fresh for about 3-4 days. If you want to keep them longer, you can freeze the baked and cooled cookies in a freezer-safe container or bag for up to 2-3 months. Just let them thaw at room temperature before enjoying!
FAQs
Q: Can I make these cookies ahead of time?
Absolutely! You can prepare the dough and store it in the refrigerator for up to 2 days. Roll them into balls and bake when you’re ready to enjoy fresh cookies.
Q: My jam bubbled out the sides. What did I do wrong?
This can happen if you overfill the indentation or if the indentation isn’t deep enough. Try using a little less jam or making a slightly deeper well in your cookies.
Q: Can I use store-bought jam or homemade?
Either works beautifully! A good quality store-bought jam is convenient and delicious, while homemade jam can add an extra special touch.
Raspberry Thumbprint Cookies
Equipment
- Electric mixer
- Whisk
- bowls one large, one medium
- Spatula
- Baking Sheet
- Parchment paper
- Wire rack
Ingredients
Main ingredients
- 1 cup unsalted butter softened
- 0.5 cup granulated sugar
- 1 large egg yolk
- 1 teaspoon vanilla extract
- 2 cups all-purpose flour
- 0.25 teaspoon salt
- 0.5 cup raspberry jam
Instructions
- In a large bowl, cream together softened butter and granulated sugar until light and fluffy (about 2-3 minutes).1 cup unsalted butter
- Beat in the egg yolk and vanilla extract until smooth.1 cup unsalted butter
- In a separate bowl, whisk together flour and salt.1 cup unsalted butter
- Gradually add the dry ingredients to the wet ingredients, mixing until just combined. Do not overwork the dough.
- Roll small portions of dough (about 1 inch in diameter) into balls.
- Place dough balls onto a parchment-lined baking sheet, about 2 inches apart.
- Gently press your thumb into the center of each cookie dough ball to create an indentation.
- Spoon about 1/2 teaspoon of raspberry jam into each indentation.1 cup unsalted butter
- Bake in a preheated oven at 350°F (175°C) for 12-15 minutes, or until edges are lightly golden brown.
- Let cookies cool on the baking sheet for a few minutes before transferring to a wire rack to cool completely.