Introduction
Hey there, sweet friends! Do you ever just crave something light, airy, and utterly luxurious, but don’t want to spend hours fussing in the kitchen? Something that feels fancy enough for a special occasion, but is secretly one of the easiest things you’ll ever make? Well, let me tell you, this Easy Vanilla Bean Mousse recipe is about to become your new best friend. It reminds me of childhood dreams – clouds of sweet, vanilla perfection that just melt in your mouth. Forget complicated techniques or endless dishes. This recipe is pure joy, pure simplicity, and pure, unadulterated vanilla bliss. Trust me, you need this in your life.
Why You’ll Love This Recipe
- Fast: Seriously, you can whip this up in minutes before it needs to chill. Perfect for last-minute dessert cravings or entertaining.
- Easy: If you can whip cream, you can make this mousse. No fancy skills required!
- Giftable: Portion it into pretty jars or cups, and you’ve got instant, elegant edible gifts.
- Crowd-pleasing: Who doesn’t love light, creamy, vanilla heaven? It’s a classic for a reason and always a hit.
Ingredients
Gather your goodies! Here’s what you’ll need for this vanilla dream:
- 1 1/2 cups Heavy cream: This is your base, providing that luscious, rich texture. Make sure it’s cold!
- 1/4 cup Powdered sugar: Also known as confectioners’ sugar. It sweetens without adding a gritty texture, which is key for that smooth mousse mouthfeel.
- 2 tsp Vanilla bean paste: Oh, the magic maker! This gives you those beautiful little vanilla speckles and a deeper, richer vanilla flavor than extract alone. If you only have extract, you can use 1.5 tsp, but the paste is worth seeking out!
- 1 1/2 tsp Gelatin, unflavored: Our secret weapon for stability! This is what helps the mousse hold its gorgeous, airy shape.
- 2 tbsp Water: Just a little bit to “bloom” and dissolve our gelatin.
- 1/8 tsp Salt: Don’t skip this! A tiny pinch of salt helps balance the sweetness and really makes that vanilla flavor pop.
How to Make It
Okay, deep breaths! You’ve got this. Let’s turn these simple ingredients into dessert magic.
- First things first, let’s get the gelatin ready. In a small bowl, sprinkle the unflavored gelatin over the 2 tablespoons of cold water. Let it sit for about 5-10 minutes. You’ll see it puff up and get a little jelly-like. This is called “blooming,” and it’s important for dissolving it properly.
- While the gelatin is blooming, get your main bowl ready. Pour in the cold heavy cream, powdered sugar, vanilla bean paste, and salt.
- Now, grab your electric mixer (or a whisk and some serious arm power!). Start whipping the cream mixture on medium-high speed. Whip until you reach soft peaks. What are soft peaks? When you lift the whisk, the cream should hold a shape but the tip should gently curl over. Be careful not to over-whip it into stiff peaks, or you’ll end up with butter, not mousse!
- Okay, back to the gelatin. Once it’s bloomed, you need to dissolve it. You can do this gently over a double boiler or, even easier, pop it in the microwave for about 10-15 seconds. It should become clear and liquid, with no granules left. Make sure it’s liquid but not super hot.
- Now for the slightly tricky part, but totally doable! While your mixer is running on low speed, slowly and steadily pour the warm, dissolved gelatin into the whipped cream mixture. Keep mixing just until it’s fully incorporated. Don’t overmix at this stage.
- And that’s it for the mixing! See? I told you it was easy. Now, gently spoon or pour the mousse into individual serving dishes, ramekins, or one larger bowl.
- Cover the dishes (plastic wrap works great) and pop them in the refrigerator. You’ll need to chill them for at least 2-3 hours, or until they are fully set and firm. The longer they chill, the better the texture will be.
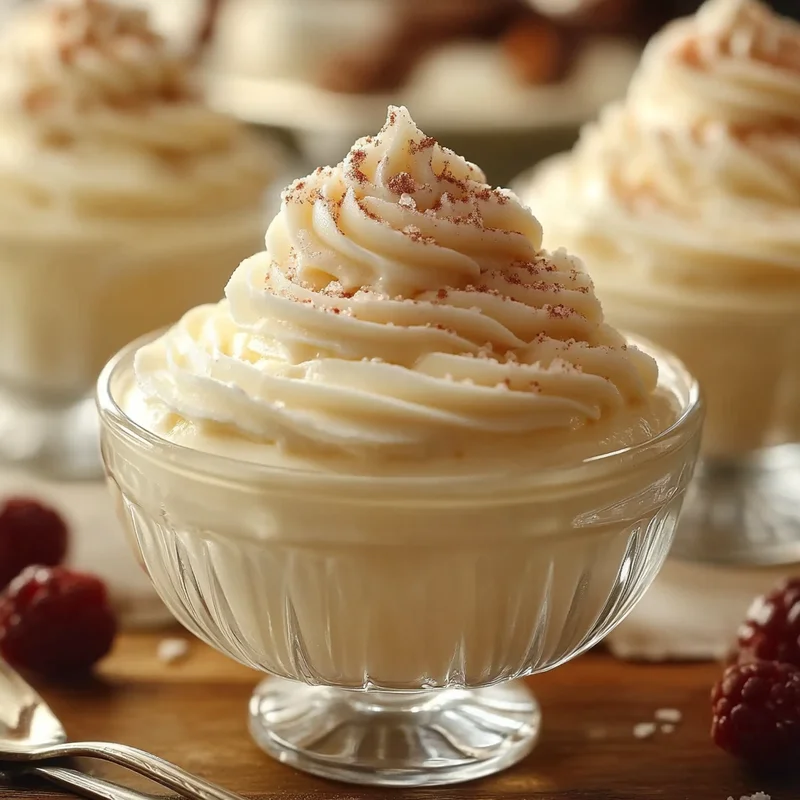
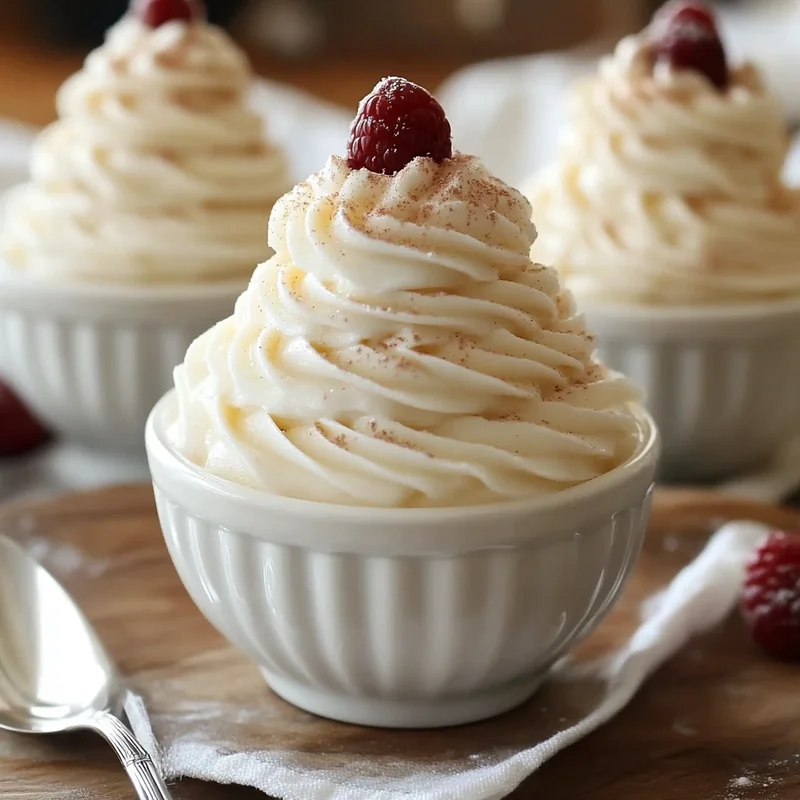
- When you’re ready to serve, you can add toppings if you like! Fresh berries, a sprinkle of chocolate shavings, a dollop of extra whipped cream, or a dusting of cocoa powder are all lovely touches. Enjoy your dreamy, homemade vanilla mousse!
Substitutions & Additions
This vanilla mousse is a fantastic blank canvas! Here are a few ideas to switch things up:
- Chocolate Swirl: Melt some chocolate chips or chopped chocolate and swirl it gently into the mousse just before chilling.
- Berry Bliss: Serve with a vibrant berry compote or fresh mixed berries.
- Citrus Kiss: Add a little lemon or orange zest to the whipped cream along with the vanilla.
- Make it a Parfait: Layer the mousse with crumbled cookies (like Nilla Wafers or shortbread) or cake cubes and fruit.
- Different Extract: Swap some of the vanilla for almond extract (use sparingly!) or even a touch of peppermint extract for a holiday twist.
- Serving Style: Pipe the mousse into glasses using a piping bag for a fancy look!

Tips for Success
A few little pointers to make sure your mousse turns out perfectly every time:
- Use Cold Cream: Make sure your heavy cream is straight from the fridge. Cold cream whips up best and holds its structure.
- Don’t Skip the Gelatin Step: Blooming and dissolving the gelatin correctly is key to getting the mousse to set properly. Make sure there are no grainy bits before adding it.
- Whip to Soft Peaks: Over-whipping leads to a heavier, less airy texture. Watch carefully and stop when you hit those soft, graceful peaks.
- Pour Gelatin Slowly: Add the dissolved gelatin in a thin stream while the mixer is running on low. This ensures it incorporates evenly without deflating the cream.
- Give it Time to Chill: Patience is a virtue here! Allow ample time in the fridge for the mousse to firm up properly. Rushing this step will result in a runny mousse.
- Prep Ahead: This mousse needs to chill, so it’s the perfect make-ahead dessert. Prepare it earlier in the day or even the day before you plan to serve it.
How to Store It
Once your delicious mousse is set, keep it covered in the refrigerator. It will stay lovely and airy for about 2-3 days. Because of the whipped cream and delicate structure, I don’t recommend freezing it, as it can lose its airy texture when thawed.
FAQs
Got questions? I’ve got answers!
- Q: My mousse didn’t set. What happened?
A: This is usually because the gelatin wasn’t properly dissolved or incorporated. Make sure the bloomed gelatin is fully liquid before adding it, and add it slowly while mixing on low speed. Also, ensure you’ve given it enough time to chill thoroughly. - Q: Can I use vanilla extract instead of paste?
A: Yes, you can! Use about 1.5 teaspoons of good quality vanilla extract. You won’t get the lovely vanilla bean speckles, but it will still taste delicious. - Q: How far in advance can I make this?
A: You can easily make this mousse a day or two ahead of time. Just keep it covered in the fridge until you’re ready to serve. - Q: Can I make a larger batch?
A: Absolutely! This recipe scales up beautifully. Just maintain the proportions of the ingredients.

Dreamy & Easy Vanilla Bean Mousse
Equipment
- Small bowl
- Main bowl
- Electric mixer or whisk
- Microwave or double boiler
- Serving dishes or ramekins or large bowl
- Plastic wrap
- Piping bag (optional)
Ingredients
Mousse Ingredients
- 1.5 cups Heavy cream cold
- 0.25 cup Powdered sugar confectioners' sugar
- 2 tsp Vanilla bean paste or 1.5 tsp vanilla extract
- 1.5 tsp Unflavored gelatin
- 2 tbsp Water cold
- 0.125 tsp Salt
Instructions
- In a small bowl, sprinkle the unflavored gelatin over the 2 tablespoons of cold water. Let it sit for about 5-10 minutes to bloom.
- While the gelatin is blooming, pour the cold heavy cream, powdered sugar, vanilla bean paste, and salt into your main bowl.
- Using an electric mixer (or whisk), whip the cream mixture on medium-high speed until soft peaks form.
- Once the gelatin has bloomed, dissolve it. Gently heat over a double boiler or microwave for 10-15 seconds until clear and liquid. Ensure it is liquid but not super hot.
- With the mixer running on low speed, slowly and steadily pour the warm, dissolved gelatin into the whipped cream mixture. Mix just until fully incorporated.
- Gently spoon or pour the mousse into individual serving dishes, ramekins, or one larger bowl.
- Cover the dishes (with plastic wrap) and refrigerate for at least 2-3 hours, or until fully set and firm.
- Serve chilled. Optional toppings include fresh berries, chocolate shavings, extra whipped cream, or cocoa powder.