Introduction
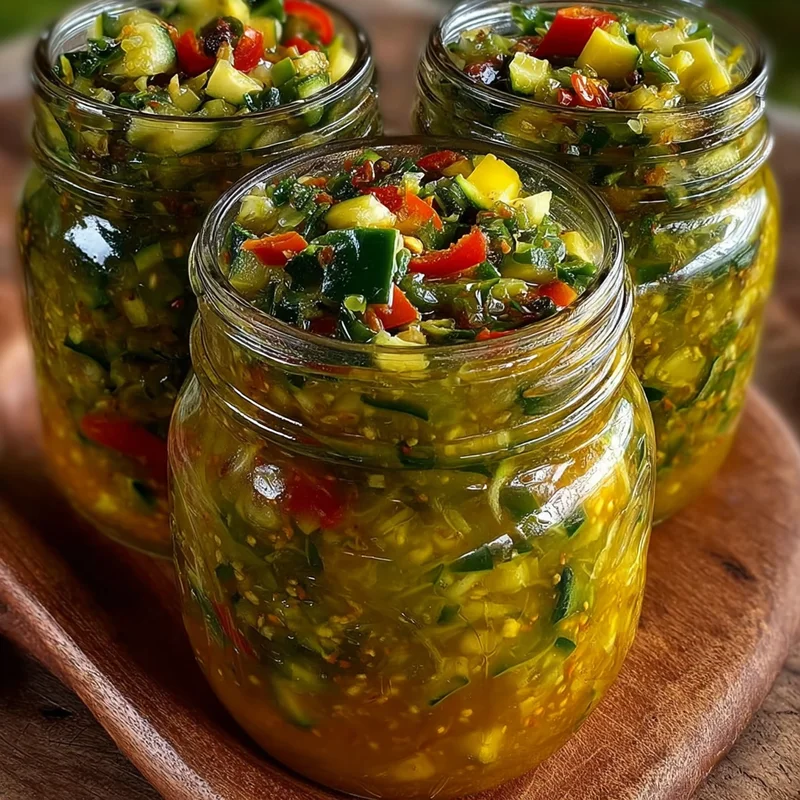
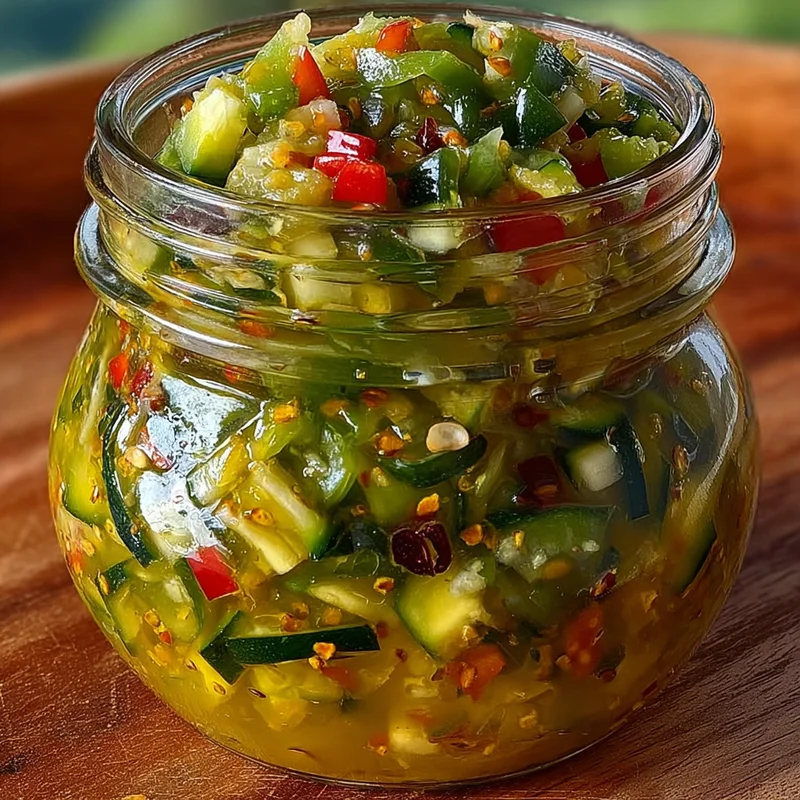
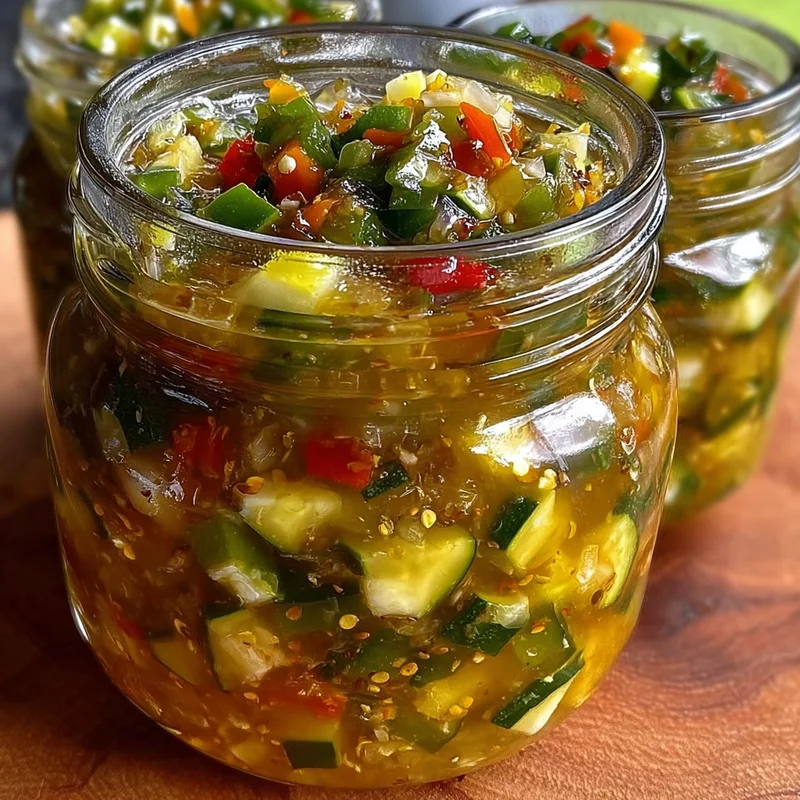
Oh, summer zucchini! It seems like every year, no matter how much you plant, you end up with an abundance of these beautiful green gems. What’s a gardener to do? Well, my friend, I’ve got the perfect solution that’s guaranteed to become your favorite way to use up that extra zucchini: Zucchini Relish!
This isn’t just any relish; it’s bright, tangy, slightly sweet, and bursting with fresh flavors. It’s the kind of condiment that makes everything taste a little bit better, from hot dogs and burgers to sandwiches and even scrambled eggs. And the best part? It’s incredibly easy to make, perfect for a relaxing afternoon in the kitchen, and it makes a fantastic homemade gift for friends and family. Get ready to transform your zucchini surplus into a kitchen staple!
Why You’ll Love This Recipe
- Fast: While it needs to sit for a bit, the active cooking time is super quick!
- Easy: Seriously, if you can chop and stir, you can make this relish.
- Giftable: Jar it up beautifully for thoughtful homemade gifts.
- Crowd-pleasing: Everyone loves a good relish, and this one is a winner.
- Versatile: Use it on everything from burgers to dips!
Ingredients
Let’s gather our goodies. You’ll need:
- 12 cups shredded unpeeled zucchini: That’s right, no need to peel! Just shred it up. This is where most of your zucchini goes.
- 4 cups chopped onion: Adds a savory depth and a little bite.
- 1 red bell pepper, chopped: For that gorgeous color and a touch of sweetness.
- 1 green bell pepper, chopped: More color, more flavor!
- 5 tablespoons canning salt: This helps draw out excess moisture from the veggies, ensuring a nice thick relish. Don’t skip this!
- 6 cups white sugar: Yes, it sounds like a lot, but it’s necessary for preservation and that classic sweet-and-tangy relish flavor.
- 2 1/2 cups white vinegar: The tangy backbone of our relish.
- 1 tablespoon cornstarch: Our secret weapon for a perfectly thickened relish.
- 1 1/2 teaspoons celery seed: Adds a unique, aromatic flavor that’s characteristic of great relishes.
- 3/4 teaspoon ground nutmeg: A little warming spice that makes this relish extra special.
- 3/4 teaspoon ground turmeric: For a beautiful golden hue and a subtle earthy note.
- 1/2 teaspoon ground black pepper: Just a little kick to balance the sweetness.
How to Make It
Alright, let’s get our aprons on and dive in! This is going to be fun.
- Prep the Veggies: In a really big bowl (trust me, you’ll need it!), combine your shredded zucchini, chopped onion, red bell pepper, and green bell pepper. Sprinkle the canning salt over everything and give it a good toss. Let this mixture sit for about 1 hour. This step is crucial – it’s like magic, pulling out all the watery stuff from the zucchini.
- Drain and Squeeze: After the hour is up, it’s time to get rid of that liquid! Drain the zucchini mixture very well. Then, and this is important for a thick relish, grab handfuls of the mixture and squeeze out as much liquid as you possibly can. You can also use cheesecloth or a clean kitchen towel to really wring it out. The drier the veggies, the better your relish will be!
- Combine the Goodness: Now, grab a large pot (again, size matters here!). Add your thoroughly drained zucchini mixture, the white sugar, and the white vinegar. Give it a good stir.
- Make the Flavor Boost: In a small bowl, whisk together the cornstarch, celery seed, nutmeg, turmeric, and black pepper. This little mix is where all the flavor magic happens!
- Add the Flavor: Pour that spiced cornstarch mixture into the pot with the zucchini, sugar, and vinegar. Stir it all together until everything is well combined.
- Cook it Up: Place the pot over medium-high heat and bring the mixture to a boil. Make sure you stir constantly to prevent sticking and ensure the sugar dissolves.
- Simmer to Perfection: Once it’s boiling, reduce the heat to low. Let it simmer gently for about 20 minutes, stirring occasionally. You’ll notice it starts to thicken up beautifully.
- Ready to Go! And there you have it! Your delicious homemade zucchini relish is ready. You can use it right away, or if you’re feeling ambitious, follow proper canning procedures to store it for later.
Substitutions & Additions
This recipe is fantastic as is, but here are a few ideas to make it your own:
- Spicy Kick: Love a little heat? Add a finely diced jalapeño or a pinch of red pepper flakes to the veggie mix before cooking.
- Onion Power: If you’re not a fan of raw onion chunks, you can use onion powder (about 1-2 tablespoons) instead, but I personally love the texture of the chopped onion.
- Herbs: Feel free to add fresh chopped dill or parsley at the very end of cooking for an extra burst of freshness.
- Different Vinegars: While white vinegar is classic, you could experiment with apple cider vinegar for a slightly different flavor profile.
Tips for Success
Here are a few of my tried-and-true tips to ensure your zucchini relish turns out perfectly:
- Don’t skimp on draining: Seriously, squeezing out all that liquid makes a HUGE difference in the final texture. A colander is good, but a good squeeze is better!
- Sterilize your jars properly: If you plan to can this relish, make sure your jars, lids, and rings are clean and sterilized according to safe canning practices. This ensures your relish stays fresh and safe for longer.
- Taste and Adjust: Before you finish cooking, give it a little taste. If you prefer it sweeter, add a touch more sugar. If you want it tangier, a splash more vinegar can work wonders.
- Prep Ahead: You can shred your zucchini and chop your veggies the day before and store them in airtight containers in the refrigerator. Just remember to squeeze out the moisture right before you start cooking.
How to Store It
Once your zucchini relish is made and cooled:
- Refrigerated: If you’re not canning it, store the relish in airtight jars or containers in the refrigerator. It should stay fresh and delicious for up to 2-3 weeks.
- Canned: Properly canned zucchini relish can be stored in a cool, dark pantry for up to a year. Always check the seal before opening and discard if it looks compromised.
FAQs
Q: Can I make this relish without canning it?
A: Absolutely! This relish is delicious eaten fresh and can be stored in the refrigerator for a few weeks. Just make sure to keep it in an airtight container.
Q: What’s the best way to squeeze the water out of the zucchini?
A: After draining in a colander, I like to put the zucchini mixture into a clean kitchen towel or cheesecloth and twist it tightly to wring out as much liquid as possible. It might feel a little silly, but it’s super effective!
Q: Can I use different colored bell peppers?
A: Yes! Feel free to use yellow or orange bell peppers for even more color. The flavor is similar, so it’s all about aesthetics.
Q: How long does the relish last once opened?
A: Once opened (whether canned or from the fridge), always store the relish in the refrigerator and use it within 2-3 weeks for the best quality.

Zucchini Relish
Equipment
- Large bowl For salting and draining the vegetables.
- Colander For draining the vegetables.
- cheesecloth or clean kitchen towel For squeezing out excess moisture from the zucchini.
- Large pot For cooking the relish.
- Small bowl For whisking the cornstarch mixture.
- Airtight jars or containers For storing the relish.
Ingredients
Vegetables
- 12 cups shredded unpeeled zucchini No need to peel.
- 4 cups chopped onion Adds a savory depth and a little bite.
- 1 red bell pepper Chopped, for gorgeous color and a touch of sweetness.
- 1 green bell pepper Chopped, for more color and flavor.
- 5 tablespoons canning salt Helps draw out excess moisture.
Sweetener & Acid
- 6 cups white sugar Necessary for preservation and flavor.
- 2.5 cups white vinegar The tangy backbone of the relish.
Flavor & Thickener
- 1 tablespoon cornstarch For perfect thickening.
- 1.5 teaspoons celery seed Adds a unique, aromatic flavor.
- 0.75 teaspoons ground nutmeg A little warming spice.
- 0.75 teaspoons ground turmeric For a beautiful golden hue and subtle earthy note.
- 0.5 teaspoon ground black pepper To balance the sweetness.
Instructions
- In a really big bowl (trust me, you’ll need it!), combine your shredded zucchini, chopped onion, red bell pepper, and green bell pepper. Sprinkle the canning salt over everything and give it a good toss. Let this mixture sit for about 1 hour. This step is crucial – it’s like magic, pulling out all the watery stuff from the zucchini.
- After the hour is up, it’s time to get rid of that liquid! Drain the zucchini mixture very well. Then, and this is important for a thick relish, grab handfuls of the mixture and squeeze out as much liquid as you possibly can. You can also use cheesecloth or a clean kitchen towel to really wring it out. The drier the veggies, the better your relish will be!
- Now, grab a large pot (again, size matters here!). Add your thoroughly drained zucchini mixture, the white sugar, and the white vinegar. Give it a good stir.
- In a small bowl, whisk together the cornstarch, celery seed, nutmeg, turmeric, and black pepper. This little mix is where all the flavor magic happens!
- Pour that spiced cornstarch mixture into the pot with the zucchini, sugar, and vinegar. Stir it all together until everything is well combined.
- Place the pot over medium-high heat and bring the mixture to a boil. Make sure you stir constantly to prevent sticking and ensure the sugar dissolves.
- Once it’s boiling, reduce the heat to low. Let it simmer gently for about 20 minutes, stirring occasionally. You’ll notice it starts to thicken up beautifully.
- And there you have it! Your delicious homemade zucchini relish is ready. You can use it right away, or if you're feeling ambitious, follow proper canning procedures to store it for later.