Introduction
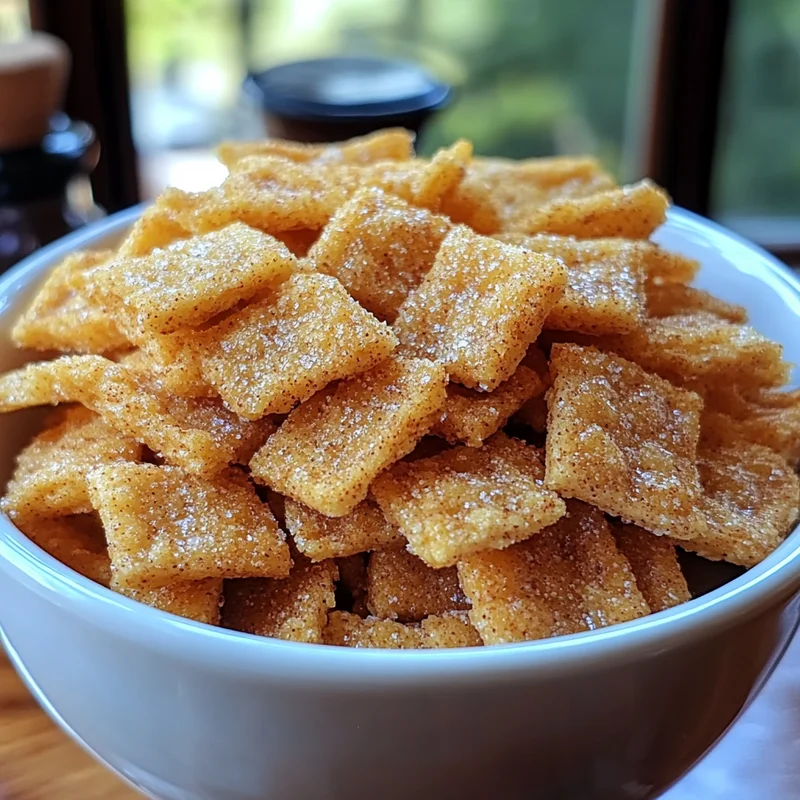
Remember those Saturday mornings? PJs on, cartoons playing, and a big bowl of Cinnamon Toast Crunch? That magical, sugary, cinnamon-y goodness that made your milk taste amazing? Ah, childhood! While I still grab a box now and then, there’s something extra special, extra magical, about making it yourself right in your own kitchen. And guess what? It’s way easier than you might think! This recipe brings back all those cozy vibes, delivering that signature crunch and flavor you love, but with the simple satisfaction of homemade.
This recipe is genuinely a blast to make, and the payoff? Incredible! Think warm, crispy squares exploding with cinnamon-sugar deliciousness. It’s a little project that yields big results, perfect for a fun afternoon or a unique breakfast treat.
Why You’ll Love This Recipe
- Fast: Quick dough prep and baking time means you’ll have this crunchy treat ready in under an hour.
- Easy: Simple ingredients and straightforward steps make this totally beginner-friendly. No fancy equipment needed!
- Giftable: Packaged in a cute jar or bag, this homemade cereal makes a wonderfully unique and thoughtful gift.
- Crowd-pleasing: Kids and adults alike will be absolutely smitten with this nostalgic, delicious snack or breakfast.
Ingredients
Gather your goodies! Most of these are probably already hanging out in your pantry and fridge.
- 1 1/4 cups all-purpose flour: The base of our crunchy squares!
- 4 tablespoons unsalted butter, cold: Cut into small cubes. Cold butter is key for creating that flaky/crispy texture when it bakes.
- 1/4 teaspoon salt: Just a pinch to balance the sweetness and enhance the flavors.
- 1/8 teaspoon ground cinnamon: A tiny bit mixed into the dough itself for an extra layer of warmth.
- 2 tablespoons maple syrup: Adds a touch of sweetness and helps bind the dough. Use the real stuff if you have it!
- 2 tablespoons cold water: Just enough to bring the dough together. Make sure it’s nice and chilly!
- 2 tablespoons melted butter, cooled: This is for coating the baked squares – it helps the cinnamon sugar stick! Let it cool slightly so it doesn’t cook the sugar.
- 3 tablespoons granulated sugar: The main event for our sweet cinnamon coating!
- 1 1/2 teaspoons ground cinnamon: The star of the show for that iconic cinnamon punch!
How to Make It
Alright, let’s get baking! Follow these steps and you’ll be crunching away in no time.
First, preheat your oven to 350°F (175°C) and line a large baking sheet with parchment paper. This prevents sticking and makes cleanup a breeze.
In a medium bowl, whisk together your dry ingredients: the flour, salt, and that little pinch of cinnamon (1/8 tsp).
Now, add your cold, cubed butter. Using a pastry blender or your fingertips, cut the butter into the dry ingredients until the mixture resembles coarse crumbs, like small peas. Working quickly keeps the butter cold!
In a separate small bowl, whisk together the maple syrup and cold water.
Pour the wet ingredients into the dry ingredients. Stir with a fork or spatula until the dough just starts to come together. Don’t overmix!
Turn the dough out onto a lightly floured surface. Gently bring it together to form a cohesive ball. If it seems too dry, add just a tiny splash more cold water (like half a teaspoon at a time), but be careful not to add too much.
Now for the fun part: rolling! This is crucial for that classic crunch. Place the dough between two sheets of parchment paper or on a well-floured surface. Roll the dough out super thin. Think cracker thin, about 1/16 to 1/8 inch thick. The thinner you go, the crispier your cereal will be!
Carefully peel off the top layer of parchment if you used it. Use a knife or a pizza cutter to trim the edges and then cut the dough into small squares, roughly 1/2 inch to 3/4 inch in size. Don’t worry about perfection – rustic squares are charming too!
Carefully transfer the squares to your prepared baking sheet. Try to space them out a little, but they don’t need tons of room.
Bake for 12-15 minutes, or until the squares are lightly golden brown around the edges and feel firm and crisp. Keep an eye on them, as thin dough can brown quickly!
While the squares are baking, prepare your delicious coating! In a shallow bowl or plate, combine the granulated sugar and the remaining ground cinnamon (1 1/2 tsp). Stir it together.
Once the squares are out of the oven, let them cool on the baking sheet for just a couple of minutes – enough so you can handle them easily, but while they’re still warm.
Gently transfer the warm squares to a medium bowl. Pour the cooled melted butter over them and toss carefully to coat each piece. A rubber spatula works well here.
Immediately add the cinnamon-sugar mixture to the bowl with the buttered squares. Toss, toss, toss! Make sure every single square gets coated in that sweet, fragrant goodness.
Spread the coated squares back onto the baking sheet (you can use the same parchment paper) in a single layer and let them cool completely. They will crisp up even more as they cool.
Once fully cooled, they’re ready to be devoured! Pour some in a bowl with milk, sprinkle them over yogurt, or just snack on them by the handful.
Substitutions & Additions
Feel free to play around and make this recipe your own!
- Flour: You could experiment with a gluten-free all-purpose blend, though the texture might vary slightly. Whole wheat pastry flour could also work.
- Sweetener: Instead of maple syrup in the dough, you could try honey or agave, though they might affect the flavor subtly.
- Butter: If you only have salted butter, just omit the 1/4 teaspoon of added salt in the dough. For a dairy-free version, use a good quality plant-based butter substitute, ensuring it’s cold for the dough step and melted/cooled for the coating.
- Flavor Boosts: Add a tiny pinch of nutmeg or cardamom to the cinnamon-sugar coating for extra warmth. A splash of vanilla extract could also be added to the melted butter before tossing.
- Spice Level: Love cinnamon? Feel free to increase the cinnamon in the coating slightly!
Tips for Success
A few little pointers to help you nail this every time:
- Keep Things Cold: For a tender dough that bakes up crispy, make sure your butter and water are cold. Handle the dough as little as possible before rolling.
- Roll THIN: I can’t stress this enough! A thicker dough will give you more of a cookie texture than a cereal crunch. Aim for thinness!
- Watch the Bake: Ovens vary! Start checking around 10-12 minutes. You want them golden and crisp, not burnt.
- Coat While Warm: Tossing the squares with butter and sugar while they are still warm (but not piping hot) helps the coating stick beautifully.
- Cool Completely: Don’t skip the final cooling step. This is when they reach their maximum crunch potential!
How to Store It
Once completely cooled, store your homemade Cinnamon Toast Crunch in an airtight container at room temperature. A glass jar or a sealed plastic container works great.
It should stay nice and crunchy for about 5-7 days. After that, it might start to lose some of its crispness, but it’s usually gone long before then!
FAQs
Got questions? I’ve got answers!
Q: Can I make the dough ahead of time?
A: You could, but I find it easiest to roll when it’s freshly made. If you need to, wrap the dough tightly in plastic wrap and refrigerate for up to a day. Let it sit at room temperature for a few minutes to make rolling easier.
Q: Why aren’t my squares crunchy?
A: The most common reason is not rolling the dough thin enough or not baking them long enough. Make sure you roll it cracker-thin and bake until they are visibly golden and feel firm.
Q: Can I use brown sugar?
A: Granulated sugar gives you that classic sparkle and crisp coating. Brown sugar would work but would result in a softer, chewier coating and a different look.
Q: Is this healthier than store-bought?
A: While it’s homemade with ingredients you control, it’s still a sweet treat! It contains butter and sugar, so it’s best enjoyed as an occasional indulgence rather than an everyday health food.

Homemade Cinnamon Toast Crunch
Equipment
- large baking sheet for baking and cooling
- Parchment paper to line baking sheet and for rolling dough
- Medium bowl for dough and coating
- pastry blender or fingertips for cutting in butter
- Small bowl for wet ingredients
- Fork or spatula for mixing dough
- Spatula or fork for mixing dough
- Knife or pizza cutter for cutting squares
- Pizza Cutter or knife for cutting squares
- shallow bowl or plate for cinnamon-sugar mixture
- Plate or shallow bowl for cinnamon-sugar mixture
- Rubber spatula for tossing squares
- Airtight container for storage
- Oven for baking
Ingredients
Dough
- 1.25 cups all-purpose flour
- 4 tablespoons unsalted butter, cold cut into small cubes
- 0.25 teaspoon salt
- 0.125 teaspoon ground cinnamon for the dough
- 2 tablespoons maple syrup use real maple syrup if possible
- 2 tablespoons cold water
Coating
- 2 tablespoons melted butter, cooled
- 3 tablespoons granulated sugar for the coating
- 1.5 teaspoons ground cinnamon for the coating
Instructions
- Preheat your oven to 350°F (175°C) and line a large baking sheet with parchment paper.
- In a medium bowl, whisk together the all-purpose flour, salt, and 1/8 teaspoon ground cinnamon.
- Add the cold, cubed butter. Using a pastry blender or your fingertips, cut the butter into the dry ingredients until the mixture resembles coarse crumbs, like small peas.
- In a separate small bowl, whisk together the maple syrup and 2 tablespoons cold water.
- Pour the wet ingredients into the dry ingredients. Stir with a fork or spatula until the dough just starts to come together. Don't overmix!
- Turn the dough out onto a lightly floured surface. Gently bring it together to form a cohesive ball.
- Place the dough between two sheets of parchment paper or on a well-floured surface. Roll the dough out super thin, about 1/16 to 1/8 inch thick.
- Use a knife or a pizza cutter to trim the edges and then cut the dough into small squares, roughly 1/2 inch to 3/4 inch in size.
- Carefully transfer the squares to your prepared baking sheet.
- Bake for 12-15 minutes, or until the squares are lightly golden brown around the edges and feel firm and crisp.
- While the squares are baking, prepare your delicious coating! In a shallow bowl or plate, combine the granulated sugar and the remaining 1 1/2 teaspoons ground cinnamon. Stir it together.
- Once the squares are out of the oven, let them cool on the baking sheet for just a couple of minutes.
- Gently transfer the warm squares to a medium bowl. Pour the cooled melted butter over them and toss carefully to coat each piece.
- Immediately add the cinnamon-sugar mixture to the bowl with the buttered squares. Toss, toss, toss! Make sure every single square gets coated.
- Spread the coated squares back onto the baking sheet in a single layer and let them cool completely. They will crisp up even more as they cool.
- Once fully cooled, store in an airtight container at room temperature.