
Introduction
Hey there, friend! Let me tell you, there are some textures in the world of food that just make your soul sing. And for me? One of the absolute best is the satisfying crunch of perfectly crispy rice. You know the kind – those golden-brown, delightful little blocks that are just begging for your favorite toppings, like spicy tuna or creamy avocado. For the longest time, I thought this was something you could only get at a fancy restaurant. But guess what? You can make it right at home, and it’s SO much easier than you might think! This recipe is a game-changer, bringing that restaurant magic right into your own kitchen with minimal fuss. Get ready to impress yourself and everyone you share it with!
Why You’ll Love This Recipe
- Fast: The active time is surprisingly quick once the rice is cooked and cooled.
- Easy: Seriously, the steps are simple. Cook rice, season, shape, fry. That’s it!
- Versatile: It’s a perfect base for endless topping possibilities, making it great for entertaining or a fun family meal.
- Crowd-pleasing: Who doesn’t love that perfect crunch? These disappear fast!
Ingredients
Alright, let’s gather our goodies. You don’t need much for this, and that’s part of the beauty!
- 1 ½ cups dry sushi rice: This is key! Sushi rice (short-grain) has the right starch content to get sticky when cooked and hold its shape, which is crucial for making those solid blocks that fry up perfectly.
- 2 cups water: Standard stuff for cooking our rice.
- 1 teaspoon salt: Just a touch to season the rice as it cooks.
- 3 tablespoons rice vinegar: Adds a little tang and authentic sushi rice flavor.
- 1 tablespoon granulated sugar: Balances out the vinegar and makes the rice seasoning just right.
- 1 teaspoon toasted sesame oil: A little drizzle adds a wonderful nutty aroma and flavor to the seasoned rice. Don’t skip this if you can help it!
How to Make It
Okay, ready to make some crispy magic? Follow these simple steps, and you’ll be a crispy rice pro in no time!
- Rinse the Rice: This is a super important step! Place your dry sushi rice in a fine-mesh sieve and rinse it under cold running water. Swish it around with your hand until the water runs mostly clear. This removes excess starch and helps prevent the rice from becoming gummy.
- Cook the Rice: Combine the rinsed rice, 2 cups of water, and the salt in a medium saucepan. Bring it to a boil over medium-high heat. Once boiling, immediately reduce the heat to low, cover the pot tightly, and simmer for about 15 minutes, or until all the water is absorbed. Don’t peek!
- Let it Steam: Once the rice is cooked, turn off the heat but keep the lid on. Let the rice steam in the pot for another 10 minutes. This finishes the cooking process perfectly.
- Season the Rice: While the rice is steaming, whisk together the rice vinegar, sugar, and toasted sesame oil in a small bowl until the sugar dissolves.
- Mix & Cool: Transfer the hot cooked rice to a large, shallow bowl or a baking sheet. Gently pour the vinegar mixture over the rice. Using a rice paddle or a wooden spoon, gently fold and cut the seasoning into the rice. Try not to mash it. Spread the rice out in a single layer and let it cool completely. You can pop it in the fridge for about 30-60 minutes to speed this up, which also helps it firm up nicely.
- Shape the Rice: Once cool and slightly sticky, lightly wet your hands with water (this helps prevent sticking). Gently press the rice into a shallow dish, baking pan, or even a sushi press, aiming for a layer about ½ to ¾ inch thick. Make sure you press it down firmly so it holds together. Cover it with plastic wrap and chill in the fridge for at least 1-2 hours, or even better, several hours or overnight. This is crucial for getting blocks that won’t fall apart when you fry them.
- Cut the Rice: Once the rice is well-chilled and firm, turn it out onto a cutting board. Use a sharp knife dipped in water (rewet the knife between cuts!) to cut the rice block into your desired shapes – traditional rectangles are popular, but squares or even circles work too!
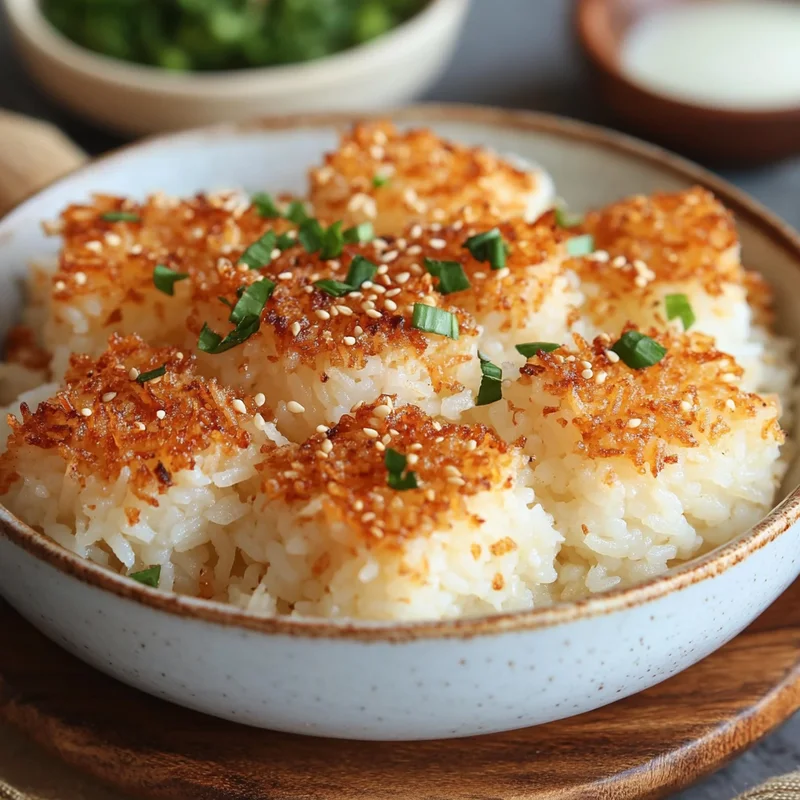
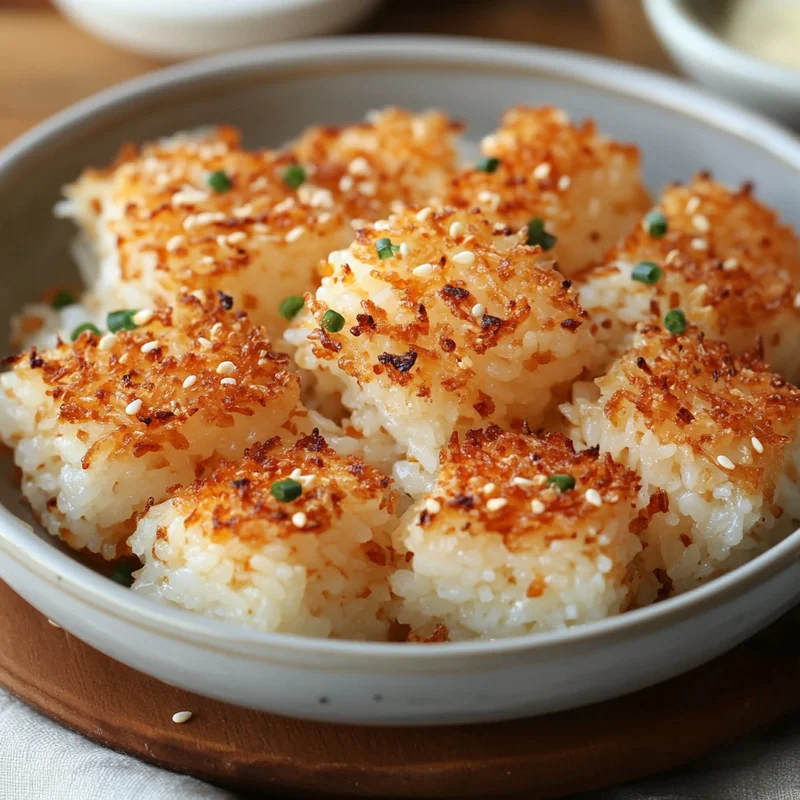
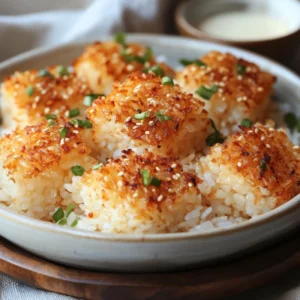
- Fry ‘Em Up: Heat about ½ inch of neutral oil (like vegetable, canola, or grapeseed oil) in a large skillet over medium-high heat. You want the oil hot enough to get things crispy quickly but not so hot that it burns (around 350-375°F is ideal if you have a thermometer). Carefully add the rice pieces to the hot oil, being careful not to overcrowd the pan. Fry for 3-5 minutes per side, or until they are golden brown and crispy all over.
- Drain: Use a slotted spoon to transfer the crispy rice pieces to a plate lined with paper towels to drain off any excess oil.
- Serve: Serve immediately! These are best enjoyed hot and fresh. Add your favorite toppings and dig in!
Substitutions & Additions
The basic crispy rice is amazing on its own, but it’s also a perfect canvas! Here are some ways to switch things up:
- Rice: While sushi rice is best, you could try medium-grain white rice in a pinch, but it might not hold its shape quite as perfectly. Long-grain rice won’t work well for this.
- Seasoning: Want a little kick? Add a tiny pinch of gochugaru (Korean chili flakes) or a dash of sriracha to your vinegar mixture.
- Oil: Any neutral high-heat oil works for frying. Avocado oil, grapeseed, canola, or vegetable oil are all good choices.
- Toppings (Get Creative!): This is where the fun happens! Traditional is spicy tuna or spicy salmon mixed with mayo and sriracha. But also try:
- Thinly sliced avocado
- Cucumber or jalapeño slices
- Sesame seeds (black and white!)
- A drizzle of eel sauce (thick, sweet soy glaze) or spicy mayo
- Edamame puree
- Crab salad
- Thinly sliced seared steak
Tips for Success
Want to nail this recipe on your first try? Keep these pointers in mind:
- Rinse That Rice! Seriously, I can’t stress this enough. It makes a difference in texture.
- Chill Time is Non-Negotiable: Don’t rush the chilling step after shaping. Cold, firm rice is much less likely to fall apart in the hot oil.
- Press Firmly: When shaping the rice, make sure you press it down really well so it’s dense and cohesive.
- Hot Oil is Key: If your oil isn’t hot enough, the rice will just soak it up and become greasy instead of crispy. Test with a small scrap of rice first.
- Don’t Overcrowd: Fry in batches if needed. Putting too many pieces in at once will drop the oil temperature and lead to less crispy results.
- Prep Ahead: You can cook, season, shape, and chill the rice a day in advance! Keep the shaped block covered tightly in the fridge, then cut and fry just before serving.
How to Store It
Okay, the crispy rice is definitely best enjoyed right after frying when it’s piping hot and crunchy. However, if you have leftovers or want to prep:
- Unfried Shaped Rice: The shaped block of rice can be kept tightly covered in the refrigerator for up to 2-3 days before cutting and frying.
- Cooked, Fried Crispy Rice: Leftover fried pieces can be stored in an airtight container at room temperature for a few hours, but they will lose their crispness. You can refrigerate them for a day, but they’ll be chewy.
- Reheating: To bring some life back to fried crispy rice, reheat it in a toaster oven or a regular oven at around 350°F (175°C) for 5-10 minutes until warmed through and slightly crisped up again. Microwaving is not recommended as it will make them rubbery.
FAQs
Got questions? I’ve got answers!
Q: Why do I need to rinse the rice so much?
A: Rinsing removes excess starch on the outside of the rice grains. Too much starch leads to gummy, mushy rice, which won’t hold its shape well for frying.
Q: Can I make this without frying?
A: You could try baking! After shaping and chilling, brush or spray the rice pieces with oil and bake at a high temperature (like 400-425°F or 200-220°C) until golden brown, flipping halfway. The texture won’t be exactly the same as frying, but you’ll still get a nice crisp!
Q: What kind of oil is best for frying?
A: Use a neutral-flavored oil with a high smoke point, like vegetable, canola, grapeseed, or avocado oil. Olive oil is not recommended due to its lower smoke point.
Q: My rice pieces are falling apart in the oil! What went wrong?
A: The most common reasons are not chilling the shaped rice long enough, or not pressing it firmly enough when shaping. Make sure your rice is very cold and compacted before cutting and frying!
Homemade Crispy Rice
Equipment
- Fine-mesh sieve
- Medium saucepan
- Small bowl
- Large shallow bowl Or baking sheet
- Rice paddle Or wooden spoon
- Shallow dish Baking pan, or sushi press
- Plastic wrap
- Cutting board
- Sharp knife
- Large skillet
- Slotted spoon
- Plate Lined with paper towels
Ingredients
Hauptzutaten
- 1.5 cups dry sushi rice Short-grain is key for texture and shape.
- 2 cups water For cooking the rice.
- 1 teaspoon salt
- 3 tablespoons rice vinegar
- 1 tablespoon granulated sugar
- 1 teaspoon toasted sesame oil
- 0.5 inch neutral oil Like vegetable, canola, or grapeseed, for frying.
Instructions
- Rinse the Rice: Place dry sushi rice in a fine-mesh sieve and rinse under cold running water until water runs mostly clear. Swish it around with your hand to remove excess starch.
- Cook the Rice: Combine the rinsed rice, 2 cups of water, and salt in a medium saucepan. Bring to a boil over medium-high heat. Immediately reduce heat to low, cover tightly, and simmer for about 15 minutes, or until all water is absorbed. Do not peek.
- Let it Steam: Once rice is cooked, turn off the heat but keep the lid on. Let the rice steam in the pot for another 10 minutes.
- Season the Rice: While the rice is steaming, whisk together rice vinegar, sugar, and toasted sesame oil in a small bowl until sugar dissolves.
- Mix & Cool: Transfer hot cooked rice to a large, shallow bowl or baking sheet. Gently pour the vinegar mixture over the rice. Using a rice paddle or wooden spoon, gently fold and cut the seasoning into the rice. Spread the rice out in a single layer and let it cool completely. You can pop it in the fridge for about 30-60 minutes to speed cooling and firm it up.
- Shape the Rice: Once cool and slightly sticky, lightly wet your hands with water. Gently press the rice into a shallow dish, baking pan, or sushi press, aiming for a layer about ½ to ¾ inch thick. Press down firmly so it holds together. Cover with plastic wrap and chill in the fridge for at least 1-2 hours, or preferably several hours or overnight. This is crucial for firm blocks.
- Cut the Rice: Once the rice is well-chilled and firm, turn it out onto a cutting board. Use a sharp knife dipped in water (rewet the knife between cuts) to cut the rice block into desired shapes (rectangles, squares, circles).
- Fry 'Em Up: Heat about ½ inch of neutral oil in a large skillet over medium-high heat (around 350-375°F). Carefully add the rice pieces to the hot oil, being careful not to overcrowd the pan. Fry for 3-5 minutes per side, or until golden brown and crispy.
- Drain: Use a slotted spoon to transfer the crispy rice pieces to a plate lined with paper towels to drain excess oil.
- Serve: Serve immediately while hot and fresh. Add your favorite toppings.