Introduction
Oh my goodness, y’all. There are some smells that just instantly transport you, aren’t there? For me, it’s the irresistible aroma of warm bread baking. And when you add garlic to the mix? Pure heaven! These homemade garlic bread rolls are the kind of comfort food magic that makes any meal feel special, or honestly, just makes a Tuesday night feel cozy. Forget those dry, store-bought versions; these rolls are unbelievably soft, packed with buttery garlic flavor, and surprisingly simple to whip up. Get ready to fill your kitchen with the most amazing scent!
Seriously, these rolls are not intimidating, even if you think baking with yeast is tricky. We’ll walk through it together, and you’ll see just how easy it is to have warm, fresh-from-the-oven garlic rolls on your table. They’re so memorable, your friends and family will be begging you for the recipe!
Why You’ll Love This Recipe
- Fast-ish! Okay, ‘fast’ for a yeast bread recipe. Most of the time is hands-off rising, which is perfect for multitasking.
- Easy Peasy! Simple ingredients, straightforward steps. You got this!
- Giftable Goodness! Bring a basket of these warm rolls to a potluck or neighbor, and you’ll be the hero of the day.
- Crowd-Pleasing King! Who doesn’t love warm, buttery garlic bread? These disappear fast.
Ingredients
Here’s what you’ll need to gather up. Simple pantry staples come together to make something truly special!
- 3 tbsp fresh garlic, minced: Fresh is really key here for the best flavor! That pungent goodness mellows beautifully as it bakes.
- 4 tbsp fresh parsley, chopped: Adds a pop of color and fresh, herbaceous balance to the garlic.
- 1 large egg (for the dough): This is our little secret for incredibly soft, enriched dough.
- 1 egg (for egg wash): Gives the rolls a gorgeous golden-brown shine.
- 3 9/16 cups all-purpose flour: Our base! You can scoop and level or weigh it for more accuracy.
- 1 tbsp granulated sugar: Just a touch to help the yeast get going and add a hint of sweetness to the dough.
- 2 1/4 tsp instant yeast: My favorite kind! No proofing needed, just mix it right in. (That’s typically one standard packet).
- 1 tsp fine sea salt: Crucial for flavor in bread. Don’t skip it!
- Flaky sea salt: For finishing! Adds a lovely little crunch and boost of salty flavor on top. Totally optional but highly recommended.
- 6 1/2 tbsp unsalted butter, melted: Divided usage – some for the dough, some for that glorious garlic-parsley topping. Using unsalted gives you control over the saltiness.
- 1 cup whole or 2% milk, warmed: Warm milk wakes up the yeast and helps create a tender crumb.
How to Make It
Alright, let’s get baking! Don’t be shy; just follow these steps, and you’ll have amazing rolls in no time.
Step 1: Activate the Yeast
In a large mixing bowl (or the bowl of your stand mixer), gently warm your milk. You want it warm to the touch, like a baby’s bath, not hot! Around 105-115°F (40-46°C) is perfect. Stir in the granulated sugar and the instant yeast. You don’t need to wait for it to foam since it’s instant yeast, but seeing a little activity is always reassuring!
Step 2: Mix the Dough
Add the large egg and about 2 tablespoons of the melted butter to the milk mixture. Give it a quick whisk. In a separate bowl, combine the flour and fine sea salt. Gradually add the dry ingredients to the wet ingredients, mixing with a spoon or on low speed with a dough hook until everything just comes together into a shaggy dough. It might seem a little sticky, and that’s okay!
Step 3: Knead the Dough
Turn the dough out onto a lightly floured surface (or continue using your stand mixer with the dough hook). Knead for about 6-8 minutes by hand, or 5-7 minutes on medium speed in a mixer. You’re looking for a smooth, elastic dough that springs back when you poke it gently. Add just a tiny bit more flour if it’s too sticky to handle, but resist the urge to add too much, or your rolls will be tough.
I like to do the windowpane test here! Pinch off a small piece of dough and gently stretch it. If you can stretch it thin enough to see light through it without it tearing, you’ve kneaded enough!
Step 4: First Rise (Bulk Fermentation)
Lightly grease a clean bowl with a little oil or cooking spray. Place the kneaded dough in the bowl, turning it to coat all sides. Cover the bowl tightly with plastic wrap or a clean kitchen towel. Let it rise in a warm spot until it has doubled in size, which usually takes about 1 to 1.5 hours, depending on the temperature of your kitchen.
My favorite warm spot? I slightly warm my oven (turn it on for just one minute, then turn it OFF!) and pop the covered bowl inside. It’s a perfect proofing box!
Step 5: Prep the Garlic Butter
While the dough is rising, melt the remaining butter. Stir in the minced fresh garlic and chopped fresh parsley. Set this mixture aside. It’s going to smell incredible!
Step 6: Shape the Rolls
Once the dough has doubled, gently punch it down to release the air. Turn it out onto a lightly floured surface. Divide the dough into equal portions. For nice-sized rolls, I usually aim for 12-16 rolls. Shape each portion into a smooth ball by tucking the edges underneath. Arrange the rolls in a greased 9×13 inch baking pan or on a baking sheet lined with parchment paper, leaving a little space between them.
Step 7: Second Rise (Proofing)
Cover the pan or baking sheet loosely with plastic wrap or a towel. Let the rolls rise again in a warm spot for about 30-45 minutes, or until they look puffy and almost doubled in size again.
Step 8: Egg Wash & Bake
Preheat your oven to 375°F (190°C). In a small bowl, whisk the remaining egg with a tablespoon of water or milk. Gently brush the tops of the rolls with the egg wash. This helps them get beautifully golden. Bake for 18-25 minutes, or until the rolls are golden brown on top and sound hollow when tapped on the bottom (if you dare to pick one up!).
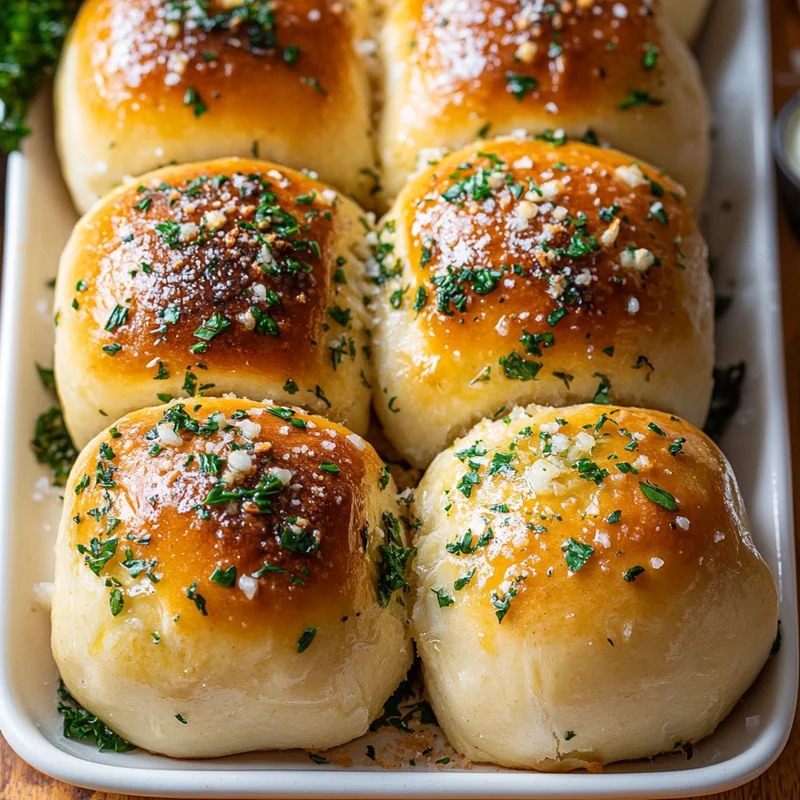
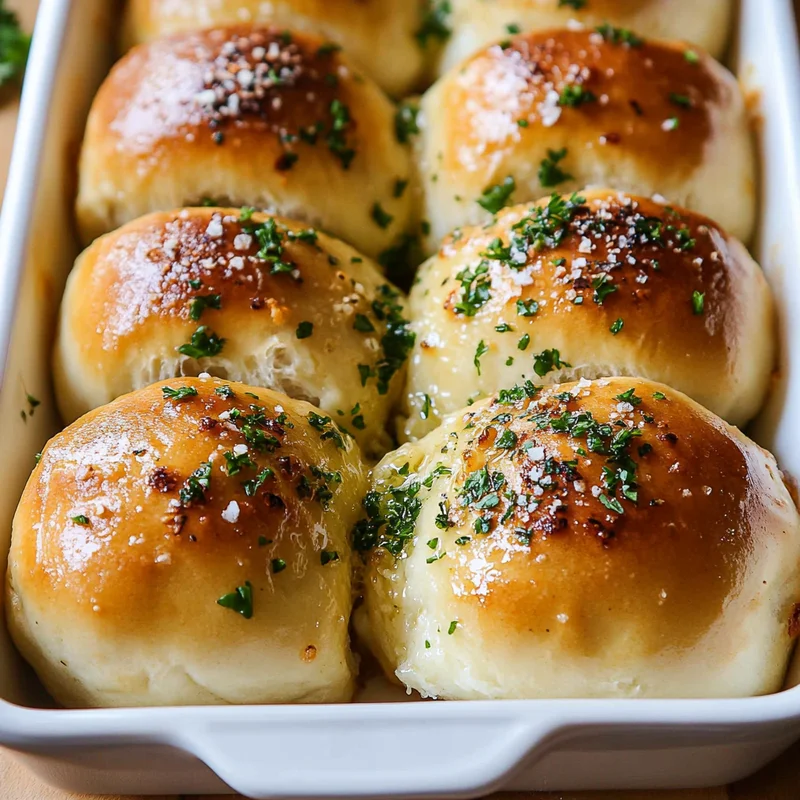
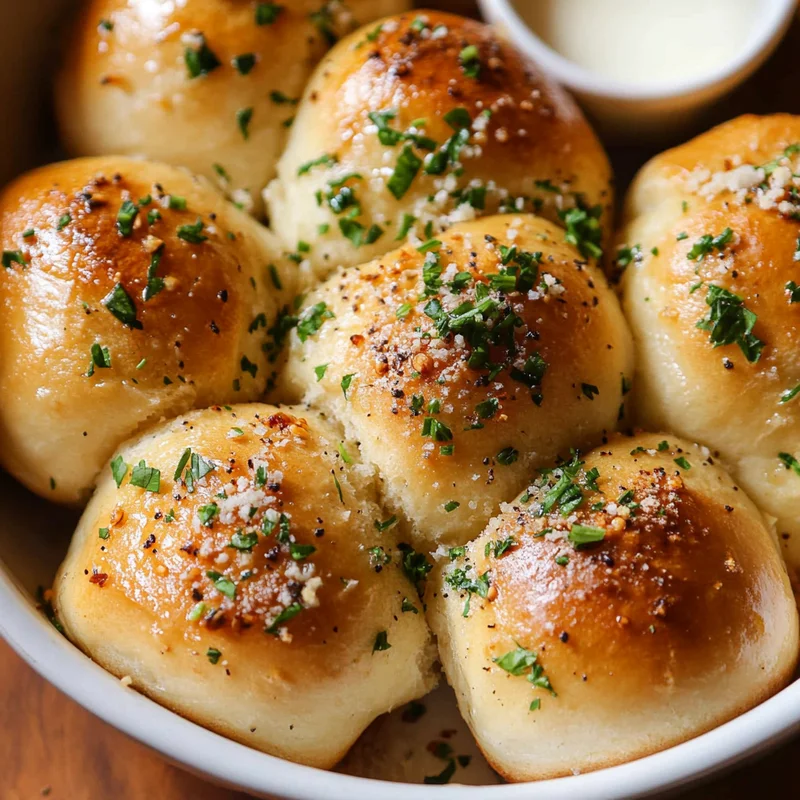
Step 9: Garlic Butter Finish!
As soon as the rolls come out of the oven, immediately brush them generously with the prepared garlic-parsley butter mixture. Sprinkle with a little flaky sea salt if you like. Let them cool in the pan for just a few minutes before serving warm.
Substitutions & Additions
Want to play around with the recipe? Go for it! Baking is all about fun.
- Cheese, Please: Add about 1/2 cup of shredded Parmesan or a blend of Italian cheeses to the garlic butter mixture before brushing it on the warm rolls. Divine!
- Herb Swap: No parsley? You can use chives or a tiny pinch of dried herbs like oregano or thyme in the garlic butter, though fresh parsley is truly the best.
- Make it Vegan: You could try substituting the butter with vegan butter, the milk with a plant-based milk (like soy or almond), and using an egg substitute or simply omitting the egg wash (they won’t be as shiny, but will still be tasty). For the egg in the dough, you might need a flax egg or commercial egg replacer designed for baking.
- Sweeter Rolls: If you wanted slightly sweeter dinner rolls (without the garlic!), you could increase the sugar to 1/4 cup and omit the garlic/parsley butter, brushing with melted plain butter instead.
Tips for Success
A few little pointers to help ensure your rolls turn out perfect every time!
- Check Your Yeast: If you’re unsure if your yeast is still active, mix it with the warm milk (make sure it’s not too hot!) and sugar and let it sit for 5-10 minutes. If it gets foamy, it’s good to go! If not, your yeast might be dead, and you’ll need a new packet.
- Don’t Add Too Much Flour: It’s tempting, especially if the dough is sticky, but too much flour makes tough rolls. A slightly sticky dough that you can manage with lightly floured hands or surface is ideal.
- Warm Spot is Key: Yeast loves warmth! If your kitchen is cold, find or create a warm environment for rising.
- Don’t Over-Proof: Rolls that rise too long can collapse or have a strange texture. They should look puffy, not like enormous balloons ready to pop.
- Prep Ahead: You can make the dough the day before! After the first rise, punch it down, shape the rolls, and place them in the pan. Cover tightly with plastic wrap and refrigerate overnight. The next day, take them out about 1-1.5 hours before baking to let them warm up and proof slightly before egg washing and baking.
How to Store It
Assuming there are any leftovers (a big assumption in my house!), here’s how to keep them fresh.
Store cooled garlic bread rolls in an airtight container at room temperature for 2-3 days. To reheat, wrap loosely in foil and warm in a 350°F (175°C) oven for 5-10 minutes, or microwave for 15-30 seconds. They’re best eaten the day they’re made, though!
These rolls also freeze well! Once completely cool, place them in a single layer on a baking sheet and freeze until solid, then transfer to a freezer-safe bag or container for up to 3 months. Thaw at room temperature and reheat as desired.
FAQs
Got questions? Let’s see if we can answer a couple of common ones!
Q: Can I make these rolls without a stand mixer?
A: Absolutely! You’ll just need to knead the dough by hand on a floured surface for about 6-8 minutes until it’s smooth and elastic. It’s a great arm workout!
Q: My rolls didn’t rise. What happened?
A: The most common culprits are inactive yeast (see tips above!), liquid that was too hot and killed the yeast, or a drafty/cold spot that prevented rising. Make sure your yeast is fresh and your milk is just warm.
Q: What should I serve with these garlic bread rolls?
A: Oh, so many things! They’re perfect with pasta dishes (especially spaghetti or lasagna!), soups, stews, chili, roasts, or just enjoyed on their own with a little extra butter!

The BEST Homemade Garlic Bread Rolls (So Buttery and Soft!)
Equipment
- Large mixing bowl or stand mixer bowl
- Stand Mixer optional, with dough hook
- Separate bowl for dry ingredients
- floured surface
- Clean bowl for first rise
- Plastic wrap or clean kitchen towel
- 9x13 inch baking pan or baking sheet
- Parchment paper optional, for baking sheet
- Small bowl for egg wash
- Whisk
- brush
Ingredients
Dough
- 1 cup whole or 2% milk warmed
- 1 tbsp granulated sugar
- 2.25 tsp instant yeast (typically one standard packet)
- 1 large egg for the dough
- 2 tbsp unsalted butter melted, portion for dough
- 3.56 cups all-purpose flour
- 1 tsp fine sea salt
Garlic Butter Finish
- 4.5 tbsp unsalted butter melted, remaining portion for topping
- 3 tbsp fresh garlic minced
- 4 tbsp fresh parsley chopped
- Flaky sea salt for finishing, optional
Egg Wash
- 1 egg for egg wash
- 1 tbsp water or milk
Instructions
- In a large mixing bowl (or the bowl of your stand mixer), gently warm your milk (105-115°F / 40-46°C). Stir in the granulated sugar and the instant yeast.
- Add the large egg (for the dough) and about 2 tablespoons of the melted butter to the milk mixture. Give it a quick whisk. In a separate bowl, combine the flour and fine sea salt. Gradually add the dry ingredients to the wet ingredients, mixing with a spoon or on low speed with a dough hook until everything just comes together into a shaggy dough.
- Turn the dough out onto a lightly floured surface (or continue using your stand mixer with the dough hook). Knead for about 6-8 minutes by hand, or 5-7 minutes on medium speed in a mixer. You're looking for a smooth, elastic dough that springs back when you poke it gently. Add just a tiny bit more flour if it's too sticky to handle, but resist the urge to add too much.
- Lightly grease a clean bowl with a little oil or cooking spray. Place the kneaded dough in the bowl, turning it to coat all sides. Cover the bowl tightly with plastic wrap or a clean kitchen towel. Let it rise in a warm spot until it has doubled in size, which usually takes about 1 to 1.5 hours.
- While the dough is rising, melt the remaining butter (4.5 tbsp). Stir in the minced fresh garlic and chopped fresh parsley. Set this mixture aside.
- Once the dough has doubled, gently punch it down to release the air. Turn it out onto a lightly floured surface. Divide the dough into equal portions (12-16 rolls). Shape each portion into a smooth ball by tucking the edges underneath. Arrange the rolls in a greased 9x13 inch baking pan or on a baking sheet lined with parchment paper, leaving a little space between them.
- Cover the pan or baking sheet loosely with plastic wrap or a towel. Let the rolls rise again in a warm spot for about 30-45 minutes, or until they look puffy and almost doubled in size again.
- Preheat your oven to 375°F (190°C). In a small bowl, whisk the remaining egg (for egg wash) with a tablespoon of water or milk. Gently brush the tops of the rolls with the egg wash. Bake for 18-25 minutes, or until the rolls are golden brown on top.
- As soon as the rolls come out of the oven, immediately brush them generously with the prepared garlic-parsley butter mixture. Sprinkle with a little flaky sea salt if you like. Let them cool in the pan for just a few minutes before serving warm.
Notes
- Check Yeast: Mix yeast with warm milk and sugar. If it gets foamy in 5-10 mins, it's active.
- Don't Add Too Much Flour: Avoid tough rolls; a slightly sticky dough is okay.
- Warm Spot: Yeast needs warmth to rise properly.
- Don't Over-Proof: Rolls should be puffy, not overly expanded. Prep Ahead: After the first rise, shape rolls, place in pan, cover tightly, and refrigerate overnight. The next day, let them warm up and proof for 1-1.5 hours before egg washing and baking. Storage: Store cooled rolls in an airtight container at room temperature for 2-3 days. Reheat wrapped in foil in a 350°F oven (5-10 mins) or microwave (15-30 seconds). Best eaten fresh. Freezing: Freeze completely cooled rolls solid on a baking sheet, then transfer to a freezer-safe container for up to 3 months. Thaw at room temperature and reheat. Making without a mixer: Knead dough by hand on a floured surface for 6-8 minutes. Serving Suggestions: Serve with pasta, soups, stews, chili, roasts, or on their own.