Introduction
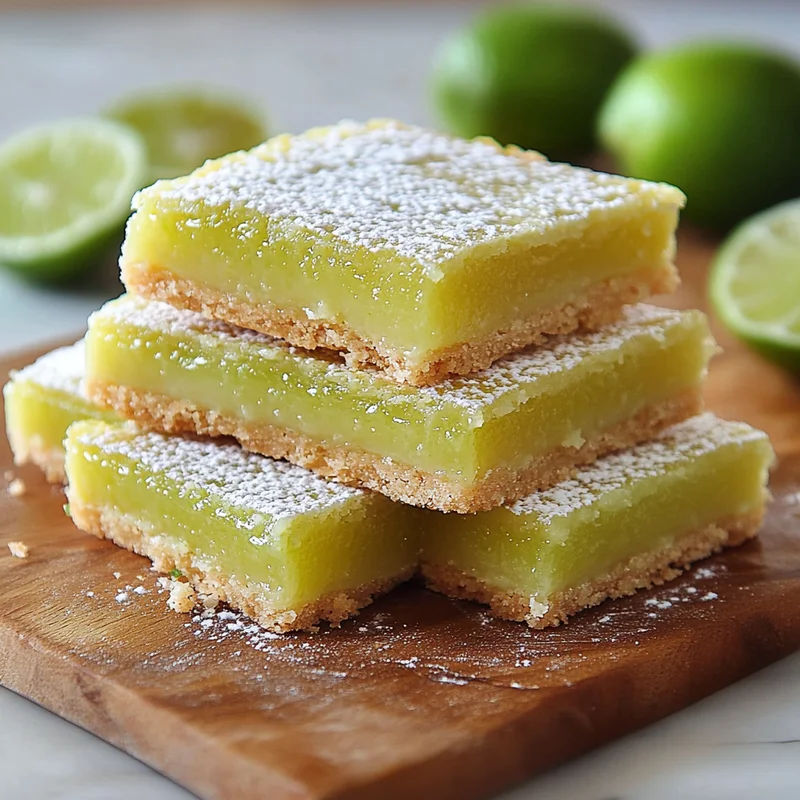
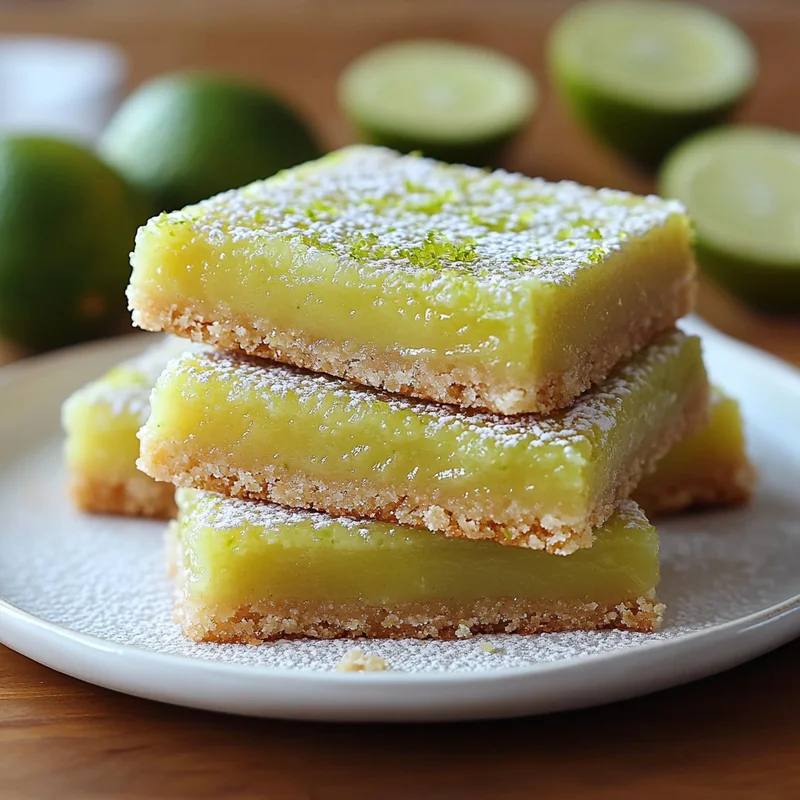
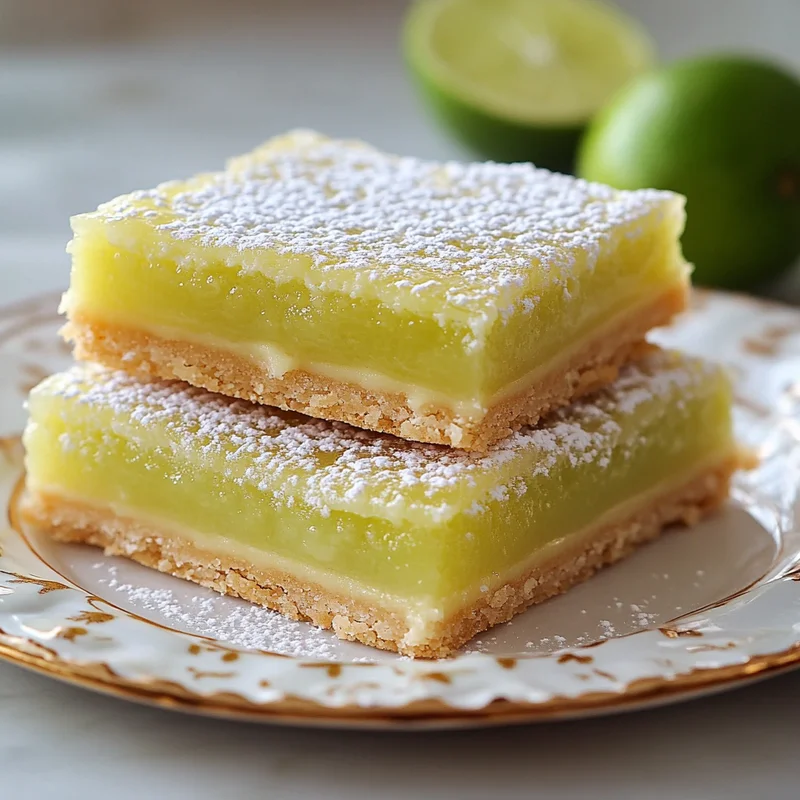
Hey there, friend! Have you ever had one of those desserts that just screams sunshine? For me, it’s these bright and zesty lime bars. They remind me of warm afternoons, backyard get-togethers, and just that perfect burst of citrusy goodness. Forget complicated fancy cakes; these bars are incredibly simple to whip up but taste like a million bucks. They’re truly a classic for a reason, and once you make them, they’ll be a go-to in your recipe box, I promise!
Why You’ll Love This Recipe
- Fast: Seriously, you can have these mixed up and in the oven in no time flat.
- Easy: No fancy techniques here, just simple steps anyone can follow.
- Giftable: Wrap these up, and you’ve got a perfect hostess gift or neighborly treat.
- Crowd-pleasing: Who can resist that sweet-tart tangy flavor? They disappear fast!
Ingredients
Gather ’round, let’s talk ingredients. You don’t need anything fancy for these beauties!
- All-purpose flour: Just your standard pantry staple for both the crust and a thickener in the filling.
- Powdered sugar: Gives the crust a lovely tender texture and sweetness.
- Salt: A little pinch is essential to balance the sweetness and enhance the flavors.
- Butter: Cold and cut into pieces for that perfect shortbread crust. Make sure it’s good quality!
- Granulated sugar: The main sweetener for that vibrant lime filling.
- Large eggs: They bind the filling and give it that smooth, rich texture.
- Fresh lime zest: This is where a huge part of that bright, floral lime flavor comes from. Don’t skip it, and definitely use fresh!
- Fresh lime juice: The essential tangy component! Freshly squeezed is non-negotiable for the best flavor.
- Food coloring (optional): Just a tiny drop of green and maybe a speck of yellow can give them that classic key lime pie look, but the flavor is amazing either way!
How to Make It
Ready to get baking? Let’s walk through it together. It’s easier than you think!
- First things first, preheat your oven to 350°F (175°C). Lightly grease or line an 8×8 or 9×9 inch baking pan with parchment paper, leaving some overhang to lift the finished bars out easily.
- Make the crust: In a medium bowl, whisk together the flour, powdered sugar, and salt.
- Cut in the cold butter pieces using a pastry blender, fork, or your fingers (my favorite way, just work quickly!) until the mixture looks like coarse crumbs, maybe like wet sand.
- Press this crumb mixture evenly into the bottom of your prepared pan. Use the bottom of a glass or measuring cup to get it nice and compact.
- Bake the crust for 15-20 minutes, or until it’s lightly golden around the edges.
- While the crust is baking, make the filling. In a medium bowl, whisk together the granulated sugar and the 1/4 cup flour until well combined. This helps prevent the flour from clumping when you add the wet ingredients.
- Whisk in the eggs one at a time until smooth.
- Stir in the lime zest and fresh lime juice. If you’re using food coloring, add a tiny drop or two now and stir until you get the desired color.
- Once the crust is done par-baking, pull the pan out of the oven. Immediately and carefully pour the lime filling evenly over the hot crust.
- Return the pan to the oven and bake for another 20-25 minutes, or until the center is just set (it might jiggle a little, but shouldn’t look liquidy).
- Let the bars cool completely in the pan on a wire rack. This is crucial for them to set up properly! I usually let them cool for at least 2-3 hours, or even pop them in the fridge once they’ve cooled a bit on the counter for faster chilling.
- Once fully chilled and set, use the parchment paper overhang to lift the whole slab out of the pan.
- Dust generously with extra powdered sugar if you like (highly recommended for that classic look!).
- Cut into squares or bars using a sharp knife. Wipe the knife clean between cuts for the neatest edges.
Substitutions & Additions
Want to mix things up? Here are a few ideas:
- Swap the Citrus: Try this recipe with lemon juice and zest for classic lemon bars! Or get adventurous with grapefruit or orange for a different twist.
- Add Coconut: Mix some shredded coconut into the crust dough for a tropical vibe.
- Different Zest: Add a bit of lemon or orange zest along with the lime zest for a more complex citrus flavor.
- Toppings: Drizzle with white chocolate or add a dollop of whipped cream before serving.
Tips for Success
A few pointers to make sure your lime bars turn out perfect every time:
- Use Fresh Juice & Zest: Bottled juice just won’t give you the same vibrant flavor. Fresh is best!
- Don’t Overbake: Pull the bars out when the center is just set. Overbaking can make the filling tough.
- Cool Completely: Patience is key here! Letting them cool and chill fully ensures the filling sets properly and makes them easy to cut.
- Clean Cuts: Use a hot, sharp knife and wipe it clean between each cut for nice, clean edges.
- Prep Ahead: You can bake the crust a day in advance, cool it, cover the pan, and leave it at room temperature until you’re ready to make the filling and bake the second step.
How to Store It
Once they’re baked and cooled, how do you keep these precious bars fresh?
Store lime bars in a single layer in an airtight container in the refrigerator. The tangy filling keeps best when chilled. They’ll stay delicious for 3-4 days. You can also freeze them! Cut bars can be frozen in a single layer on a baking sheet until solid, then transferred to a freezer-safe container or bag for up to 2-3 months. Thaw in the refrigerator.
FAQs
Got questions? I’ve got answers!
- Q: Why is my filling runny?
A: This usually happens if the bars weren’t baked quite long enough, or if they weren’t cooled completely before cutting. Make sure the center is set when you pull them out, and let them chill fully! - Q: Can I use bottled lime juice?
A: While you technically can, the flavor won’t be nearly as bright, fresh, or nuanced as using fresh juice and zest. It really does make a significant difference! - Q: How do I get clean cuts?
A: Make sure the bars are thoroughly chilled. Use a sharp knife and wipe the blade clean with a warm, damp cloth between each cut. - Q: Can I make these in a different size pan?
A: Yes, you could use a 9×13 inch pan, but the bars will be thinner, and the baking time will be shorter for both the crust and the filling. Keep a close eye on them!
Bright & Zesty Homemade Lime Bars Recipe
Equipment
- Oven
- Baking pan 8x8 or 9x9 inch
- Parchment paper For lining the pan
- Medium bowl For crust and filling
- Whisk Or pastry blender, fork, fingers for cutting in butter
- Glass or measuring cup For pressing crust
- Wire rack For cooling
- Sharp knife For cutting bars
Ingredients
- All-purpose flour For both the crust and a thickener in the filling
- Powdered sugar Gives the crust a lovely tender texture and sweetness
- Salt A little pinch is essential to balance the sweetness and enhance the flavors
- Butter Cold and cut into pieces for that perfect shortbread crust
- Granulated sugar The main sweetener for that vibrant lime filling
- Large eggs They bind the filling and give it that smooth, rich texture
- Fresh lime zest This is where a huge part of that bright, floral lime flavor comes from
- Fresh lime juice The essential tangy component! Freshly squeezed is non-negotiable for the best flavor.
- Food coloring Optional; a tiny drop of green and maybe a speck of yellow for color
- Extra powdered sugar For dusting (highly recommended)
Instructions
- First things first, preheat your oven to 350°F (175°C). Lightly grease or line an 8x8 or 9x9 inch baking pan with parchment paper, leaving some overhang to lift the finished bars out easily.
- Make the crust: In a medium bowl, whisk together the flour, powdered sugar, and salt.All-purpose flour
- Cut in the cold butter pieces using a pastry blender, fork, or your fingers (my favorite way, just work quickly!) until the mixture looks like coarse crumbs, maybe like wet sand.All-purpose flour
- Press this crumb mixture evenly into the bottom of your prepared pan. Use the bottom of a glass or measuring cup to get it nice and compact.
- Bake the crust for 15-20 minutes, or until it's lightly golden around the edges.
- While the crust is baking, make the filling. In a medium bowl, whisk together the granulated sugar and the 1/4 cup flour until well combined. This helps prevent the flour from clumping when you add the wet ingredients.All-purpose flour
- Whisk in the eggs one at a time until smooth.All-purpose flour
- Stir in the lime zest and fresh lime juice. If you're using food coloring, add a tiny drop or two now and stir until you get the desired color.All-purpose flour
- Once the crust is done par-baking, pull the pan out of the oven. Immediately and carefully pour the lime filling evenly over the hot crust.
- Return the pan to the oven and bake for another 20-25 minutes, or until the center is just set (it might jiggle a little, but shouldn't look liquidy).
- Let the bars cool completely in the pan on a wire rack. This is crucial for them to set up properly! I usually let them cool for at least 2-3 hours, or even pop them in the fridge once they've cooled a bit on the counter for faster chilling.
- Once fully chilled and set, use the parchment paper overhang to lift the whole slab out of the pan.
- Dust generously with extra powdered sugar if you like (highly recommended for that classic look!).All-purpose flour
- Cut into squares or bars using a sharp knife. Wipe the knife clean between cuts for the neatest edges.
Notes
- Use Fresh Juice & Zest: Bottled juice just won't give you the same vibrant flavor. Fresh is best!
- Don't Overbake: Pull the bars out when the center is just set. Overbaking can make the filling tough.
- Cool Completely: Patience is key here! Letting them cool and chill fully ensures the filling sets properly and makes them easy to cut.
- Clean Cuts: Use a hot, sharp knife and wipe it clean between each cut for nice, clean edges.
- Prep Ahead: You can bake the crust a day in advance, cool it, cover the pan, and leave it at room temperature until you're ready to make the filling and bake the second step.
How to Store It:
- Store lime bars in a single layer in an airtight container in the refrigerator. They'll stay delicious for 3-4 days.
- To freeze: Cut bars can be frozen in a single layer on a baking sheet until solid, then transferred to a freezer-safe container or bag for up to 2-3 months. Thaw in the refrigerator.
FAQs:
- Runny filling usually happens if not baked quite long enough or not cooled completely. Ensure the center is set and chill fully.
- While you can use bottled lime juice, the flavor won't be nearly as bright, fresh, or nuanced.
- For clean cuts, make sure bars are thoroughly chilled, use a sharp knife, and wipe the blade clean with a warm, damp cloth between cuts.
- Using a 9x13 inch pan will result in thinner bars with shorter baking times.