
Introduction
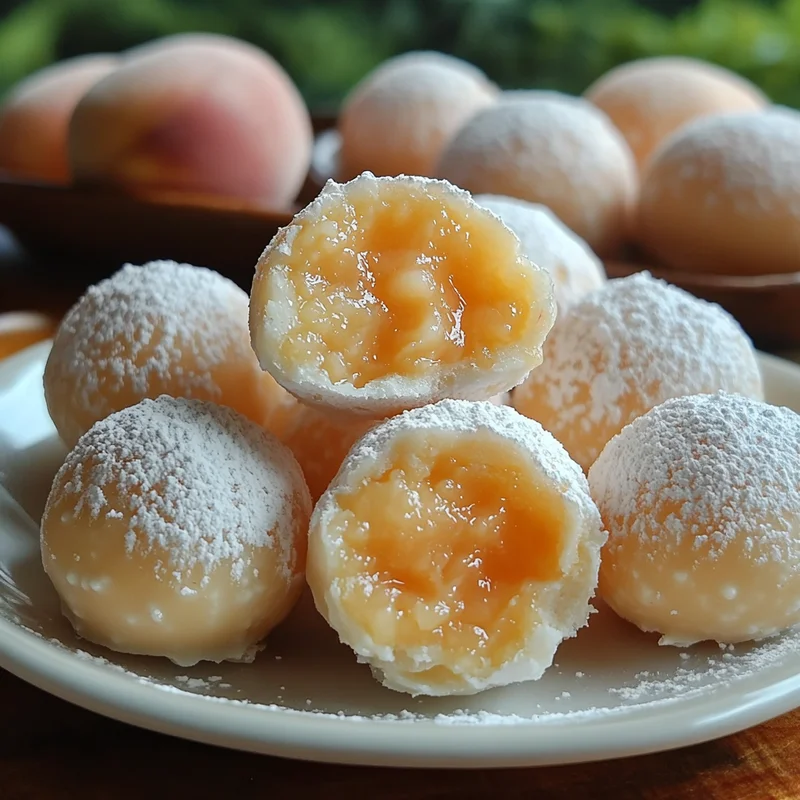
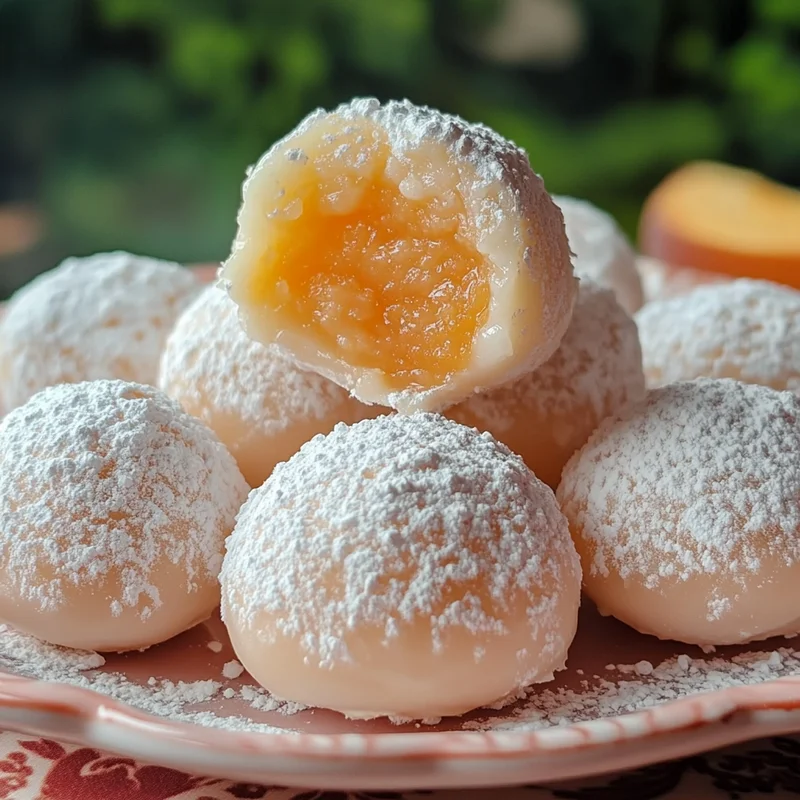
Hey there, baking buddies! Have you ever craved a little bite of sunshine? Something sweet, incredibly creamy, and bursting with a hint of fresh, summery flavor, no matter the season? Well, get ready, because I’m about to share a recipe that does exactly that. These Peach Cream Truffles are like tiny, melt-in-your-mouth clouds of peachy goodness. They are surprisingly simple to make, require no baking whatsoever, and look so elegant that nobody will guess how quick they were to whip up. Whether you’re making a special treat for yourself, prepping for a party, or looking for the perfect homemade gift, these truffles are about to become your new best friend in the kitchen. Let’s dive in!
Why You’ll Love This Recipe
Seriously, what’s not to love? These little gems tick all the boxes:
- Fast: No complicated steps, mostly waiting for chilling!
- Easy: If you can melt chocolate and stir, you can make these. Promise!
- Giftable: Package them up in a cute box or tin for a thoughtful homemade present.
- Crowd-pleasing: Who can resist a creamy, flavorful truffle?
Ingredients
Gather ’round, here’s what you’ll need to create these peachy dreams:
- 1 cup white chocolate chips: Use a good quality brand here! It really makes a difference in the creaminess and how smoothly the truffles set.
- ½ teaspoon peach extract or 1 tbsp peach jam: The star flavor! Extract gives a pure peach punch, while jam adds a little texture and natural sweetness. I often use extract for a smoother truffle, but jam is lovely too!
- 3 drops peach or orange food coloring (optional): This just gives them that lovely, subtle peachy hue. Totally optional, they taste just as amazing without it!
- ½ cup unsalted butter: Make sure it’s softened to room temperature. This helps it blend seamlessly into the mixture.
- 3 tablespoons heavy whipping cream: Adds that essential richness and helps create the perfect truffle texture.
- ¼ cup powdered sugar (for coating): For that classic, elegant truffle finish.
How to Make It
Okay, let’s turn these simple ingredients into magical truffles! You’ve got this.
Step 1: Melt the Chocolate Base
In a heatproof bowl set over a pot of simmering water (a double boiler), or carefully in the microwave in 30-second intervals, melt the white chocolate chips. Stir frequently until smooth and creamy. Be patient with white chocolate, it can be a bit finicky! Avoid getting any water into the chocolate.
Step 2: Blend in the Good Stuff
Once your chocolate is melted, take it off the heat (or out of the microwave). Stir in the softened butter until it’s completely melted and combined. Then, whisk in the heavy whipping cream until everything is smooth and glossy. It should look luscious!
Step 3: Add the Peach Power & Color
Now for the flavor! Stir in the peach extract (or jam) and the food coloring, if you’re using it. Mix until the color is uniform and the peach flavor is well distributed. Give it a little taste – is it peachy enough for you?
Step 4: Chill, Chill, Chill!
This is a crucial step! Cover the bowl and pop the mixture into the refrigerator. You’ll need to chill it for at least 2-3 hours, or until it’s firm enough to roll. Don’t rush this part; if it’s too soft, you’ll have a sticky mess!
Step 5: Roll ‘Em Up!
Once chilled, take the mixture out. Scoop out small portions (a teaspoon or a tiny cookie scoop works great for uniformity) and quickly roll them between your palms into smooth balls. Your hands will warm the mixture slightly, making it pliable. If the mixture gets too soft as you work, just pop it back in the fridge for 10-15 minutes.
Step 6: Coat Your Truffles
Put the powdered sugar in a shallow dish. Gently drop the rolled truffles into the sugar, one or two at a time, and roll them around to coat completely. Lift them out, shaking off any excess sugar.
Step 7: Final Chill & Enjoy!
Place the finished truffles on a plate or tray lined with parchment paper. Pop them back in the fridge for a final chill for about 30 minutes to firm up the coating. Then, they are ready to be devoured or shared!
Substitutions & Additions
Feeling creative? Here are some ways to play with this recipe:
- Different Coating: Instead of powdered sugar, try rolling them in finely shredded coconut, chopped pistachios, crushed freeze-dried peaches, or dip them in melted white or dark chocolate for an extra layer.
- Other Flavors: Swap peach extract for almond, raspberry, orange, or even a touch of vanilla bean paste.
- Add a Little Zing: A tiny pinch of ground ginger or cardamom mixed in with the peach flavor can add a lovely twist.
- Make it Adult: Add a tablespoon of peach schnapps or a fruity liqueur along with the cream (reduce the cream slightly if adding liqueur).
Tips for Success
A few little pointers to help you nail these on your first try:
- Melting White Chocolate: White chocolate can seize up easily. Use low, gentle heat whether you’re using a double boiler or the microwave. Stir constantly and remove from heat just as it’s mostly melted, letting the residual heat finish the job.
- Chilling Time is Key: Don’t skip or shorten the chilling time for the mixture. This is what allows you to roll it into balls. If it’s too soft, it’ll be sticky and frustrating!
- Rolling Technique: Roll the truffles fairly quickly between cool hands. If your hands are warm, run them under cold water briefly and dry them thoroughly before rolling.
- Uniform Size: I find using a small cookie scoop (like a 1-tablespoon size) helps make all the truffles roughly the same size, which looks nice and ensures even chilling/setting.
How to Store It
These truffles are best stored in an airtight container in the refrigerator. Layer them with parchment paper if stacking to prevent sticking. They will soften at room temperature, especially on warm days, so keep them cool until serving.
FAQs
Got questions? I’ve got (quick!) answers!
Q: Can I use milk or dark chocolate instead of white chocolate?
A: You can, but the flavor profile will be different. Dark or milk chocolate will overpower the delicate peach flavor more than white chocolate does. If you do, you might need to adjust the amount of cream or butter slightly as they have different consistencies when melted.
Q: My mixture is too soft to roll after chilling. What went wrong?
A: It likely wasn’t chilled long enough or your fridge isn’t cold enough. Pop it back in for another hour or two, or even briefly in the freezer (check every 15-20 mins). Make sure your butter wasn’t too soft initially, either.
Q: How long do these truffles last?
A: Stored properly in the refrigerator, they should be good for up to 1-2 weeks. They are best enjoyed within the first week for optimal texture and flavor.
Q: Do I have to use food coloring?
A: Nope! The food coloring is purely for aesthetics to give them a nice peachy look. They will taste exactly the same without it.
Enjoy making (and eating!) these delightful Peach Cream Truffles. Happy treating!
Easy & Creamy Homemade Peach Cream Truffles
Equipment
- Heatproof bowl or suitable for microwave
- Pot for simmering water, if using double boiler
- Microwave optional, for melting chocolate
- Shallow dish for coating
- Plate or tray
- Parchment paper
- small cookie scoop optional, approx 1-tablespoon size
Ingredients
Main Ingredients
- 1 cup white chocolate chips Use a good quality brand
- 0.5 teaspoon peach extract OR 1 tbsp peach jam
- 3 drops peach or orange food coloring optional
- 0.5 cup unsalted butter softened to room temperature
- 3 tablespoons heavy whipping cream
- 0.25 cup powdered sugar for coating
Instructions
- In a heatproof bowl set over a pot of simmering water (a double boiler), or carefully in the microwave in 30-second intervals, melt the white chocolate chips. Stir frequently until smooth and creamy. Be patient with white chocolate, it can be a bit finicky! Avoid getting any water into the chocolate.
- Once your chocolate is melted, take it off the heat (or out of the microwave). Stir in the softened butter until it's completely melted and combined. Then, whisk in the heavy whipping cream until everything is smooth and glossy. It should look luscious!
- Now for the flavor! Stir in the peach extract (or jam) and the food coloring, if you're using it. Mix until the color is uniform and the peach flavor is well distributed. Give it a little taste – is it peachy enough for you?
- This is a crucial step! Cover the bowl and pop the mixture into the refrigerator. You'll need to chill it for at least 2-3 hours, or until it's firm enough to roll. Don't rush this part; if it's too soft, you'll have a sticky mess!
- Once chilled, take the mixture out. Scoop out small portions (a teaspoon or a tiny cookie scoop works great for uniformity) and quickly roll them between your palms into smooth balls. Your hands will warm the mixture slightly, making it pliable. If the mixture gets too soft as you work, just pop it back in the fridge for 10-15 minutes.
- Put the powdered sugar in a shallow dish. Gently drop the rolled truffles into the sugar, one or two at a time, and roll them around to coat completely. Lift them out, shaking off any excess sugar.
- Place the finished truffles on a plate or tray lined with parchment paper. Pop them back in the fridge for a final chill for about 30 minutes to firm up the coating. Then, they are ready to be devoured or shared!