Introduction
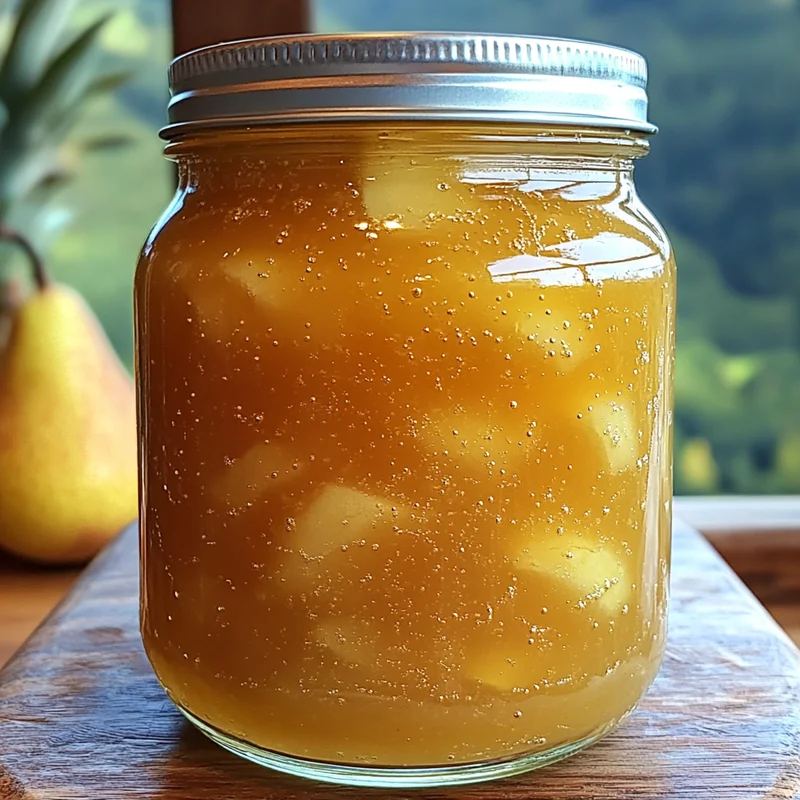
Hey there, friend! Let’s talk about something truly special today – homemade pear honey. Maybe you grew up with a jar of this sunshine-in-a-jar on your pantry shelf, or perhaps it’s a brand new discovery waiting to happen. Either way, buckle up, because we’re about to whip up a batch of this incredibly easy, wonderfully versatile spread that tastes like a cozy autumn afternoon, no matter the season!
Forget complicated processes; this recipe is incredibly simple, relying on just a few humble ingredients and a bit of gentle simmering. It’s the kind of recipe that fills your kitchen with the most amazing aroma and leaves you with a sweet reward that’s perfect for toast, biscuits, ice cream, or even just a spoon!
Why You’ll Love This Recipe
- Fast (Mostly passive simmer time!)
- Easy (Seriously, just three ingredients!)
- Giftable (Everyone adores a homemade jar!)
- Crowd-pleasing (Kids and adults alike can’t resist!)
Ingredients
Gather ’round, let’s look at our simple lineup:
- 8 cups very ripe pears, ground or finely chopped: The star of the show! Make sure they’re nice and soft – the riper, the sweeter and easier to cook down. Any type of pear works, but I find Bosc or Anjou give a lovely flavor. Grinding them in a food processor or chopping super finely helps them break down beautifully.
- 1 large can crushed pineapple: This is the secret ingredient that gives it that “honey” texture and a delightful tangy brightenss. Don’t drain it – we need that juice!
- 5 cups granulated sugar: This preserves the pear honey and, of course, sweetens it to perfection. Yes, it seems like a lot, but trust me, it balances the fruit and helps achieve that thick, spreadable consistency.
How to Make It
Alright, let’s get cooking! This part is super straightforward.
- First things first, grab your largest, heaviest-bottomed pot. You need something big because this mixture will bubble as it cooks, and a heavy bottom helps prevent scorching. Carefully combine your prepared pears, the entire can of crushed pineapple (juice and all!), and the granulated sugar in the pot. Give it a good stir to mix everything up.
- Place the pot over medium-high heat. Now, this is important: you’ll need to stir constantly at this stage. Sugar can easily scorch, and stirring prevents it from sticking to the bottom as it heats up and starts to boil. Keep stirring until the mixture comes to a rolling boil.
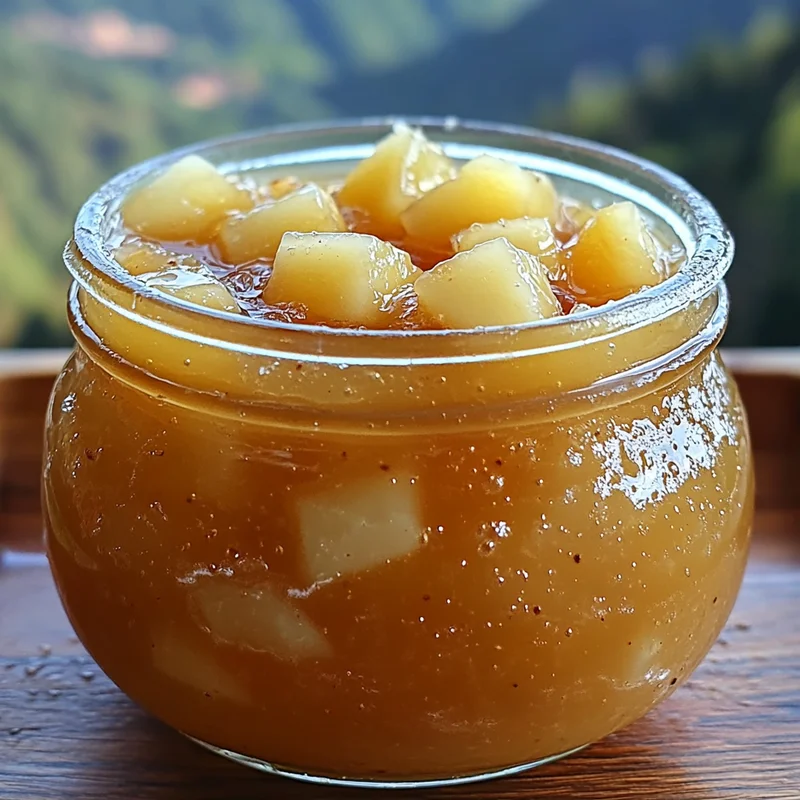
- Once you’ve hit that boil, immediately reduce the heat way down to low. You want a gentle simmer, just a little bit of bubbling action. Now, the waiting game begins! Simmer gently, stirring occasionally (maybe every 10-15 minutes) to make sure nothing is sticking, until the mixture thickens. This usually takes about 1.5 to 2 hours. How do you know it’s ready? It should look thick and jammy, much like honey or a thick syrup. You can test it by putting a spoonful on a cold plate – if it thickens as it cools, you’re good to go!
- Once it’s reached your desired consistency, remove the pot from the heat. Be careful – it will be very hot!
That’s it! You’ve made homemade pear honey. Let it cool slightly before handling or transferring.
Substitutions & Additions
- Pears: While pears are key, you could experiment with adding other fruits like finely chopped apples (use a tart variety!) or a small amount of diced peach.
- Pineapple: If you absolutely can’t do pineapple, you could try substituting with an equal amount of apple juice concentrate or even a splash of lemon juice for brightness, but the pineapple really gives it that unique texture and tang. It won’t quite be “pear honey” without it, but you’ll get a lovely pear jam!
- Spices: Oh, the possibilities! Stir in a teaspoon of ground cinnamon, nutmeg, or ginger during the last 30 minutes of simmering for a warm, spiced version. A pinch of ground cloves can also add a lovely depth.
- Extracts: A splash of vanilla extract added right at the end (after removing from heat) is always a good idea! Almond extract would also be lovely.

Tips for Success
- Use Ripe Pears: I can’t stress this enough! Ripe pears are sweeter and break down more easily, giving you a smoother product.
- Stir, Stir, Stir (Initially!): That initial boiling phase requires your attention. Don’t walk away! Constant stirring prevents the sugar from caramelizing too much or burning.
- Be Patient During Simmering: The thickening takes time. Don’t rush it by turning up the heat too high, or you risk scorching. Low and slow is the way to go.
- Check for Thickness: Remember the cold plate test? Keep one handy in the freezer. Spoon a little hot pear honey onto it, let it cool for a minute, then nudge it. If it holds its shape and doesn’t run all over, it’s likely thick enough. It will continue to thicken as it cools completely.
How to Store It
Once your pear honey is finished cooking, let it cool down in the pot for a bit. Then, carefully ladle it into clean jars or airtight containers. Store it in the refrigerator, where it will keep for several weeks. For longer storage, you can process it in a boiling water bath according to standard canning procedures – if you’re new to canning, be sure to follow a reputable guide for safe processing times specific to jams/jellies.
FAQs
- Can I use less sugar? The sugar level is important for both flavor balance and consistency. Reducing it significantly might affect how well it thickens and its shelf life in the fridge. I don’t recommend cutting it down by too much.
- What if my pear honey is too thin? Pop it back on low heat and simmer uncovered for a bit longer, stirring occasionally, until it reduces and thickens.
- What if my pear honey is too thick? This is less common, but if it gets too stiff as it cools, you can gently warm it up with a splash of water or apple juice to reach your desired consistency.
- Can I leave the skins on the pears? While you technically could, leaving the skins on will give your pear honey a different texture and potentially a cloudy appearance. For the smoothest “honey” texture, I recommend peeling the pears first.

Sweet & Simple Homemade Pear Honey
Equipment
- Large, heaviest-bottomed pot Heavy bottom helps prevent scorching
- Food processor or knife For grinding or finely chopping pears
Ingredients
Main Ingredients
- 8 cups very ripe pears ground or finely chopped, any type but Bosc or Anjou recommended
- 1 large can crushed pineapple undrained
- 5 cups granulated sugar
Instructions
- Grab your largest, heaviest-bottomed pot. Combine your prepared pears, the entire can of crushed pineapple (juice and all!), and the granulated sugar in the pot. Give it a good stir to mix everything up.
- Place the pot over medium-high heat. Stir constantly until the mixture comes to a rolling boil.
- Reduce the heat to low for a gentle simmer, stirring occasionally (every 10-15 minutes), until the mixture thickens (about 1.5 to 2 hours). Test thickness by spooning a bit onto a cold plate.
- Remove the pot from the heat once desired consistency is reached.
- Let it cool slightly before handling or transferring.