Introduction
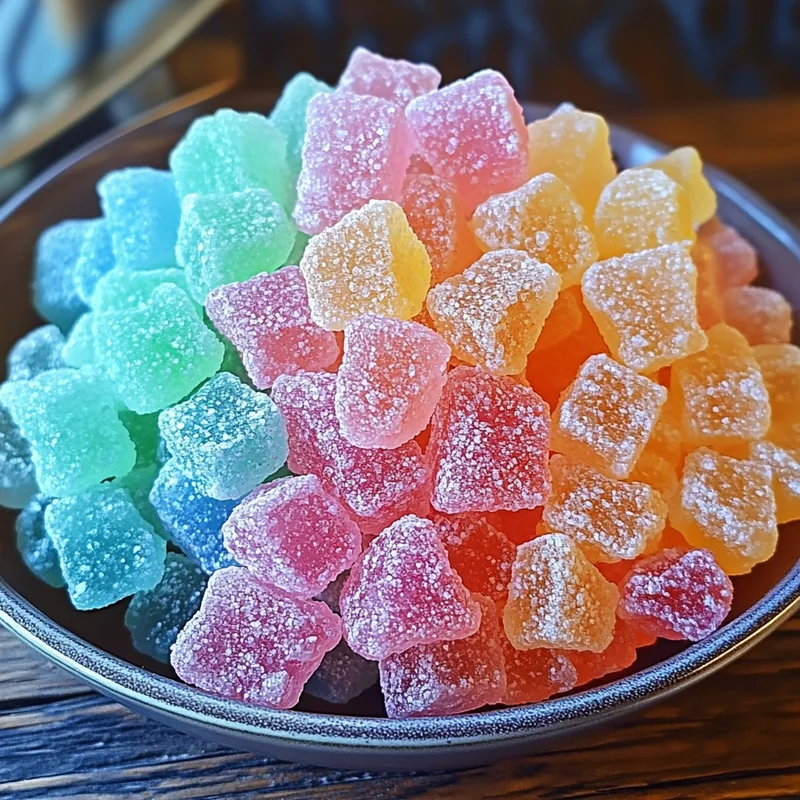
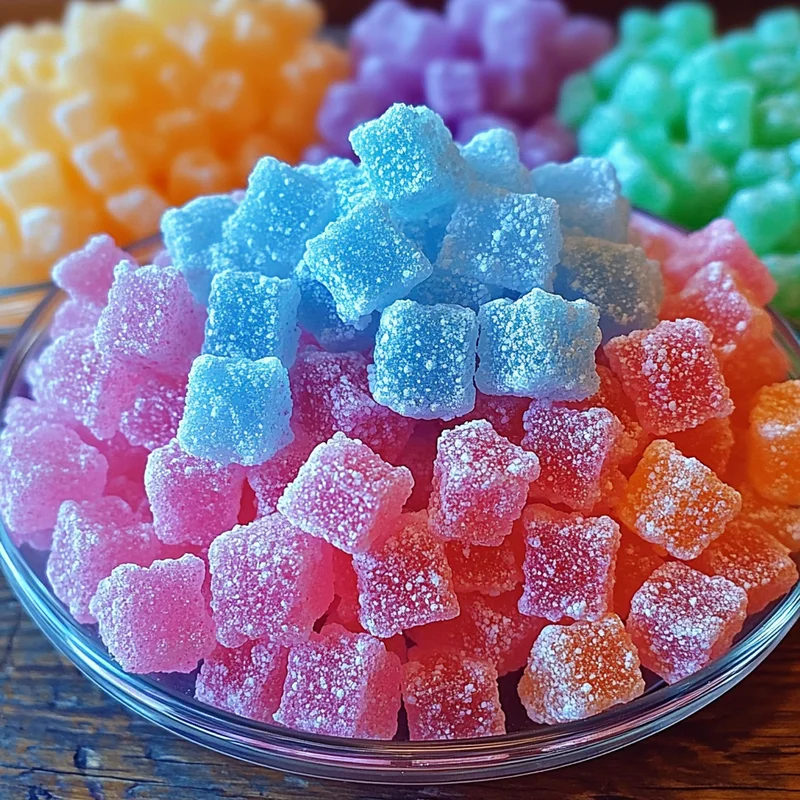
Oh boy, do I have a blast from the past for you today! Remember those little packets of pure joy you’d grab at the corner store? The ones that fizzed and popped like tiny fireworks on your tongue? Yep, we’re talking Pop Rocks! And guess what? You can totally make them right in your own kitchen!
I know, it sounds like some kind of magic trick, but it’s actually a really cool (and surprisingly simple!) kitchen science project. It’s one of those recipes that feels extra special, bringing back all those fun childhood memories. Plus, watching the candy transform and knowing you made that popping magic yourself? Pure satisfaction. It’s quick, it’s fun, and it’s guaranteed to get a reaction (literally!).
Why You’ll Love This Recipe
- Fast: Once you get the hang of it, the actual cooking time is super speedy.
- Easy: No fancy equipment needed, just standard kitchen tools and a candy thermometer.
- Giftable: Package them up in cute little bags for a unique and fun gift!
- Crowd-Pleasing: Kids and adults alike are mesmerized by the pop and fizz!

Ingredients
Here’s what you’ll need to whip up your own batch of popping goodness. Most of these are probably already in your pantry, though you might need a quick trip for a couple of items!
- 1 cup granulated sugar: Just your basic white sugar, the foundation of our candy.
- 1/2 cup light corn syrup: This helps prevent crystallization and gives our candy a smooth texture.
- 1/4 cup water: Just enough to dissolve the sugar and corn syrup initially.
- 1/4 teaspoon baking soda: Added early on to help with the candy’s structure (don’t confuse this with the fizzing soda!).
- 1 teaspoon flavored extract: This is where the fun comes in! Raspberry, orange, cherry, grape… whatever flavor explosion you dream of!
- 2 to 3 drops food coloring (optional): Add a little color to match your flavor, if you like!
- 1/4 teaspoon citric acid (for a tangy pop): This is half of the dynamic duo that creates the fizz. You can find this in the baking aisle or sometimes with canning supplies.
- 1/4 teaspoon baking soda (for the fizz): The other half of the fizzing team! Make sure this is a fresh box.
How to Make It
Ready to make some magic? Let’s do this step-by-step. Just remember, we’re working with hot sugar, so be extra careful!
1. Get Prepped: Line a baking sheet with parchment paper and set it aside. Measure out all your ingredients and have them ready to go, because things move fast once the sugar is hot!
2. Combine & Heat: In a medium saucepan, combine the granulated sugar, light corn syrup, and water. Stir just until everything is wet. Clip your candy thermometer to the side of the pan, making sure the tip is submerged but not touching the bottom.
3. Cook to Hard Crack: Place the saucepan over medium heat and bring the mixture to a boil. Don’t stir while it’s boiling! Just let it cook until it reaches the “hard crack” stage, which is between 300°F and 310°F (149°C-154°C) on your thermometer. This might take 10-20 minutes depending on your stove.
4. Add First Baking Soda & Flavor: Carefully remove the pan from the heat immediately when it hits the temperature. Quickly but gently stir in the first 1/4 teaspoon of baking soda, the flavored extract, and the food coloring (if using). The mixture will bubble up a bit, which is normal.
5. Prepare the Fizz Mix: In a tiny separate bowl or just on a piece of parchment paper, quickly mix together the citric acid and the second 1/4 teaspoon of baking soda. Have this ready!
6. Add the Fizz Magic: This is the critical part for the pop! Wait about 30 seconds after removing the candy from the heat (it needs to cool slightly but still be very hot and liquid). Quickly sprinkle the citric acid and baking soda mixture evenly over the surface of the candy in the pan. DO NOT STIR IT IN! Just let it sit on top for a moment.
7. Pour & Spread: Immediately pour the hot candy mixture onto your prepared parchment-lined baking sheet. It might look foamy where you added the fizz mix, that’s good! You can gently tilt the pan to spread it slightly thin, about 1/4 inch thick. Work quickly!
8. Cool Completely: Let the candy cool completely and harden on the baking sheet. This will take about 20-30 minutes.
9. Break It Up: Once fully cooled and hard, break the candy into small pieces. You can use a meat mallet, a rolling pin, or just your hands. Break it into varying sizes, just like the store-bought kind!
10. Store Immediately: Transfer your homemade Pop Rocks to an airtight container right away to preserve the fizz!
Substitutions & Additions
Want to get creative? Here are a few ways to change things up:
- Flavor Frenzy: The possibilities are endless! Try lemon extract, lime, watermelon, or even more unique flavors like root beer or cotton candy.
- Color Play: Match your food coloring to your flavor – red for cherry, orange for orange, green for lime. You can even swirl colors!
- Extra Sparkle: Stir in a pinch of edible glitter right before you pour the candy onto the baking sheet for some extra pizzazz (though this won’t affect the pop!).
- Tang Power: If you love extra sour candy, you could slightly increase the amount of citric acid, but do it gradually as it can affect the texture.
Tips for Success
Making candy can be a little tricky, but these tips will help you get that perfect pop!
- Candy Thermometer is Your BFF: Don’t guess the temperature! A candy thermometer is essential for hitting that hard crack stage correctly.
- Work Clean: Have everything measured and ready. Candy making requires speed and focus once the sugar is hot.
- Don’t Stir the Fizz: Seriously, resist the urge to stir in the citric acid/baking soda mixture. The magic happens as the candy cools around those reacting bubbles.
- Humidity is the Enemy: Candy hates humidity! Try to make this on a dry day if possible. Store it in an airtight container immediately.
- Safety First: Hot sugar causes severe burns. Keep kids and pets away from the stove and handle the hot pan with extreme care.
How to Store It
Storing your homemade Pop Rocks correctly is key to keeping their pop-ability! Because they react with moisture, they need to be kept totally dry.
Store them in an airtight container at room temperature. A zip-top bag with all the air squeezed out works too, but a hard container offers more protection. Kept this way, they should maintain their pop for a few weeks, though the fizz might diminish over time.
FAQs
Got questions about your popping creation? Here are a few common ones:
Q: Why does it pop?
A: It’s a little bit of kitchen science! When the citric acid and baking soda mix is added to the hot liquid candy, they react and create tiny bubbles of carbon dioxide gas. As the candy cools and hardens quickly around these bubbles, they get trapped. When you put the candy in your mouth, your saliva dissolves the candy, releasing the trapped gas bubbles with that signature popping sound!
Q: My candy didn’t pop much! What went wrong?
A: There could be a few reasons. Make sure your citric acid and baking soda were fresh and active. Ensure you added them after removing the candy from the heat but while it was still very hot and liquid (around 280-290°F is ideal for adding the fizz mix according to some candy makers, though adding it right after taking it off the 300°F heat works too – the key is speed!). Also, humidity can make the candy absorb moisture and lose its pop.
Q: Is this safe to eat?
A: Absolutely! All the ingredients are standard food-grade ingredients. The popping reaction is just like the fizz you get from baking soda and lemon juice, only trapped in hard candy.
Q: Can I use different types of sugar?
A: Granulated sugar is best for this recipe. Other sugars might affect the crystallization and prevent the correct texture needed to trap the gas bubbles.
Homemade Pop Rocks

Recreate the nostalgic fizz and pop of Pop Rocks right in your own kitchen with this surprisingly simple candy science project. Quick, fun, and guaranteed to impress!
- Medium saucepan
- Candy thermometer
- Baking Sheet
- Parchment paper
- tiny separate bowl
- Meat mallet
- Airtight container
Ingredients
- 1 cup granulated sugar (basic white sugar)
- 0.5 cup light corn syrup
- 0.25 cup water
- 0.25 teaspoon baking soda ((first addition, for structure))
- 1 teaspoon flavored extract (e.g., raspberry, orange, cherry, grape)
- 2 drops food coloring (optional (use 2 to 3 drops))
- 0.25 teaspoon citric acid (for a tangy pop)
- 0.25 teaspoon baking soda ((second addition, for the fizz – make sure it’s fresh))
- Get Prepped: Line a baking sheet with parchment paper and set it aside. Measure out all your ingredients and have them ready to go, because things move fast once the sugar is hot!
- Combine & Heat: In a medium saucepan, combine the granulated sugar, light corn syrup, and water. Stir just until everything is wet. Clip your candy thermometer to the side of the pan, making sure the tip is submerged but not touching the bottom.
- Cook to Hard Crack: Place the saucepan over medium heat and bring the mixture to a boil. Don’t stir while it’s boiling! Just let it cook until it reaches the “hard crack” stage, which is between 300°F and 310°F (149°C-154°C) on your thermometer. This might take 10-20 minutes depending on your stove.
- Add First Baking Soda & Flavor: Carefully remove the pan from the heat immediately when it hits the temperature. Quickly but gently stir in the first 1/4 teaspoon of baking soda, the flavored extract, and the food coloring (if using). The mixture will bubble up a bit, which is normal.
- Prepare the Fizz Mix: In a tiny separate bowl or just on a piece of parchment paper, quickly mix together the citric acid and the second 1/4 teaspoon of baking soda. Have this ready!
- Add the Fizz Magic: Wait about 30 seconds after removing the candy from the heat (it needs to cool slightly but still be very hot and liquid). Quickly sprinkle the citric acid and baking soda mixture evenly over the surface of the candy in the pan. DO NOT STIR IT IN! Just let it sit on top for a moment.
- Pour & Spread: Immediately pour the hot candy mixture onto your prepared parchment-lined baking sheet. It might look foamy where you added the fizz mix, that’s good! You can gently tilt the pan to spread it slightly thin, about 1/4 inch thick. Work quickly!
- Cool Completely: Let the candy cool completely and harden on the baking sheet. This will take about 20-30 minutes.
- Break It Up: Once fully cooled and hard, break the candy into small pieces. You can use a meat mallet, a rolling pin, or just your hands. Break it into varying sizes, just like the store-bought kind!
- Store Immediately: Transfer your homemade Pop Rocks to an airtight container right away to preserve the fizz!
Candy Thermometer is essential for success. Have all ingredients measured and ready as candy making requires speed. Do NOT stir in the citric acid/baking soda mixture after sprinkling. Humidity is the enemy of this candy; make on a dry day and store immediately in an airtight container. Hot sugar causes severe burns, handle with extreme care.