Introduction
Hey there, friend! Have you ever had one of those days? You know, the kind where you’re craving something sweet, something decadent, something utterly satisfying… but you also want to stick to your healthy goals? Yeah, me too. It feels like a constant battle sometimes, doesn’t it? Well, get ready because I’ve found the most amazing solution, and I’m SO excited to share it with you!
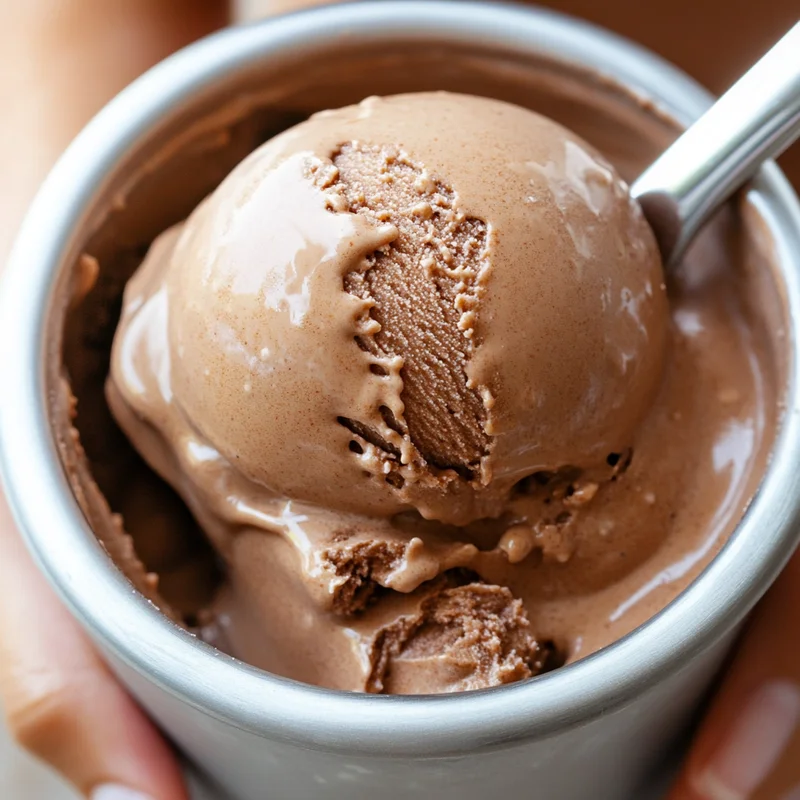
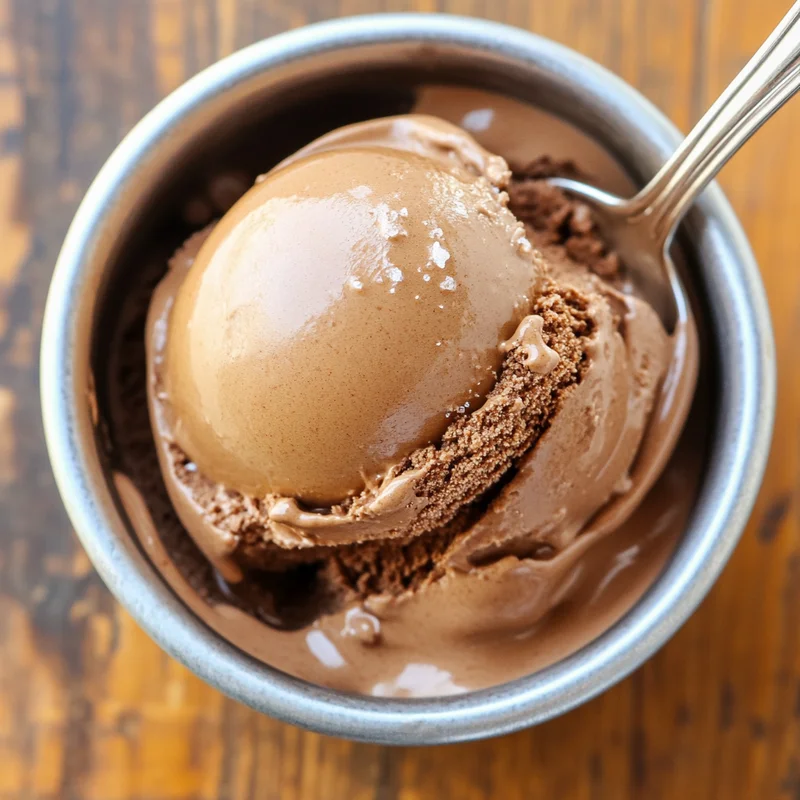
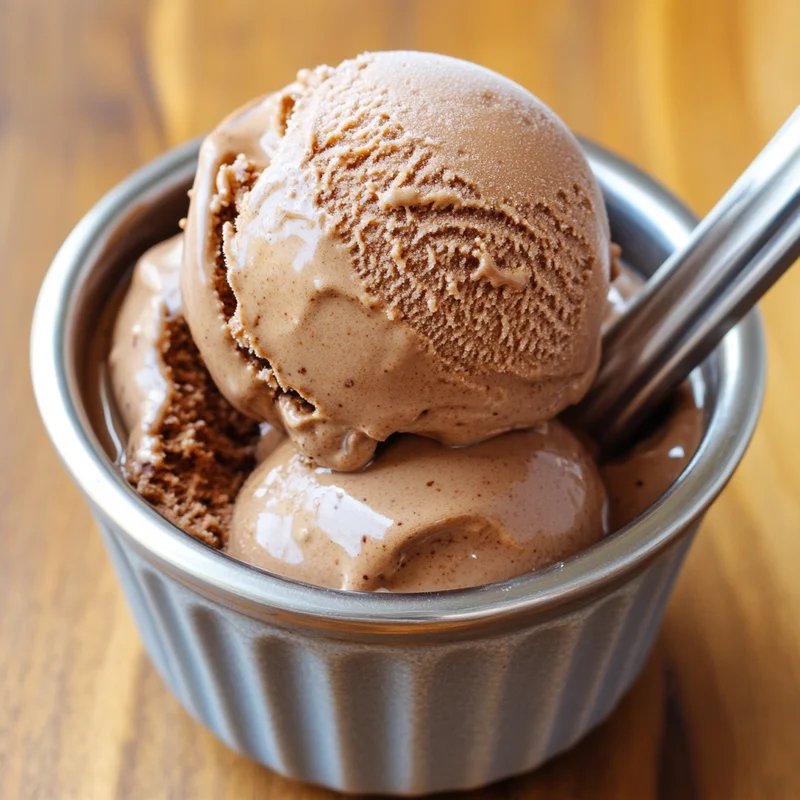
This isn’t just any ice cream. This is a luscious, creamy, dreamy protein ice cream that tastes like pure indulgence but secretly packs a nutritional punch. It’s surprisingly easy to whip up at home, and trust me, once you try it, you’ll never look back. Forget those icy, weird-tasting “healthy” frozen desserts. This recipe delivers on flavor AND texture. It’s the perfect way to treat yourself without the sugar crash or the guilt. Let’s make some magic!
Why You’ll Love This Recipe
- Fast-ish! While there’s some chilling time involved (totally hands-off!), the active prep time is surprisingly quick.
- Easy Peasy: No complicated techniques here! If you can stir a pot, you can make this.
- Giftable: Whip up a batch and share the healthy deliciousness with friends! (If you can bear to part with it.)
- Crowd-Pleasing: Even folks who aren’t focused on protein will LOVE this rich, chocolatey dessert.
- Satisfying: The protein helps keep you feeling full and satisfied longer.
- Low Carb & Sugar-Free: Perfect for those watching their sugar intake.
Ingredients
You’ll need just a few simple ingredients to make this incredible protein ice cream. Each one plays a special role in creating that perfect texture and flavor!
- 5 large Egg Yolks: These are key to creating that rich, custard-like base that makes this ice cream so smooth and creamy. Don’t skip them!
- 1/2 cup Besti Powdered Monk Fruit Allulose Blend: This is my go-to for sugar-free sweetness. It measures cup-for-cup like sugar and doesn’t have that weird aftertaste some sweeteners do. Plus, allulose helps keep ice cream softer!
- 1 pinch Sea Salt: A little salt goes a long way to enhance the chocolate flavor and balance the sweetness.
- 1 1/2 cups Unsweetened Vanilla Almond Milk: Provides the liquid base. The vanilla adds a nice background note, but plain works too.
- 1 cup Heavy Cream: This is where we get that luxurious richness and creaminess!
- 1/4 cup Dutch Processed Cocoa Powder: Dutch process cocoa gives a deep, smooth chocolate flavor. It’s less acidic than natural cocoa.
- 1/4 cup Collagen Protein Powder (or any unsweetened protein powder): I love using collagen because it dissolves beautifully and is tasteless, adding pure protein power. You can use other unsweetened protein powders, but the texture might vary slightly depending on the type (whey, casein, pea, etc.) and how well it blends.
How to Make It
Alright, let’s get cooking! Follow these steps, and you’ll be enjoying homemade protein ice cream before you know it.
First things first, grab a medium saucepan and a whisk. We’re going to make our custard base.
In a separate medium bowl, whisk together your egg yolks, Besti powdered sweetener, and sea salt until the mixture is light yellow and well combined. This aerates the yolks a bit and helps dissolve the sweetener.
Now, pour the almond milk and heavy cream into your saucepan. Heat this mixture over medium heat, stirring occasionally, just until it’s warm and steamy, but not boiling. You should see little bubbles starting to form around the edges.
Time to temper those yolks! This sounds fancy, but it just means we’re going to slowly bring the temperature of the egg mixture up so it doesn’t scramble. While whisking the egg yolk mixture constantly, slowly drizzle about half a cup of the warm cream mixture into the bowl. Keep whisking! Once combined, pour the entire egg yolk mixture back into the saucepan with the rest of the warm cream.
Return the saucepan to medium heat. Now, you need to stir CONSTANTLY with a whisk or a wooden spoon. We’re gently cooking the custard until it’s thick enough to coat the back of a spoon (meaning if you run your finger across the spoon, the line stays). This usually takes about 5-8 minutes. Be patient and keep stirring to prevent the bottom from scorching.
Once thickened, remove the saucepan from the heat. Now, whisk in the Dutch processed cocoa powder and the collagen (or other protein powder) until everything is completely smooth and there are no lumps. This might take a minute or two of vigorous whisking.
Pour the mixture through a fine-mesh sieve into a clean bowl. This catches any potential tiny bits of cooked egg or unmixed powder, ensuring a super smooth texture.
Now, for the most important part (besides eating it!): cooling. You need to cool this base completely before churning. I recommend placing the bowl in an ice bath for about 15-20 minutes, stirring occasionally, then covering it and refrigerating for at least 4 hours, but ideally overnight. A really cold base churns better and gives you a creamier result.
Once your base is thoroughly chilled, it’s time to churn! Pour the cold mixture into your ice cream maker and churn according to the manufacturer’s instructions. This usually takes about 20-30 minutes, depending on your machine. The ice cream will be soft-serve consistency at this stage.
Transfer the churned ice cream to a freezer-safe container. Press a piece of parchment paper or plastic wrap directly onto the surface of the ice cream to prevent ice crystals from forming. Cover the container tightly and freeze for another 4-6 hours, or until firm enough to scoop.
Scoop, serve, and enjoy your delicious, guilt-free protein treat!
Substitutions & Additions
This recipe is fantastic as is, but here are some ideas to change it up:
- Protein Powder: While collagen is my preference for smoothness, you can experiment with other unsweetened protein powders like whey isolate, casein, or a plant-based blend. The final texture might vary slightly.
- Milk: You could use other unsweetened non-dairy milks (like coconut or cashew) or even dairy milk if you prefer, though this would change the low-carb/dairy-free profile slightly.
- Sweetener: If you don’t have Besti, you could use other sugar-free powdered sweeteners like erythritol or a monk fruit/erythritol blend, but the texture might be a bit harder straight from the freezer without the allulose. You might need to let it sit at room temperature for a few minutes before scooping.
- Flavor Boosts: Add a teaspoon of vanilla extract with the cocoa, a pinch of cinnamon, or even a little espresso powder for a mocha twist.
- Mix-ins: Once churned but before freezing, fold in chopped nuts, sugar-free chocolate chips, shredded coconut, or swirls of sugar-free caramel or chocolate sauce.
Tips for Success
Want to make sure your protein ice cream turns out perfectly every time? Keep these tips in mind:
- Don’t Rush the Custard: Cook the base gently over medium heat and stir constantly. If it gets too hot too fast, you risk scrambling the eggs. Low and slow wins the race here.
- Chill, Chill, Chill: A properly chilled base is CRUCIAL for creamy ice cream. Don’t skip the refrigeration step!
- Churning Matters: Make sure your ice cream maker bowl is frozen solid according to its instructions. Don’t overfill the machine – it needs room to expand as it churns.
- Texture After Churning: Remember, it will be soft-serve after churning. It needs time in the freezer to firm up to scoopable consistency.
- Prevent Ice Crystals: Pressing plastic wrap directly onto the surface before freezing is the best way to keep those pesky ice crystals from forming and ruining that smooth texture.
How to Store It
Store your homemade protein ice cream in a tightly sealed, freezer-safe container. An airtight container is key to preventing freezer burn and maintaining the best texture. With the proper storage, it should stay delicious for up to 2-3 weeks in the freezer. As mentioned, covering the surface directly with wrap before the lid helps a lot!
FAQs
Why is my protein ice cream hard as a rock?
Homemade ice cream without sugar (like this recipe using Besti with allulose) tends to freeze harder than traditional ice cream. Using a sweetener with allulose (like Besti) helps keep it softer than pure erythritol. If it’s too hard, just let it sit on the counter for 10-15 minutes before scooping.
Can I make this without an ice cream maker?
It’s challenging to get the same creamy texture without churning. You could try a “no-churn” method by whipping heavy cream separately and folding it into the chilled base, then freezing, but the protein powder might make it tricky to get smooth results compared to a churned version.
What’s the best protein powder to use?
I find collagen or a very finely milled whey isolate works best for minimal texture impact. Avoid powders with added thickeners or gums if possible, as they can sometimes make ice cream gummy or icy.
Can I use natural cocoa powder instead of Dutch processed?
Yes, you can, but it will have a slightly different flavor profile (more acidic, sharper chocolate) and might slightly affect the texture or color. It will still work, though!

Homemade Protein Ice Cream
Equipment
- Medium saucepan
- Whisk
- Medium bowl
- Fine-mesh sieve
- Ice cream maker Follow manufacturer's instructions; bowl needs to be frozen solid.
- Freezer-safe container Tightly sealed, airtight container is key.
- Parchment paper or plastic wrap To press directly onto the surface before freezing.
Ingredients
Hauptzutaten
- 5 large Egg Yolks Key to a rich, custard-like base.
- 0.5 cup Besti Powdered Monk Fruit Allulose Blend Or other sugar-free powdered sweetener (texture may vary).
- 1 pinch Sea Salt
- 1.5 cup Unsweetened Vanilla Almond Milk Plain works too, or other unsweetened non-dairy or dairy milk.
- 1 cup Heavy Cream
- 0.25 cup Dutch Processed Cocoa Powder Or natural cocoa powder (flavor may vary).
- 0.25 cup Collagen Protein Powder Or any unsweetened protein powder (whey, casein, pea, etc.; texture may vary).
Instructions
- Grab a medium saucepan and a whisk. We're going to make our custard base.
- In a separate medium bowl, whisk together your egg yolks, Besti powdered sweetener, and sea salt until the mixture is light yellow and well combined.
- Pour the almond milk and heavy cream into your saucepan. Heat this mixture over medium heat, stirring occasionally, just until it's warm and steamy, but not boiling. You should see little bubbles starting to form around the edges.
- Time to temper those yolks! While whisking the egg yolk mixture constantly, slowly drizzle about half a cup of the warm cream mixture into the bowl. Keep whisking! Once combined, pour the entire egg yolk mixture back into the saucepan with the rest of the warm cream.
- Return the saucepan to medium heat. Stir CONSTANTLY with a whisk or a wooden spoon. Gently cook the custard until it's thick enough to coat the back of a spoon (meaning if you run your finger across the spoon, the line stays). This usually takes about 5-8 minutes. Be patient and keep stirring to prevent scorching.
- Once thickened, remove the saucepan from the heat. Now, whisk in the Dutch processed cocoa powder and the collagen (or other protein powder) until everything is completely smooth and there are no lumps. This might take a minute or two of vigorous whisking.
- Pour the mixture through a fine-mesh sieve into a clean bowl. This catches any potential tiny bits of cooked egg or unmixed powder, ensuring a super smooth texture.
- Cool the base completely before churning. Place the bowl in an ice bath for about 15-20 minutes, stirring occasionally, then cover it and refrigerate for at least 4 hours, but ideally overnight. A really cold base churns better and gives you a creamier result.
- Once your base is thoroughly chilled, it's time to churn! Pour the cold mixture into your ice cream maker and churn according to the manufacturer's instructions. This usually takes about 20-30 minutes, depending on your machine. The ice cream will be soft-serve consistency at this stage.
- Transfer the churned ice cream to a freezer-safe container. Press a piece of parchment paper or plastic wrap directly onto the surface of the ice cream to prevent ice crystals from forming. Cover the container tightly and freeze for another 4-6 hours, or until firm enough to scoop.
- Scoop, serve, and enjoy your delicious, guilt-free protein treat!
Notes
Storing in a tightly sealed, airtight container with wrap pressed onto the surface helps prevent freezer burn and maintain texture for up to 2-3 weeks.
A properly chilled base is crucial for creamy ice cream. Cook the custard gently and stir constantly to prevent scrambling. Make sure your ice cream maker bowl is frozen solid.