
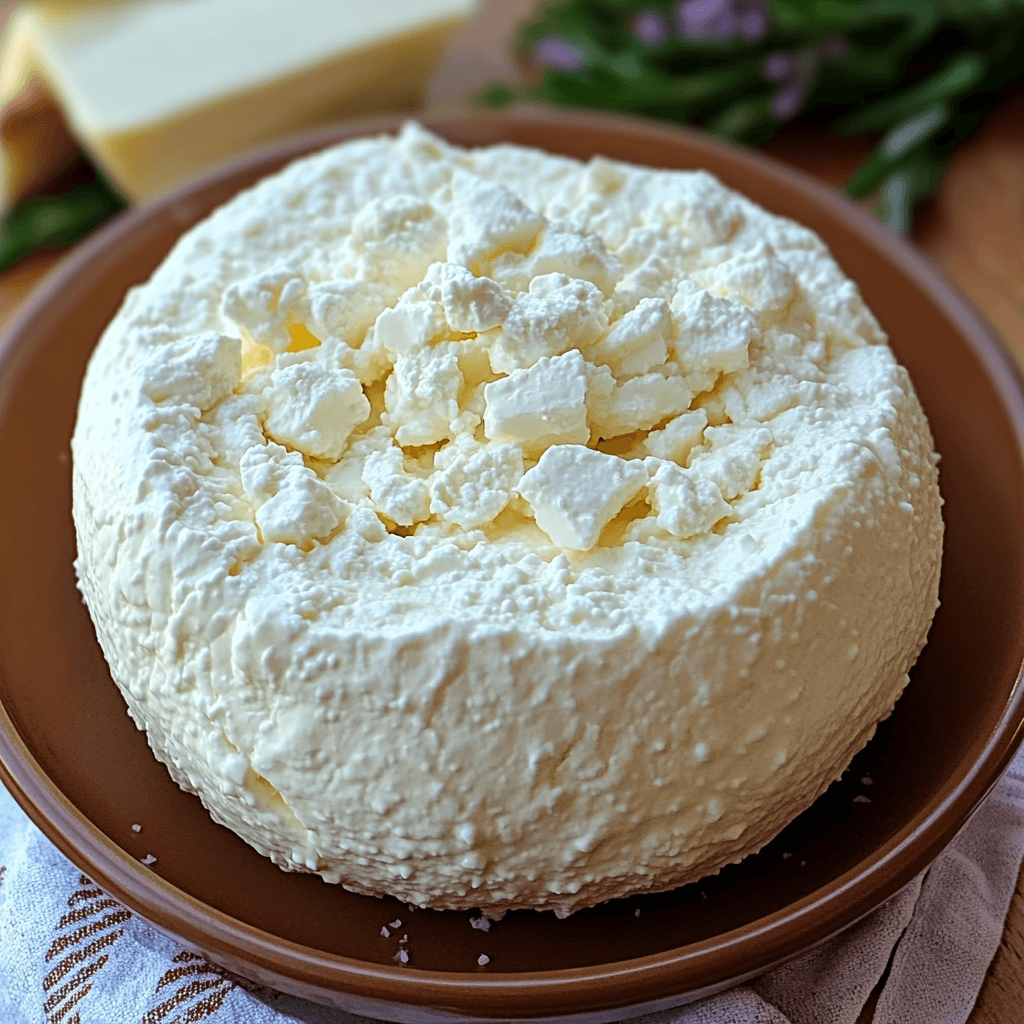
Hey there, cheese lovers! Are you ready to embark on a culinary adventure that’s both surprisingly simple and incredibly rewarding? Let me introduce you to the joy of making your own queso fresco – a fresh, creamy Mexican cheese that’s bursting with flavor. Forget those bland, store-bought versions; this recipe will show you how to create a truly exceptional queso fresco right in your own kitchen. You’ll be amazed at how easy it is!
What makes this recipe so special? It’s the delightful combination of creamy texture and tangy, slightly salty taste. The process is remarkably quick, requiring minimal equipment and fuss. You’ll be enjoying your homemade queso fresco in less time than it takes to order takeout! Imagine the satisfying crunch as you bite into a piece, the way it melts beautifully in your mouth, and the sheer versatility it brings to your culinary creations. It’s the perfect addition to tacos, enchiladas, salads, or simply enjoyed on its own with some crusty bread and a glass of wine. The comforting aroma during the making will fill your kitchen with a welcoming warmth, transporting you to a sun-drenched Mexican kitchen. It’s a recipe that’s perfect for beginners and seasoned cooks alike, and the final product is a real showstopper.

This recipe is more than just a cheese-making process; it’s an experience. It’s about creating something delicious and wholesome from scratch, savoring the process, and sharing the joy with loved ones. Trust me, your taste buds (and your friends!) will thank you!
What You’ll Need
This recipe requires just a few simple ingredients, most of which you likely already have in your pantry. Let’s dive into the ingredient list:
- 1 gallon whole milk: The star of the show! Whole milk provides the richness and creaminess that makes queso fresco so delightful. Don’t skimp on the fat content for the best results.
- 1/3 cup Greek yogurt (optional): This is a secret ingredient for extra creaminess and a slightly tangier flavor. Feel free to omit it if you prefer a more traditional taste.
- 2/3 cup white vinegar: The acid in the vinegar is crucial for curdling the milk, forming the cheese curds. Make sure it’s white vinegar, as other types might affect the flavor.
- Salt, to taste: Use your own judgment to season the cheese to your liking. Remember, you can always add more salt, but you can’t take it away!
- Cheesecloth or fine-mesh sieve: Essential for draining the whey from the curds.
Step-by-Step Instructions
Making queso fresco at home is simpler than you might think. Follow these steps for perfectly creamy, delicious cheese.
- Heat the milk: In a large, heavy-bottomed pot (at least 6 quarts), gently heat the whole milk over medium heat. Stir occasionally to prevent scorching. The ideal temperature is around 190-200°F (88-93°C). Use a candy thermometer for accuracy. Don’t let it boil!
- Add the yogurt (optional): If using, stir in the Greek yogurt until it’s fully incorporated into the warm milk.
- Introduce the acid: Remove the pot from the heat and slowly pour in the white vinegar, whisking gently but constantly. You’ll immediately see the milk begin to curdle – it’s quite magical!
- Let it rest: Cover the pot and let the mixture rest undisturbed for at least 10 minutes. This allows the curds to fully separate from the whey (the liquid).
- Drain the whey: Line a colander with cheesecloth or use a fine-mesh sieve. Gently pour the curds and whey into the lined colander. Let it drain for at least 30 minutes, or until most of the whey has been released. You can also gently press on the curds to encourage further draining.
- Salt and shape: Once sufficiently drained, add salt to the curds and mix gently. The amount of salt depends on your preference. You can press the curds into a mold (a small bowl works well) to achieve a more uniform shape, or leave them loose.
- Chill and enjoy: Refrigerate the cheese for at least 4-6 hours, or preferably overnight, to allow it to firm up. Once firm, your homemade queso fresco is ready to enjoy!
Tip: For a firmer queso fresco, you can increase the draining time or use a cheese press.
Tips for Success
Here are a few tips to help you achieve perfect queso fresco every time:
Use a thermometer: Accurate temperature control is crucial for successful curdling. Don’t rely solely on visual cues; a thermometer ensures the milk reaches the right temperature without boiling.
Gentle stirring: Avoid vigorous stirring, especially when adding the vinegar, as it can result in smaller, less desirable curds.
Proper draining: Ensure thorough draining to prevent a watery or overly soft cheese. Consider weighing down the curds for a firmer texture.
Don’t rush the process: Patience is key! Allow sufficient time for curdling, draining, and chilling to develop the best texture and flavor.
Taste as you go: Adjust the salt level to your liking before chilling. You can always add more later, but it’s harder to remove excess salt.
Variations to Try
Feel free to experiment with different flavors and additions to customize your queso fresco:
Herbs and spices: Incorporate finely chopped herbs like cilantro, chives, or oregano into the curds before draining for an extra layer of flavor.
Chili powder: Add a pinch of chili powder for a touch of heat. Adjust the amount to your spice preference.
Different milks: While whole milk is recommended, you can experiment with other types, but keep in mind that the final product’s texture might differ.
Goat milk: Use goat milk instead of cow’s milk for a tangier, unique flavor profile.
Storing and Reheating
Proper storage is essential to maintain the quality and freshness of your homemade queso fresco. Store it in an airtight container in the refrigerator for up to 7 days. For longer storage, you can freeze it, but the texture might slightly change. Wrap it tightly in plastic wrap and then aluminum foil before freezing. To reheat, simply let it sit at room temperature for a bit, or gently warm it in the microwave for a few seconds.
Frequently Asked Questions
Q: Can I substitute apple cider vinegar for white vinegar?
A: While it’s possible, apple cider vinegar might impart a slightly different flavor to your queso fresco. Stick to white vinegar for the most traditional taste.
Q: How long does homemade queso fresco last?
A: Properly stored in the refrigerator, your homemade queso fresco should last for about 5-7 days. After that, it may start to lose its quality.
Q: What can I do if my queso fresco is too soft?
A: If your queso fresco is too soft, you likely didn’t drain it sufficiently. You can try wrapping it in cheesecloth and letting it drain further, or you can press it under a weight for a few hours.
Q: Can I make a smaller batch of queso fresco?
A: Absolutely! You can easily scale down this recipe to make a smaller quantity. Just remember to adjust the proportions of all ingredients accordingly.
Q: What are some creative ways to use homemade queso fresco?
A: The possibilities are endless! Use it in tacos, salads, enchiladas, quesadillas, or simply crumble it over your favorite dishes for a burst of fresh, salty flavor. It’s incredibly versatile!
The Final Word
Making your own queso fresco is a rewarding experience that yields a delicious, creamy cheese that surpasses store-bought versions in both taste and quality. This simple recipe requires minimal ingredients and effort, yet the result is a culinary masterpiece. The fresh, slightly tangy flavor, combined with its delightful creamy texture, will elevate your dishes to a whole new level. So, what are you waiting for? Grab your ingredients and give this recipe a try! Don’t forget to leave a comment below and share your experience. We’d love to hear how your homemade queso fresco turned out! And if you enjoyed this recipe, please give it a rating – your feedback helps others discover this amazing cheese-making adventure!

Queso Fresco
Equipment
- Large pot For heating the milk
- Thermometer To monitor milk temperature
- Cheesecloth or fine-mesh strainer For draining the curds
Ingredients
Dairy
- 1 gallon Whole milk
- 0.33 cup Greek yogurt Optional, for extra creaminess
Acid & Seasoning
- 0.67 cup White vinegar
- 1 teaspoon Salt To taste
Instructions
- Heat the milk in a large pot over medium heat to 190-200°F (88-93°C), stirring occasionally.
- Remove from heat and stir in the Greek yogurt (if using).
- Slowly pour in the white vinegar while stirring gently.
- Let the mixture sit undisturbed for 5-10 minutes until curds form.
- Line a colander with cheesecloth or a fine-mesh strainer and place it over a large bowl.
- Pour the curds and whey into the lined colander and let it drain for at least 30 minutes, or until most of the whey has drained.
- Gently gather the cheesecloth or strainer and squeeze out any remaining whey.
- Season with salt to taste. Your Queso Fresco is ready!