
Introduction
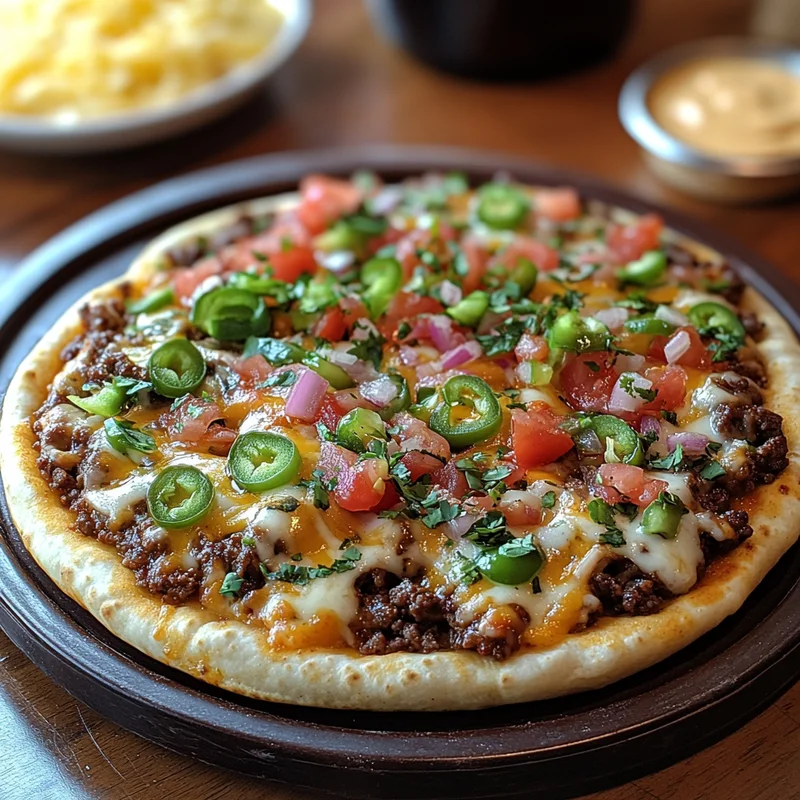
Oh, friend, let’s talk about the good ol’ days. Remember the pure joy of biting into that crispy, cheesy, saucy, layered masterpiece from Taco Bell? For many of us, the Mexican Pizza was more than just a menu item; it was a nostalgic comfort food, a little moment of fast-food bliss. When they took it away (and then brought it back, phew!), I knew I needed a reliable way to get my fix anytime, right in my own kitchen. And guess what? This homemade version is not only easy and quick, but dare I say… even better? It brings back all those cherished memories and makes new ones around your own table.
Making this at home means you can customize it just the way you like, load up on your favorite toppings, and achieve that perfect level of crispness without even leaving your house. Trust me, once you try this, you’ll wonder why you didn’t make it sooner!
Why You’ll Love This Recipe
- Fast: Comes together quicker than a drive-thru run (okay, almost!).
- Easy: Simple steps, straightforward ingredients. Perfect for a weeknight.
- Giftable: Okay, maybe not giftable, but definitely shareable!
- Crowd-pleasing: Who doesn’t love a crispy, cheesy, taco-meets-pizza situation?
Ingredients
Here’s what you’ll need to gather from your pantry and fridge to whip up these beauties:
- 1 lb Ground beef: Your classic base for that savory meat layer. I like to use a lean blend.
- 1 bunch Fresh cilantro: For garnish and a burst of freshness at the end.
- 2 Garlic cloves: Minced up to add that essential aromatic punch to the meat.
- 1/2 tsp Garlic powder: Layers in more garlic flavor with the fresh stuff.
- 1/4 cup Green onions: Sliced for topping – adds a mild oniony bite.
- 1/2 cup Onion: Chopped, to sauté with the ground beef and build flavor.
- 1 small jar Pickled jalapenos: Sliced or chopped, for those who crave a little heat on top!
- 1/2 cup Tomatoes: Diced, for a juicy, fresh topping.
- 1 (15 oz) can Refried beans: The essential creamy layer between the tortillas. I usually grab traditional style.
- 1/4 cup Black olives: Sliced, a classic Mexican pizza topping that adds a salty counterpoint.
- 2 tbsp Taco sauce or salsa: Use your favorite! This goes on top of the meat layer.
- 1/2 cup Tomato sauce: Forms the base of the iconic reddish sauce on top.
- 1/4 tsp Chili powder: Adds depth and a hint of warmth to the meat seasoning.
- Salt and pepper: To taste, for seasoning the meat.
- 2 tbsp Taco seasoning: A store-bought packet works great here for ease and classic flavor.
- 1 tbsp Olive oil: For browning the ground beef and sautéing the onion.
- 1/2 tsp Cumin: Earthy warmth that complements the taco seasoning perfectly.
- 8 Small flour tortillas or tostada shells: You need two per pizza. You can fry or bake the tortillas yourself, or cheat a little and buy pre-made tostada shells!
- 1 cup Cheddar cheese: Shredded, for that classic cheesy pull.
- 1 cup Monterey jack cheese: Shredded, melts beautifully and adds creaminess. A mix is key!
- Sour cream: For a cool, creamy dollop on top – essential in my book!
- 1/4 cup Water: To help the taco seasoning meld with the meat.
How to Make It
Alright, let’s get cooking! This is where the magic happens. Follow these steps, and you’ll be sinking your teeth into your homemade Mexican Pizza in no time.
1. Get that Meat Ready: Heat the olive oil in a large skillet over medium heat. Add the chopped onion and cook until softened, about 3-5 minutes. Toss in the minced garlic and cook for another minute until fragrant. Add the ground beef and brown, breaking it up with a spoon. Once fully browned, drain off any excess grease. Stir in the taco seasoning, chili powder, cumin, salt, pepper, and water. Let it simmer for 5-7 minutes, or until most of the liquid has evaporated and the meat is nicely seasoned. Set aside.
2. Heat the Beans: While the meat simmers, warm the refried beans in a small pot or microwave-safe bowl. You want them spreadable.
3. Prepare the Shells: This is crucial for the crunch! If using small flour tortillas, you’ll need to crisp them up. You can pan-fry them in a little oil until golden and crispy, bake them on a baking sheet until firm, or even use an air fryer. If using pre-made tostada shells, you can skip this step or just warm them slightly if you like. You need two crispy shells per pizza.
4. Build Your Pizza: Place one crispy tortilla/shell on a baking sheet (you might need two sheets depending on how many you make). Spread a layer of warm refried beans over the shell, going almost to the edge. Spoon some of the seasoned ground beef over the beans.
5. Add the Top Shell & Sauce: Carefully place a second crispy tortilla/shell directly on top of the beef layer. In a small bowl, stir together the tomato sauce and taco sauce/salsa. Spoon and spread this mixture over the top shell.
6. Cheese Please! Sprinkle the shredded cheddar and Monterey Jack cheeses generously over the sauce-covered top shell. Now is the time to be cheesy!
7. Bake Until Melty: Pop the baking sheet(s) into a preheated oven at 375°F (190°C) or under the broiler for a few minutes, just until the cheese is completely melted and bubbly. Keep a close eye on it, especially under the broiler, as it can brown quickly!
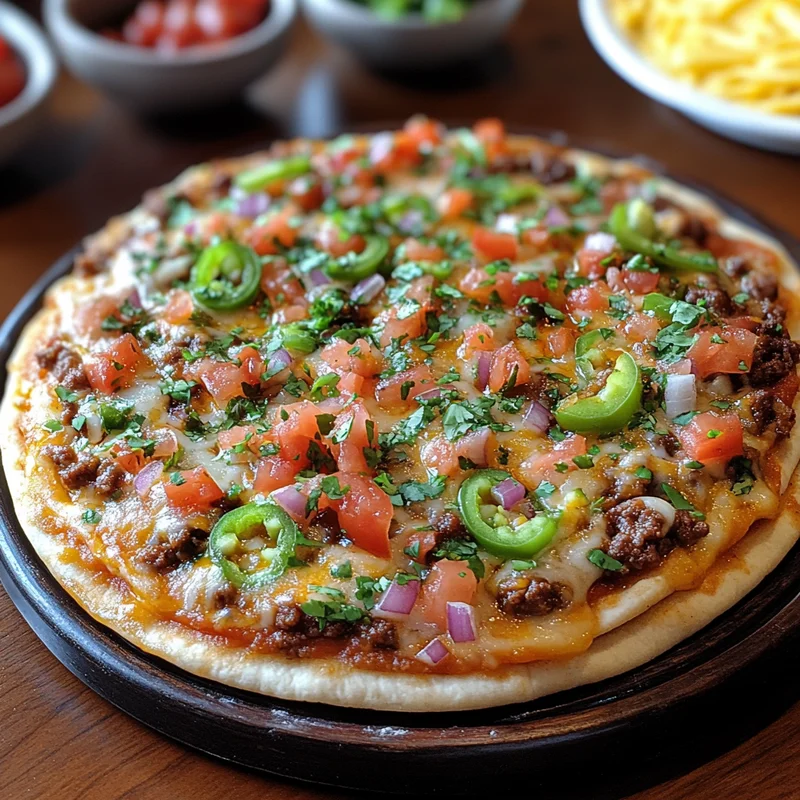
8. Top It Off: Once the cheese is melted, carefully slide the pizzas onto plates. Add your desired toppings: diced tomatoes, sliced black olives, sliced green onions, pickled jalapeños, a dollop of sour cream, and a sprinkle of fresh cilantro. Pile ’em on!
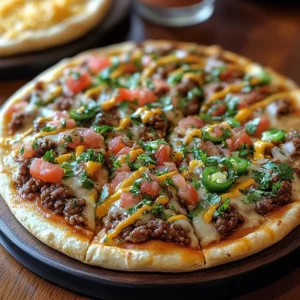
9. Serve & Enjoy: Cut into squares (the classic way!) or just dive right in! Be careful, they’re hot and gloriously messy.
Substitutions & Additions
This recipe is super flexible! Feel free to play around and make it your own.
- Meat Alternatives: Not a beef person? Use ground turkey, chicken, or even a plant-based meat substitute. For a vegetarian version, load up on the beans and maybe add some seasoned roasted veggies like peppers and onions.
- Beans: While refried beans are classic, you could try a layer of seasoned black beans instead for a different texture.
- Spice Level: Want more heat? Add a pinch of cayenne pepper to the meat, use a spicier taco seasoning, or pile on extra jalapeños (fresh or pickled!).
- Cheese: Use a Mexican blend cheese, Pepper Jack for a kick, or just straight-up cheddar.
- Extra Toppings: Consider adding diced onions (raw or sautéed), guacamole, hot sauce, or even some pickled red onions.
- Shells: If you can’t find small flour tortillas, larger ones work too, you’ll just have bigger pizzas! Or stick to the pre-made tostadas for ultimate ease.
Tips for Success
A few little pointers to help you nail this Mexican Pizza every time:
- Drain the Beef: Make sure you drain off any excess grease from the ground beef after browning. You don’t want your pizza to be greasy.
- Crisp the Tortillas Well: This is key for that authentic Mexican Pizza experience. If they aren’t crispy enough, the whole thing can get soggy. Bake them until they feel firm and slightly golden. If frying, drain them well on paper towels.
- Don’t Over-Sauce: Use just enough of the tomato/taco sauce mixture on the top shell. Too much can make the shell soggy.
- Shred Your Own Cheese: Pre-shredded cheese has anti-caking agents that can make it not melt as smoothly. Shredding block cheese yourself is always my preference for the best melt!
- Prep Ahead: You can cook the seasoned ground beef ahead of time and store it in the fridge for a few days. Then, just reheat it when you’re ready to assemble and bake. The beans can also be heated just before assembling.
How to Store It
Homemade Mexican Pizzas are definitely best enjoyed fresh and hot right after assembly and melting the cheese. The crispy shells can soften over time once assembled.
If you do have leftovers, you can store individual pizzas in an airtight container in the refrigerator for 1-2 days. The shells will lose their crispness.
To reheat, your best bet is often a toaster oven or air fryer at a medium heat (around 300-350°F or 150-175°C) for several minutes until heated through and the cheese is bubbly again. The microwave will heat it, but the shell will be soft.
FAQs
Got questions? I’ve got some answers!
- Can I use corn tortillas? You can, but the texture will be different. Corn tortillas crisp up nicely, but they are smaller and can be a bit more brittle. Small flour tortillas are what give it that classic floppy-yet-crispy feel.
- Can I make a big batch for a party? Absolutely! Prep the meat and beans ahead. You can crisp the shells just before assembly. Set up a topping bar and let everyone build their own before you pop them in the oven to melt the cheese.
- How do I make the shells crispy without frying? Baking is a great option! Lightly brush or spray both sides of the small flour tortillas with oil, place them on a baking sheet, and bake at 400°F (200°C) for about 8-10 minutes, flipping halfway, until they are golden and firm. Air frying also works wonders!
So there you have it, your ticket to Taco Bell Mexican Pizza heaven, right in your own kitchen. Get ready for that satisfying crunch, that savory meat, those creamy beans, and all that gooey cheese. Happy cooking, friend!
Homemade Taco Bell Mexican Pizza Copycat
Equipment
- Large skillet
- Small pot or microwave-safe bowl For heating beans
- Baking Sheet
- Small bowl For sauce
Ingredients
Hauptzutaten
- 1 lb Ground beef lean blend recommended
- 1 bunch Fresh cilantro for garnish
- 2 Garlic cloves minced
- 0.5 tsp Garlic powder
- 0.25 cup Green onions sliced, for topping
- 0.5 cup Onion chopped
- 1 small jar Pickled jalapenos sliced or chopped, for topping
- 0.5 cup Tomatoes diced, for topping
- 1 can Refried beans 15 oz
- 0.25 cup Black olives sliced, for topping
- 2 tbsp Taco sauce or salsa
- 0.5 cup Tomato sauce
- 0.25 tsp Chili powder
- Salt to taste
- Pepper to taste
- 2 tbsp Taco seasoning
- 1 tbsp Olive oil
- 0.5 tsp Cumin
- 8 Small flour tortillas or tostada shells Need two per pizza
- 1 cup Cheddar cheese shredded
- 1 cup Monterey jack cheese shredded
- Sour cream for topping
- 0.25 cup Water
Instructions
- Get that Meat Ready: Heat the olive oil in a large skillet over medium heat. Add the chopped onion and cook until softened, about 3-5 minutes. Toss in the minced garlic and cook for another minute until fragrant. Add the ground beef and brown, breaking it up with a spoon. Once fully browned, drain off any excess grease. Stir in the taco seasoning, chili powder, cumin, salt, pepper, and water. Let it simmer for 5-7 minutes, or until most of the liquid has evaporated and the meat is nicely seasoned. Set aside.
- Heat the Beans: While the meat simmers, warm the refried beans in a small pot or microwave-safe bowl. You want them spreadable.
- Prepare the Shells: This is crucial for the crunch! If using small flour tortillas, you'll need to crisp them up. You can pan-fry them in a little oil until golden and crispy, bake them on a baking sheet until firm, or even use an air fryer. If using pre-made tostada shells, you can skip this step or just warm them slightly if you like. You need two crispy shells per pizza.
- Build Your Pizza: Place one crispy tortilla/shell on a baking sheet (you might need two sheets depending on how many you make). Spread a layer of warm refried beans over the shell, going almost to the edge. Spoon some of the seasoned ground beef over the beans.
- Add the Top Shell & Sauce: Carefully place a second crispy tortilla/shell directly on top of the beef layer. In a small bowl, stir together the tomato sauce and taco sauce/salsa. Spoon and spread this mixture over the top shell.
- Cheese Please! Sprinkle the shredded cheddar and Monterey Jack cheeses generously over the sauce-covered top shell. Now is the time to be cheesy!
- Bake Until Melty: Pop the baking sheet(s) into a preheated oven at 375°F (190°C) or under the broiler for a few minutes, just until the cheese is completely melted and bubbly. Keep a close eye on it, especially under the broiler, as it can brown quickly!
- Top It Off: Once the cheese is melted, carefully slide the pizzas onto plates. Add your desired toppings: diced tomatoes, sliced black olives, sliced green onions, pickled jalapeños, a dollop of sour cream, and a sprinkle of fresh cilantro. Pile 'em on!
- Serve & Enjoy: Cut into squares (the classic way!) or just dive right in! Be careful, they're hot and gloriously messy.