Introduction
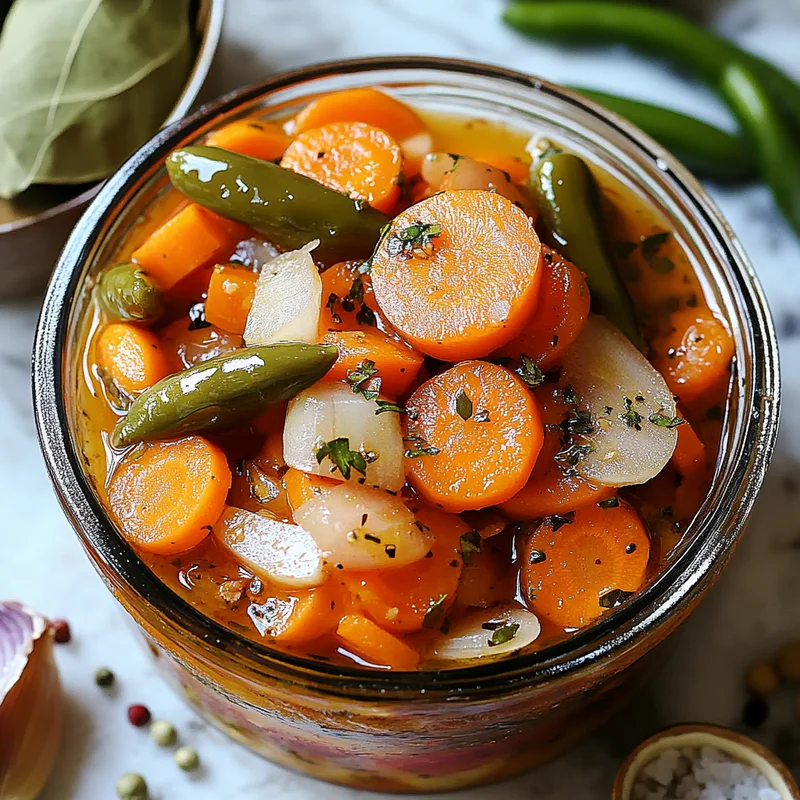
Hey friend! Let’s talk about those little jars of magic you find at your favorite taqueria. You know the ones – those bright, tangy, slightly spicy pickled carrots and onions that make everything taste better? Yep, those. For the longest time, I thought they were some kind of secret restaurant-only creation. But guess what? Making them at home is SO incredibly easy, and honestly, even better because you can make a big batch! This recipe brings that authentic flavor right into your kitchen with minimal effort. They’re crunchy, zesty, and add the perfect pop to tacos, salads, or just straight out of the jar!
Whether you’re planning a big taco night, prepping for a BBQ, or just looking for a simple way to elevate your everyday snacks, these Mexican pickled carrots are about to become your new best friend. Seriously, they take hardly any time to put together, and the payoff in flavor is huge. Let’s get pickling!
Why You’ll Love This Recipe
- Fast: Minimal prep and cook time – you can whip up a batch in under 30 minutes.
- Easy: No fancy equipment or complicated steps required. Perfect for beginners!
- Giftable: Pack them in a cute jar and you’ve got a thoughtful, tasty gift for fellow food lovers.
- Crowd-Pleasing: Everyone who tries these falls in love with their tangy, spicy crunch.
- Versatile: Amazing on tacos, tortas, salads, grain bowls, or alongside grilled meats.

Ingredients
- 1 ½ pounds carrots: Look for nice, firm carrots. Peel ’em up!
- 1 small onion, sliced: White or yellow onion works perfectly here. Just thin slices.
- 3-4 serrano or jalapeño chilies, whole or sliced: Your spice level, your choice! Keep them whole for less heat, slice them for more kick.
- 1 ¼ cups white or apple cider vinegar: White vinegar is classic, but apple cider adds a lovely tang. Use what you have!
- 1 ¼ cups water: Balances out the vinegar for the perfect brine.
- 1 Tablespoon Mexican oregano: Key for that authentic flavor! It’s different from Mediterranean oregano, so try to find the Mexican variety if you can.
- 3 bay leaves: Adds a subtle, aromatic depth to the brine.
- ½ teaspoon black peppercorns, lightly crushed: Gives a little peppery punch. A quick mash with the back of a spoon is all you need.
- 3 cloves garlic, peeled: Adds wonderful garlicky notes to the pickle.
- 3 Tablespoons olive oil: This might seem unusual for pickles, but it’s traditional in many Mexican escabeche recipes and adds a silky richness to the brine. Trust me on this one!
- 1 teaspoon table salt, or more to taste: Salt is crucial for flavor and helping the pickling process.
How to Make It
Alright, let’s turn these simple ingredients into tangy, spicy perfection! Here’s how you do it:
Step 1: Prep Your Veggies. Start by peeling the carrots. You can slice them into rounds about ¼-inch thick, or cut them into sticks (like thick matchsticks). Slice your small onion thinly. If you’re feeling brave and want more heat, slice your serrano or jalapeño chilies; otherwise, leave them whole. Peel your garlic cloves – you can leave them whole too.
Step 2: Get the Brine Ready. In a medium saucepan, combine the white or apple cider vinegar, water, salt, Mexican oregano, bay leaves, lightly crushed black peppercorns, garlic cloves, and the olive oil. Yes, the olive oil goes in the brine! It might look a little cloudy at first, that’s totally fine.
Step 3: Simmer the Brine & Add Veggies. Bring the brine mixture to a boil over medium-high heat. Once it’s boiling, add your prepared carrots and onion slices. If you sliced your chilies, add them now too. If you left them whole, you can add them here or directly to the jar later.
Step 4: Cook Briefly. Let the mixture simmer gently for just about 5-7 minutes. You want the carrots to soften ever so slightly, but still have a good crunch to them. Don’t overcook them into mush!
Step 5: Cool Down. Carefully remove the saucepan from the heat. Let the carrots and brine cool in the pan for about 15-20 minutes before transferring to your storage container. This helps the flavors meld a bit as it cools.
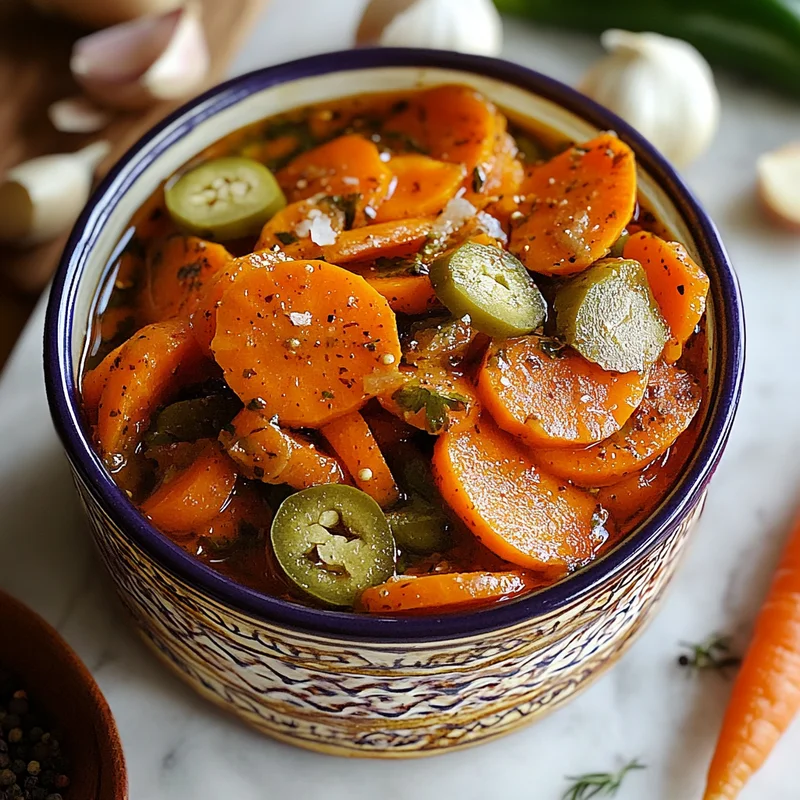
Step 6: Jar It Up! Using a slotted spoon, transfer the carrots, onions, chilies, garlic, bay leaves, and peppercorns into a clean glass jar or airtight container. Pour the warm brine over the top, making sure all the veggies are submerged. You might need to gently press them down.
Step 7: Chill & Pickle. Let the jar cool completely to room temperature uncovered, or with the lid slightly ajar. Once cool, seal the jar tightly and pop it in the refrigerator. They are technically ready to eat after a few hours, but they are MUCH better if you can wait at least 24 hours for the flavors to really develop. The longer they sit, the more pickled and flavorful they become!
Substitutions & Additions
Feeling creative? Here are some ways to tweak this recipe:
- Other Veggies: Add cauliflower florets, sliced radishes, or even small pearl onions to the mix! Just make sure they are cut into similar sizes so they pickle evenly.
- Vinegar Swap: While white or apple cider vinegar are standard, you could experiment with distilled white vinegar for a super clean flavor, or even a mix.
- Spice Level: Use fewer chilies, remove the seeds for less heat, or add more (like habaneros!) if you’re a heat seeker. You can also add a pinch of red pepper flakes to the brine.
- Spices: Feel free to add a pinch of cumin seeds or a little pinch of marjoram alongside the oregano for a different flavor profile.
Tips for Success
- Don’t Overcook the Carrots: The goal is tender-crisp, not soft. Keep an eye on them during the simmering step.
- Use Clean Jars: While this isn’t a canning recipe meant for shelf-stable storage, using clean jars is always a good idea for food safety.
- Wait for Flavor: Patience is key! They taste good right away, but wait 24-48 hours for the best flavor payoff.
- Submerge Veggies: Make sure all the solid ingredients are under the brine line in the jar for even pickling.
How to Store It
These pickled carrots need to be stored in an airtight container in the refrigerator. They will last for at least 2-3 weeks, often longer, as long as they are kept submerged in the brine. The flavor will continue to develop over time!
FAQs
Q: Are these very spicy?
A: You control the spice! Keeping the serrano or jalapeño chilies whole adds flavor with less heat. Slicing them (especially leaving the seeds in) increases the spiciness significantly. Start with whole chilies if you’re sensitive to heat.
Q: Can I use baby carrots?
A: Yes, you can! You might not need to peel them, but definitely wash them well. If they are very thin, reduce the simmering time slightly so they don’t get too soft.
Q: What is Mexican oregano and can I substitute it?
A: Mexican oregano has citrusy, earthy notes compared to the more floral, minty Mediterranean oregano. While you can use Mediterranean oregano in a pinch, the flavor won’t be quite the same authentic Mexican taste. Look for Mexican oregano in the spice aisle of larger supermarkets or Latin grocery stores.

Easy & Addictive Mexican Pickled Carrots (Zanahorias en Escabeche!)
Equipment
- Medium saucepan
- Slotted spoon
- Glass jar or airtight container
Ingredients
Main Ingredients
- 1.5 pounds carrots peeled
- 1 small onion sliced
- 3 serrano or jalapeño chilies 3 to 4, whole or sliced
- 1.25 cups white or apple cider vinegar
- 1.25 cups water
- 1 Tablespoon Mexican oregano
- 3 bay leaves
- 0.5 teaspoon black peppercorns lightly crushed
- 3 cloves garlic peeled
- 3 Tablespoons olive oil
- 1 teaspoon table salt or more to taste
Instructions
- Prep Your Veggies. Start by peeling the carrots. You can slice them into rounds about ¼-inch thick, or cut them into sticks (like thick matchsticks). Slice your small onion thinly. If you're feeling brave and want more heat, slice your serrano or jalapeño chilies; otherwise, leave them whole. Peel your garlic cloves – you can leave them whole too.
- Get the Brine Ready. In a medium saucepan, combine the white or apple cider vinegar, water, salt, Mexican oregano, bay leaves, lightly crushed black peppercorns, garlic cloves, and the olive oil. Yes, the olive oil goes in the brine! It might look a little cloudy at first, that's totally fine.
- Simmer the Brine & Add Veggies. Bring the brine mixture to a boil over medium-high heat. Once it's boiling, add your prepared carrots and onion slices. If you sliced your chilies, add them now too. If you left them whole, you can add them here or directly to the jar later.
- Cook Briefly. Let the mixture simmer gently for just about 5-7 minutes. You want the carrots to soften ever so slightly, but still have a good crunch to them. Don't overcook them into mush!
- Cool Down. Carefully remove the saucepan from the heat. Let the carrots and brine cool in the pan for about 15-20 minutes before transferring to your storage container. This helps the flavors meld a bit as it cools.
- Jar It Up! Using a slotted spoon, transfer the carrots, onions, chilies, garlic, bay leaves, and peppercorns into a clean glass jar or airtight container. Pour the warm brine over the top, making sure all the veggies are submerged. You might need to gently press them down.
- Chill & Pickle. Let the jar cool completely to room temperature uncovered, or with the lid slightly ajar. Once cool, seal the jar tightly and pop it in the refrigerator. They are technically ready to eat after a few hours, but they are MUCH better if you can wait at least 24 hours for the flavors to really develop. The longer they sit, the more pickled and flavorful they become!