When it comes to pies, there’s something universally delightful about a delicious, sweet, and tangy filling in a perfect crust. If you love the classic lemon pie but want to try something new, Mini Lime Impossible Pies offer a refreshing twist. These mini pies are the perfect balance of bright, tart lime and creamy sweetness, making them a fantastic dessert for any occasion. They’re easy to make and are sure to impress your guests with their vibrant flavor and unique texture.
In this article, we’ll explore why you’ll love Mini Lime Impossible Pies, provide you with everything you need to make them, guide you through step-by-step instructions, and offer tips, variations, and storage suggestions. Let’s dive into the world of these irresistible little pies.

Why You’ll Love These Mini Lime Impossible Pies
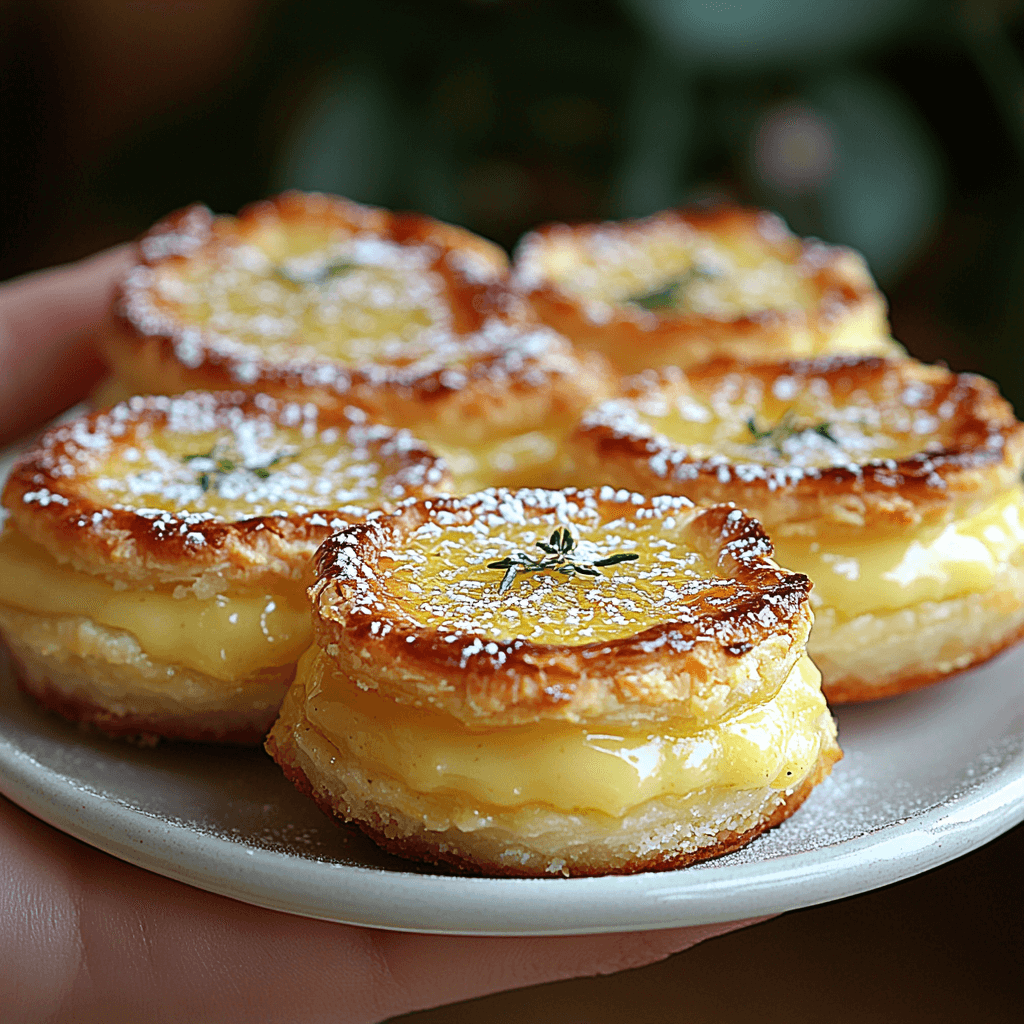
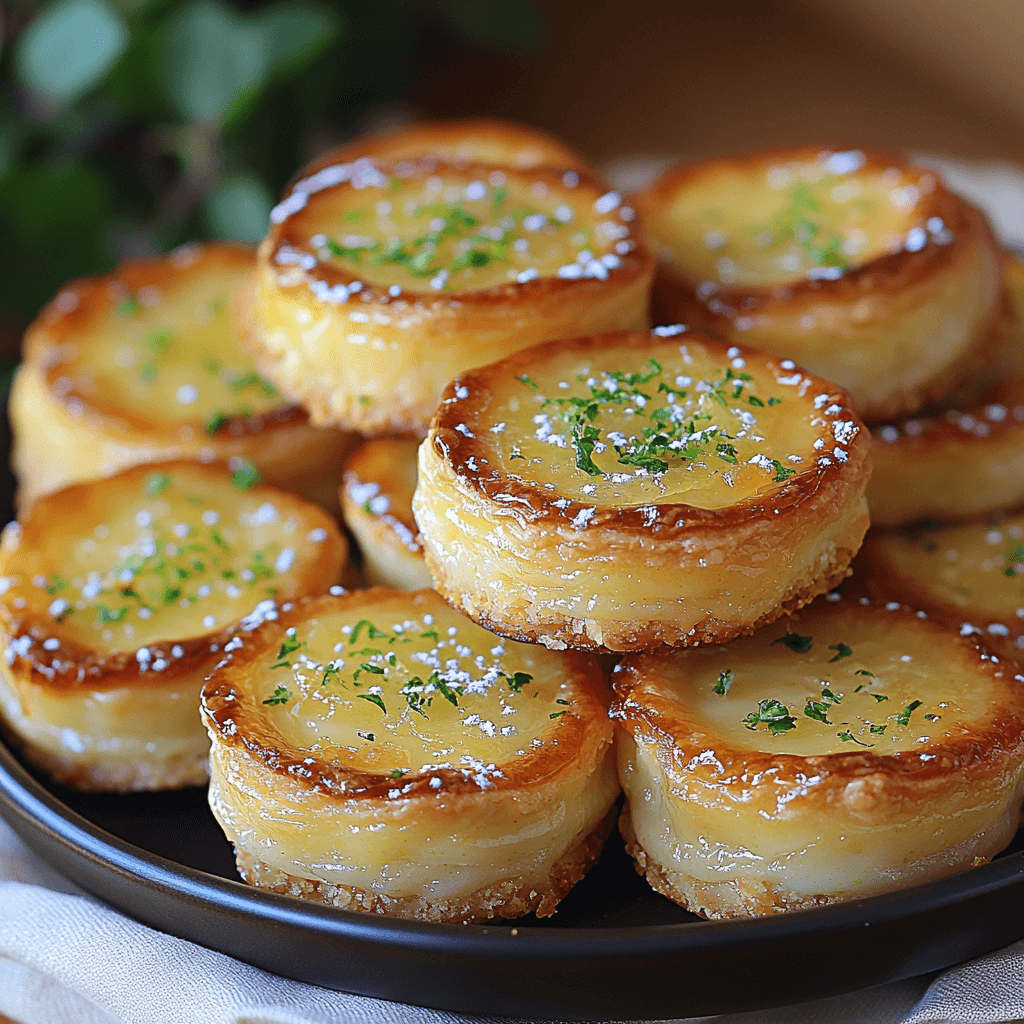
Mini Lime Impossible Pies are the perfect combination of tangy lime flavor and a rich, creamy filling that’s nestled in a soft, tender crust. They’re individual-sized, making them great for serving at parties or as a sweet treat for yourself without the need for slicing a full pie. These mini pies have an impossibly smooth texture, and thanks to the use of self-rising flour, the filling essentially “forms” its own crust as it bakes, hence the name “Impossible Pie.”
The bright lime flavor adds an extra level of zest compared to the more common lemon version. The tartness of the lime is perfectly balanced by the sweetness of the condensed milk, creating a flavor profile that’s both refreshing and indulgent. The best part? The entire recipe comes together easily in just a few steps, meaning you can have these mini pies ready to enjoy in no time.
Additionally, Mini Lime Impossible Pies are wonderfully versatile and can be served on many occasions. Whether it’s a summer barbecue, a holiday gathering, or a simple weekday treat, these little pies will shine.
What You’ll Need
To make these Mini Lime Impossible Pies, you won’t need many ingredients. Here’s everything you’ll need to make the perfect batch:
Ingredients:
- 1 can (14 oz) sweetened condensed milk – This is the base of the filling, giving it a creamy, sweet richness.
- ½ cup lime juice – Fresh lime juice is the key to achieving that refreshing, tangy flavor. It’s best to use freshly squeezed lime juice rather than bottled juice.
- 2 large eggs – Eggs are necessary to help bind the filling and give it structure.
- ¼ cup melted butter – The butter adds richness to the filling and helps the pie to set.
- ½ cup self-rising flour – This unique ingredient is what allows the filling to form its own crust while baking.
- 1 tsp vanilla extract – A small amount of vanilla enhances the flavor of the pie and adds a subtle sweetness.
- Zest of 1 lime – The zest provides an additional burst of lime flavor that complements the juice in the filling.
- Powdered sugar (for dusting) – A light dusting of powdered sugar on top adds a beautiful finishing touch and a bit of sweetness.
Equipment:
- Muffin tin or individual pie dishes (for mini pies)
- Mixing bowl
- Whisk or electric mixer
- Measuring cups and spoons
- Grater for zesting the lime
- Spoon or small sifter for dusting powdered sugar

Once you have your ingredients ready, you’ll be all set to make these delicious mini pies!
Step-by-Step Instructions
Making Mini Lime Impossible Pies is easy and quick. Follow these simple instructions, and you’ll have these zesty treats ready in no time.
Step 1: Preheat Your Oven
Preheat your oven to 350°F (175°C). Make sure your oven is properly heated before placing the pies inside to ensure they bake evenly.
Step 2: Prepare Your Muffin Tin or Pie Dishes
Grease your muffin tin or mini pie dishes with butter or non-stick spray to make it easier to remove the pies after baking. Alternatively, you can use cupcake liners, but greasing the tin is usually enough. If you’re using a muffin tin, it’s best to use the 12-cup standard size to create the perfect mini pies.
Step 3: Mix the Filling
In a medium-sized mixing bowl, whisk together the sweetened condensed milk, lime juice, eggs, and melted butter until well combined. The mixture should be smooth and slightly thick.
Step 4: Add the Dry Ingredients
Once the wet ingredients are thoroughly mixed, add the self-rising flour, vanilla extract, and lime zest. Stir until the ingredients are just combined. Be careful not to overmix the batter to avoid a dense texture. The batter will be a little thinner than a typical pie filling, but that’s normal – this is what helps it form its crust as it bakes.
Step 5: Pour the Batter Into the Muffin Tin
Spoon the batter evenly into the prepared muffin tin or mini pie dishes. Fill each cup almost to the top, leaving a small amount of space for the pies to rise slightly while baking.
Step 6: Bake the Pies
Place the muffin tin or pie dishes in the preheated oven and bake for 18-22 minutes. The pies are done when the tops are set and lightly golden. A toothpick inserted into the center should come out clean or with just a few moist crumbs.
Step 7: Cool and Dust with Powdered Sugar
Once baked, remove the mini pies from the oven and allow them to cool in the pan for about 5 minutes. Then, transfer them to a wire rack to cool completely. Once cooled, dust the tops with powdered sugar using a small sifter or spoon for a delicate finish.
Step 8: Serve and Enjoy!
Your Mini Lime Impossible Pies are ready to be served! They can be enjoyed as-is or garnished with a dollop of whipped cream or a slice of lime for extra flair. Serve these pies chilled or at room temperature—either way, they’re sure to be a hit.
Tips for Success
To ensure that your Mini Lime Impossible Pies turn out perfectly every time, here are some helpful tips:
- Use Fresh Lime Juice: Freshly squeezed lime juice will give you the brightest and most vibrant flavor. Bottled lime juice often lacks the fresh, tangy punch that fresh lime juice provides.
- Don’t Overmix the Batter: When adding the flour and zest, mix gently until just combined. Overmixing can lead to a dense pie with a less-than-ideal texture.
- Watch the Baking Time: Since ovens vary, keep an eye on your pies as they bake. Check them at the 18-minute mark, and make sure they are firm to the touch before removing them from the oven.
- Grease the Muffin Tin Well: Even if you’re using non-stick muffin tins, it’s always a good idea to grease them to ensure that the pies come out easily. You don’t want to lose any of that delicious pie filling!
- Chill Before Serving: While you can serve these mini pies immediately, they taste even better when allowed to chill for a bit. Let them rest in the fridge for at least an hour to allow the filling to set completely.
Variations to Try
While Mini Lime Impossible Pies are delightful on their own, there are a few variations you can try to personalize this recipe even more.
- Key Lime Flavor: For a more authentic key lime pie taste, you can substitute the regular lime juice with key lime juice. Key limes are smaller and more aromatic, giving your pies an extra punch of lime flavor.
- Graham Cracker Crust: Although these pies form their own crust, if you want to add a traditional crust, you can press a mixture of crushed graham crackers, sugar, and butter into the bottom of the muffin tin before adding the filling.
- Add Coconut: For a tropical twist, you can fold in some shredded coconut to the batter. The coconut will add a chewy texture and a sweet flavor that pairs wonderfully with the lime.
- Top with Whipped Cream: For an extra creamy finish, top your pies with a dollop of whipped cream or even a scoop of vanilla ice cream.
- Mini Lemon Impossible Pies: If lime isn’t your thing, simply swap the lime juice and zest for fresh lemon juice and zest for a citrusy alternative that’s just as refreshing.
Storing and Reheating
These Mini Lime Impossible Pies are best enjoyed within a few days of baking, but they store very well for longer enjoyment.
Storing:
- At Room Temperature: If you plan to eat the pies within 1-2 days, you can store them in an airtight container at room temperature.
- In the Refrigerator: For longer storage, place the pies in an airtight container and refrigerate them for up to 5 days.

Reheating:
To reheat, simply place the pies in the microwave for about 15-20 seconds or in a preheated 300°F (150°C) oven for about 5 minutes. However, these pies are equally delicious served cold, so reheating isn’t necessary if you prefer them chilled.
Frequently Asked Questions
1. Can I make Mini Lime Impossible Pies ahead of time?
Yes, these pies can be made in advance. They store well in the fridge for up to 5 days, making them an excellent make-ahead dessert for parties or gatherings.
2. Can I freeze Mini Lime Impossible Pies?
While the pies are best fresh, you can freeze them for up to 2-3 months. Wrap them tightly in plastic wrap and place them in an airtight container before freezing. Thaw in the fridge overnight before serving.
3. Can I use regular flour instead of self-rising flour?
Yes, you can use regular all-purpose flour, but you’ll need to add 1 ½ teaspoons of baking powder and a pinch of salt to the recipe to help the pies rise properly.
4. Can I use a larger pie dish instead of mini muffin tins?
Absolutely! You can use a standard pie dish, but the baking time will vary. Larger pies may take longer to bake, so check them with a toothpick and adjust accordingly.
The Final Word
Mini Lime Impossible Pies are a fantastic, refreshing dessert that adds a unique twist to the classic lemon pie. With a creamy lime filling and a self-forming crust, these mini pies are easy to make and perfect for any occasion. Whether you’re serving them at a summer gathering or as a weeknight treat, these zesty mini pies will undoubtedly impress your guests and become a new favorite.
So, grab your ingredients and get baking! These Mini Lime Impossible Pies are sure to brighten your day with their vibrant lime flavor and impossibly delicious texture.