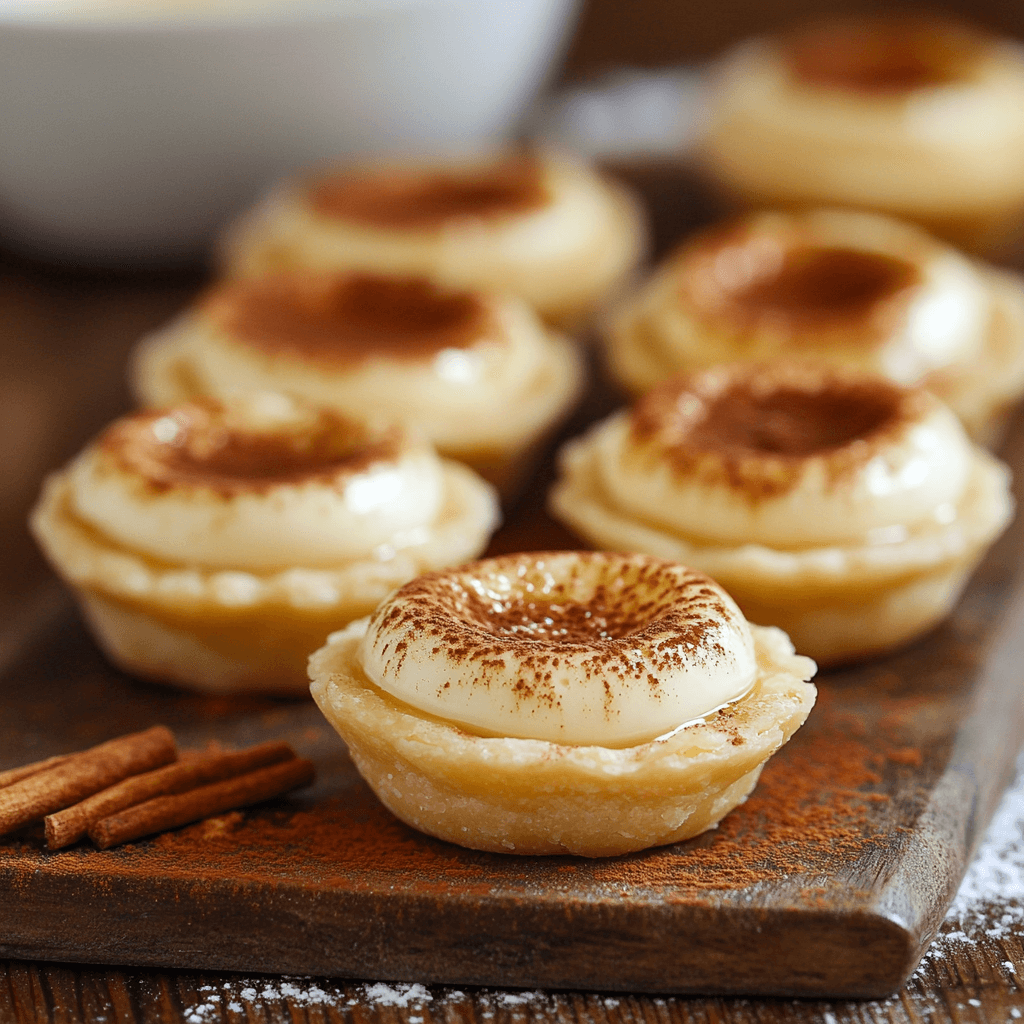
Why You’ll Love This Mini Milk Tart Bites
Mini Milk Tart Bites are the perfect treat for anyone who loves the classic South African dessert, Milk Tart (also known as Melktert). These bite-sized versions capture all the delicious flavors and creamy texture of the traditional Milk Tart, but in a more convenient and fun-to-eat format. Whether you’re hosting a party, having a family gathering, or simply indulging in a sweet craving, these mini tarts offer the ideal balance of rich, velvety custard and a light, flaky crust.
What makes this recipe so irresistible is its simplicity and versatility. It combines pantry staples—milk, sugar, egg, vanilla, and cinnamon—into a rich, smooth filling, while the mini tart shells create the perfect crispy base. The subtle sweetness of the custard and the warm dusting of cinnamon bring a comforting, nostalgic flavor that both adults and children will enjoy. Plus, these mini bites are easy to prepare, making them an excellent dessert choice for anyone, from beginner bakers to seasoned pros.

These tarts are not only delicious, but they’re also visually stunning, with their delicate golden crusts and the lightly browned dusting of cinnamon on top. They make for an impressive addition to any dessert table and are perfect for portion-controlled snacking—just the right amount of sweetness in every bite. Ready to elevate your dessert game? Let’s dive into how to make these Mini Milk Tart Bites.
What You’ll Need
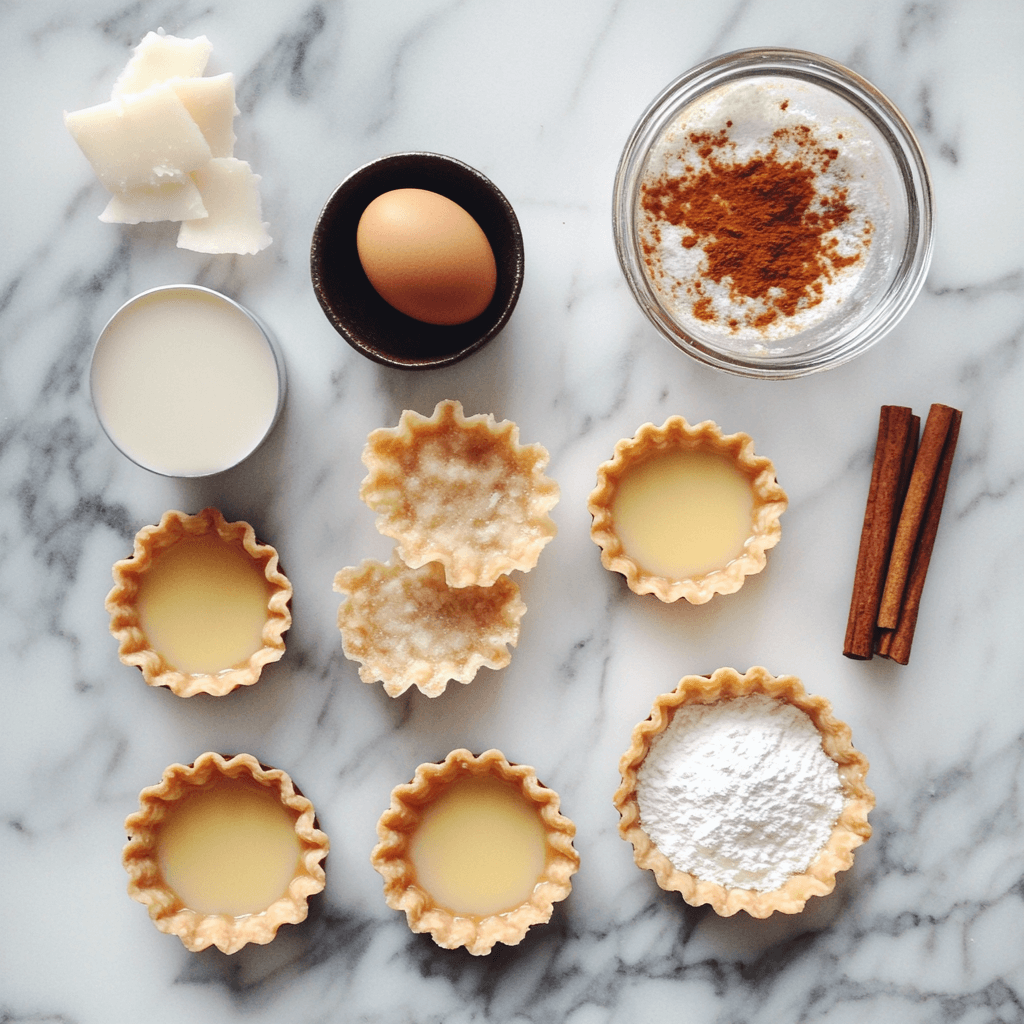
The best part about Mini Milk Tart Bites is that they require minimal ingredients, many of which you likely already have in your kitchen. Here’s what you’ll need:
- 1 pack mini tart shells (store-bought or homemade): These serve as the base for your mini tarts. You can buy pre-made mini tart shells or make your own if you prefer a more homemade touch.
- 1 1/2 cups milk: Full-fat milk is ideal for creating a rich, creamy filling, but you can use low-fat milk if you prefer a lighter version.
- 1/4 cup sugar: Sugar adds just the right amount of sweetness to the custard. Adjust the sweetness to your preference, but this is a standard amount for a well-balanced flavor.
- 2 tbsp cornflour (cornstarch): Cornflour is used to thicken the custard filling and give it that signature creamy texture. Without it, the custard may be too runny.
- 1 egg: The egg provides structure to the filling and helps create a smooth, silky texture once cooked.
- 1 tsp vanilla extract: This adds a lovely depth of flavor to the custard, rounding out the sweetness and giving the tarts a subtle, aromatic taste.
- Ground cinnamon for dusting: A dusting of cinnamon adds a warm, aromatic finishing touch to the tarts, completing the flavor profile and enhancing the overall experience.
Step-by-Step Instructions
Now that you have all your ingredients ready, let’s get started on making these Mini Milk Tart Bites! Follow these simple steps for perfect results:
- Preheat the Oven:
- Preheat your oven to 180°C (350°F). If you’re using store-bought mini tart shells, there’s no need to bake them before filling, as they are pre-baked. However, if you’re making your own tart shells from scratch, make sure they are baked and cooled before proceeding.
- Prepare the Custard Filling:
- In a medium saucepan, combine 1 1/2 cups of milk and 1/4 cup of sugar. Place the saucepan over medium heat and stir occasionally to dissolve the sugar.
- While the milk and sugar mixture heats up, whisk the egg, cornflour, and vanilla extract together in a separate bowl. It’s essential to whisk the ingredients until the cornflour is fully dissolved and the mixture is smooth to prevent any lumps from forming later.
- Once the milk is warm (not boiling), slowly pour about half of it into the egg mixture, whisking constantly. This process is called tempering, and it helps prevent the egg from curdling when added to the hot liquid.
- After incorporating the warm milk into the egg mixture, pour everything back into the saucepan. Return it to the heat and continue whisking as the mixture cooks. Keep stirring until the custard thickens, which should take about 3–5 minutes.
- Once the custard is thickened, remove it from the heat. Allow it to cool slightly before filling your tart shells. The custard will continue to thicken as it cools.
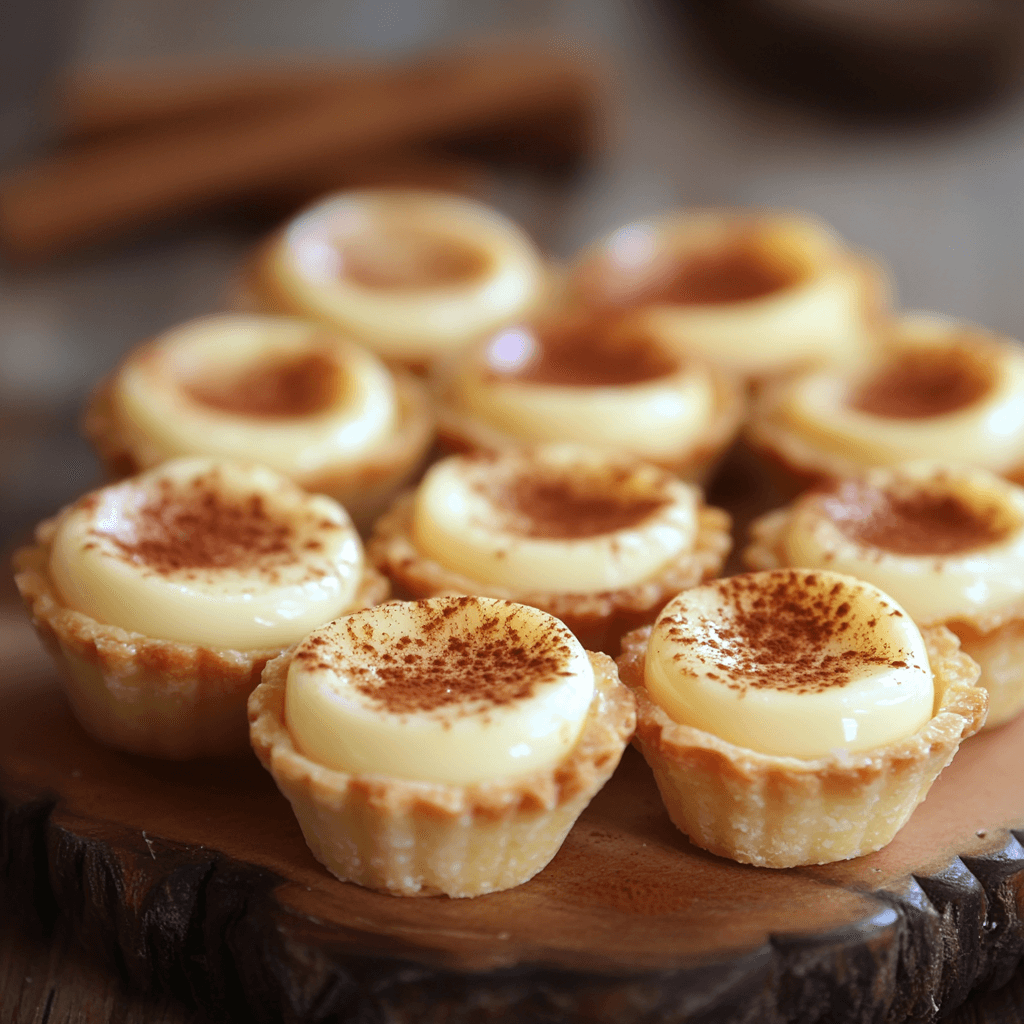
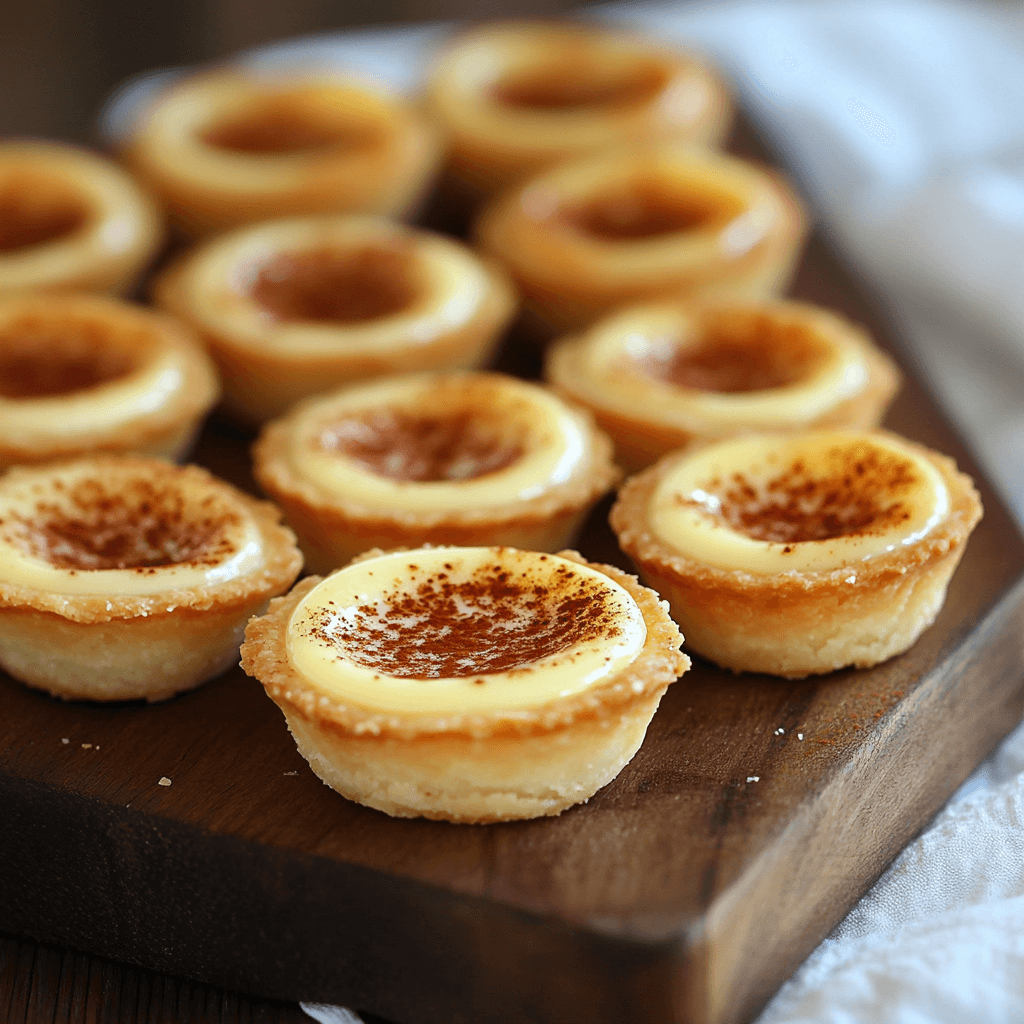
- Assemble the Mini Milk Tart Bites:
- Take your mini tart shells and spoon the warm custard into each one. Fill each tart shell with a generous amount of custard, making sure the filling is even and smooth.
- After filling the tart shells, give them a gentle tap to remove any air bubbles and ensure the custard is level.
- Dust with Cinnamon:
- Lightly dust each mini milk tart with a small amount of ground cinnamon. This step not only adds a lovely spice, but it also enhances the visual appeal of the tarts, giving them that traditional Milk Tart look.
- Chill and Serve:
- Allow the mini tarts to cool at room temperature for about 15 minutes, and then transfer them to the refrigerator. Let them chill for at least 1–2 hours to allow the custard to fully set. The longer they chill, the firmer and more enjoyable the custard will become.
- Serve chilled and enjoy!
Tips for Success
- Tempering the Eggs: Always temper the eggs slowly with a little bit of the hot milk mixture. This is crucial to avoid scrambling the eggs. By gradually warming the eggs, you ensure a smooth custard.
- Whisk Constantly: When cooking the custard, whisk continuously to avoid burning the milk or creating lumps. A steady hand and attention are key for achieving that silky smooth texture.
- Chill Before Serving: For the best texture and flavor, chill the tarts in the refrigerator before serving. The custard needs time to set and solidify, making the tarts easier to handle and giving them that rich, creamy mouthfeel.
- Cinnamon Variations: While ground cinnamon is traditional, you can also experiment with a hint of nutmeg or cardamom for a unique flavor twist. These spices will bring a bit of warmth and complexity to the tarts.
- Don’t Overfill the Tarts: You want to fill the tart shells, but not overstuff them. Leave just a bit of space at the top to prevent any overflow during baking or chilling.
Variations to Try
While the classic Mini Milk Tart Bites are delicious, there are a few variations you can try to put a fun twist on this traditional dessert:
- Fruit Topping: Add a layer of fresh fruit such as raspberries, strawberries, or even passion fruit on top of the custard. This will add a burst of freshness and acidity to balance the richness of the milk tart.
- Chocolate Milk Tart Bites: For a chocolatey variation, melt some chocolate and mix it into the custard filling before pouring it into the tart shells. This will create a deliciously creamy chocolate milk tart that is sure to impress chocolate lovers.
- Coconut Crust: If you want to add more flavor and texture to the crust, try mixing some shredded coconut into the tart shells before baking. This will give the crust a chewy, coconutty flavor that pairs beautifully with the creamy custard.
- Almond Milk Tart: For a dairy-free twist, use almond milk in place of regular milk. This variation works well with the traditional filling and still provides that rich, creamy texture.
- Lemon Zest: Add a touch of lemon zest to the custard for a subtle citrus flavor that brightens up the richness of the milk tart filling. This simple addition will give your mini tarts a refreshing twist.
Storing and Reheating
Mini Milk Tart Bites are best served chilled, and they store well for a few days. Here’s how to store them:
- Storing: After the mini tarts have cooled and chilled in the refrigerator, cover them with plastic wrap or store them in an airtight container. They will keep in the fridge for up to 3–4 days. Keep in mind that the crust may lose some of its crispness over time, but the custard will remain delicious.
- Freezing: While these tarts can be frozen, the texture of the custard may change slightly after freezing and thawing. If you choose to freeze them, place the mini tarts in a single layer on a baking sheet and freeze until solid. Then transfer them to an airtight container for longer storage. To thaw, leave them in the fridge overnight.
- Reheating: There’s no need to reheat Mini Milk Tart Bites since they are best served cold. Simply remove them from the fridge before serving and enjoy.
Frequently Asked Questions
- Can I make my own tart shells?
- Yes! You can make your own tart shells using a basic pastry dough recipe. However, store-bought mini tart shells make this recipe incredibly quick and easy.
- Can I use a different milk for the custard?
- Yes, you can substitute whole milk with almond milk, coconut milk, or any other non-dairy milk, but the flavor and texture of the custard may vary slightly.
- Can I make these tarts ahead of time?
- Absolutely! Mini Milk Tart Bites can be made a day or two ahead of time. Just make sure to chill them in the refrigerator until you’re ready to serve them.
- What if I don’t have ground cinnamon?
- While cinnamon is traditional, you can also use nutmeg, cardamom, or a combination of spices if you prefer. Just keep in mind that the flavor will be slightly different.
The Final Word
Mini Milk Tart Bites are a delightful twist on the classic South African Milk Tart, offering all the creamy richness and comforting flavor in a fun, bite-sized form. They’re perfect for parties, casual gatherings, or simply as a sweet treat to enjoy at home. The combination of a flaky, crispy shell and the smooth, luscious custard filling, topped with a dusting of cinnamon, makes these mini tarts a dessert that everyone will love.
Whether you’re a seasoned baker or a beginner, this recipe is simple and foolproof, and the results are nothing short of delicious. So, gather your ingredients, get into the kitchen, and treat yourself and your loved ones to these irresistible Mini Milk Tart Bites—you won’t regret it!