
Introduction
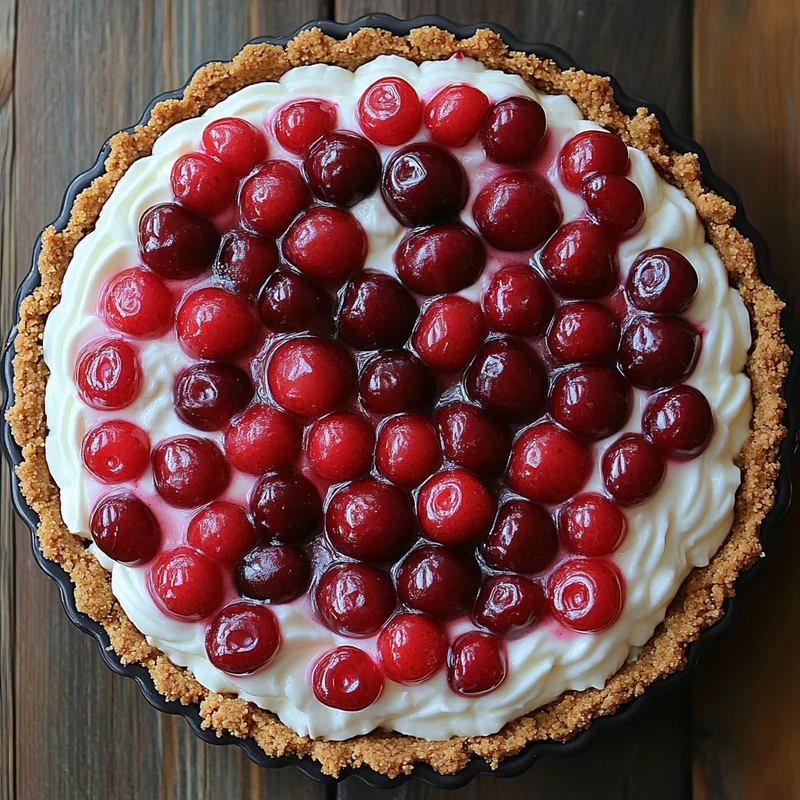
Oh boy, sometimes you just need a sweet treat that feels special but doesn’t require turning on your oven. Maybe you’re remembering lazy summer afternoons, a simple dessert shared with loved ones, or just craving something creamy and bright. This No-Bake Cherry Cream Cheese Tart is exactly that kind of recipe. It’s incredibly easy, surprisingly quick to put together, and delivers big on fresh, fruity flavor and luscious creaminess. It’s one of those desserts you’ll keep coming back to, especially when you want maximum deliciousness with minimal effort. Trust me, this one’s a keeper!
Why You’ll Love This Recipe
- Fast: Seriously, you can have this assembled in under 20 minutes (plus chill time!).
- Easy: No baking, no complicated steps, just simple mixing and chilling. Perfect for beginners!
- Giftable: Bring this to a potluck or picnic, and watch it disappear. It travels beautifully once set.
- Crowd-pleasing: Who can resist the classic combo of graham cracker crust, tangy cream cheese, and fresh cherries? Not many people I know!
Ingredients
Here’s what you’ll need to whip up this dreamy tart. Simple, everyday ingredients!
- 1½ cups graham cracker crumbs: You can buy them pre-crushed or crush whole graham crackers yourself (about 10-12 full sheets).
- ¼ cup unsalted butter, melted: This is the glue that holds your lovely crust together. Make sure it’s melted, not just softened.
- 8 oz cream cheese, softened: Let this sit on the counter for an hour or so before you start. Softened cream cheese is key to a smooth, lump-free filling.
- ½ cup powdered sugar: Also known as confectioners’ sugar or icing sugar. It sweetens the filling and helps with texture.
- 1 tsp vanilla extract: Adds that essential touch of warm, classic flavor to the cream cheese filling.
- ½ cup heavy cream, whipped: You’ll want to whip this until it holds soft peaks. It makes the filling light and airy!
- 1 cup fresh cherries, pitted and halved: The star of the show! Use fresh if you can, they provide the best flavor and texture contrast.
- Optional: cherry jam or glaze: A little warm jam brushed over the cherries adds a beautiful shine and extra burst of cherry flavor. Totally optional, but lovely!
How to Make It
Alright, let’s get this no-bake party started! Follow these simple steps:
First things first, let’s make that crust! Grab a medium bowl and combine your graham cracker crumbs and the melted butter. Stir them together until all the crumbs are moistened and it looks like wet sand.
Now, grab your 9-inch pie or tart pan. Pour the crumb mixture in and use the bottom of a glass or your fingers to firmly press it into the bottom and up the sides of the pan. You want a nice, compact crust that won’t crumble when you slice it. Pop this into the fridge while you work on the filling.
Next, let’s make the creamy filling. In a medium bowl, add your softened cream cheese. Beat it with an electric mixer (or a whisk and some elbow grease!) until it’s super smooth and creamy with no lumps. Add the powdered sugar and vanilla extract and beat again until everything is well combined and the mixture looks light and fluffy.
Now for the whipped cream magic! Gently fold the whipped heavy cream into the cream cheese mixture. Use a spatula and a light hand, incorporating it until there are no white streaks left and the filling is smooth and airy. Don’t overmix here, you want to keep that lightness!
Take your chilled crust out of the fridge and spoon the delicious filling into it. Spread it out evenly with your spatula right to the edges.
Cover the tart lightly with plastic wrap (try not to let it touch the filling surface) and pop it back into the refrigerator. It needs at least 4 hours to firm up properly, but overnight is even better if you have the time. The longer it chills, the cleaner your slices will be.
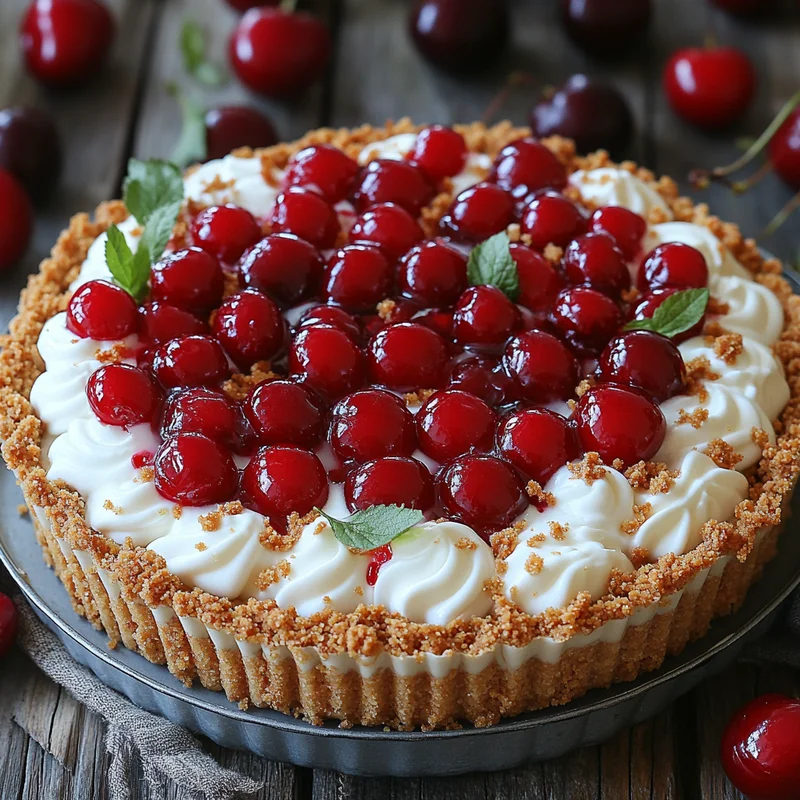
Once your tart is fully set and you’re ready to serve, it’s time for the grand finale – the cherries! Arrange your beautiful pitted and halved fresh cherries all over the top of the filling. If you’re using the optional cherry jam or glaze, warm it up slightly (a few seconds in the microwave works!) and brush or drizzle it over the cherries and/or the filling for extra shine and flavor.
Slice, serve, and watch everyone ask for seconds!
Substitutions & Additions
Want to play around with the recipe? Go for it! Here are a few ideas:
- Crust Variations: Not a graham cracker fan? Try crushed shortbread cookies, vanilla wafers, or even chocolate cookies for a different twist.
- Fruit Swaps: No cherries? No problem! This tart works beautifully with other fresh berries like strawberries, blueberries, raspberries, or a mix. Peaches or even sliced kiwi could be fun too!
- Add Zest: For an extra burst of freshness, add the zest of half a lemon or lime to the cream cheese filling.
- Chocolate Swirl: Melt a little chocolate and swirl it into the filling before chilling, or drizzle it over the finished tart.
- Extract Fun: Swap vanilla for almond extract, or add a tiny drop of cherry extract to enhance the cherry flavor.
Tips for Success
A few little tricks to make sure your tart turns out perfectly every time:
- Soften that Cream Cheese: I can’t stress this enough! Cold cream cheese means lumps, and nobody wants a lumpy filling. Let it sit out or gently microwave it for 10-15 seconds if you’re in a hurry.
- Don’t Skip the Chill Time: The refrigeration step is crucial. It allows the crust to set and the filling to firm up into a sliceable dessert. Be patient!
- Whip Cream Properly: Whip the heavy cream to soft peaks, not stiff. This keeps the filling light. Over-whipped cream can make the filling too dense.
- Press Crust Firmly: A well-pressed crust is less likely to fall apart when you cut into the tart.
- Fresh is Best for Topping: While you could use canned pie filling, fresh cherries provide a wonderful textural contrast and bright flavor that really elevates this simple tart.
How to Store It
Once made, this tart needs to stay chilled. Cover it loosely with plastic wrap or store it in an airtight container in the refrigerator.
It will keep well in the fridge for 3-4 days. The crust might soften slightly over time, but the flavor will still be delicious.
I don’t recommend freezing this tart, as the texture of the cream cheese filling and fresh fruit can change upon thawing.
FAQs
Got questions? I’ve got answers!
Can I make this tart ahead of time?
Absolutely! This tart needs at least 4 hours to set, so it’s perfect to make the day before you plan to serve it. The longer it chills, the better.
Do I have to use fresh cherries?
Fresh cherries are highly recommended for the best texture and flavor on top. You could technically use well-drained canned cherries (pie filling kind) or thawed frozen cherries, but the texture won’t be quite the same. If using canned, be sure to drain them really well so they don’t make the tart watery.
How do I pit cherries easily?
If you don’t have a cherry pitter, you can use a sturdy straw, a chopstick, or even the back of a piping tip (the round end) to push the pit through where the stem was attached. Be careful, it can get a little messy!
Can I use a pre-made crust?
Yes, you can definitely save a step by using a store-bought graham cracker crust! Just pour the filling directly into it and chill as directed.
Easy No-Bake Cherry Cream Cheese Tart
Equipment
- Medium bowl
- 9-inch pie or tart pan
- Electric mixer or a whisk
- Spatula
- Plastic wrap
Ingredients
Crust
- 1.5 cups graham cracker crumbs about 10-12 full sheets
- 0.25 cup unsalted butter melted
Filling
- 8 oz cream cheese softened
- 0.5 cup powdered sugar confectioners' or icing sugar
- 1 tsp vanilla extract
- 0.5 cup heavy cream whipped
Topping
- 1 cup fresh cherries pitted and halved
- cherry jam or glaze optional
Instructions
- Grab a medium bowl and combine your graham cracker crumbs and the melted butter.
- Stir them together until all the crumbs are moistened and it looks like wet sand.
- Grab your 9-inch pie or tart pan. Pour the crumb mixture in and use the bottom of a glass or your fingers to firmly press it into the bottom and up the sides of the pan.
- Pop the crust into the fridge while you work on the filling.
- In a medium bowl, add your softened cream cheese. Beat it with an electric mixer (or a whisk) until it's super smooth and creamy with no lumps.
- Add the powdered sugar and vanilla extract and beat again until everything is well combined and the mixture looks light and fluffy.
- Gently fold the whipped heavy cream into the cream cheese mixture using a spatula until there are no white streaks left and the filling is smooth and airy.
- Take your chilled crust out of the fridge and spoon the filling into it.
- Spread it out evenly with your spatula right to the edges.
- Cover the tart lightly with plastic wrap and pop it back into the refrigerator.
- It needs at least 4 hours to firm up properly, but overnight is even better.
- Once your tart is fully set, arrange your pitted and halved fresh cherries all over the top of the filling.
- If using the optional cherry jam or glaze, warm it slightly and brush or drizzle it over the cherries and/or the filling.
- Slice, serve, and enjoy!
Notes
- Crust Variations: Try crushed shortbread cookies, vanilla wafers, or chocolate cookies.
- Fruit Swaps: Works well with strawberries, blueberries, raspberries, peaches, or sliced kiwi.
- Add Zest: Add the zest of half a lemon or lime to the cream cheese filling.
- Chocolate Swirl: Melt chocolate and swirl into filling or drizzle over finished tart.
- Extract Fun: Swap vanilla for almond extract, or add a drop of cherry extract. Tips for Success:
- Soften Cream Cheese: Cold cream cheese leads to lumps. Let it sit out or gently microwave for 10-15 seconds.
- Don't Skip the Chill Time: Crucial for the crust and filling to set into a sliceable dessert.
- Whip Cream Properly: Whip to soft peaks to keep the filling light.
- Press Crust Firmly: Ensures the crust doesn't fall apart when cut.
- Fresh is Best for Topping: Fresh cherries provide wonderful texture and flavor, though drained canned or thawed frozen can be used (texture may differ). Storage:
- Store covered loosely with plastic wrap or in an airtight container in the refrigerator.
- Keeps well in the fridge for 3-4 days. The crust may soften over time.
- Freezing is not recommended as the texture of the filling and fruit can change.