Why You’ll Love This No-Bake Lemon Meringue Pie Squares
Hey there, dessert lovers! Are you craving a zesty, sweet treat that’s as easy to make as it is delicious? Then get ready to fall head over heels for these No-Bake Lemon Meringue Pie Squares! Forget slaving over a hot oven – this recipe is a total game-changer. Imagine this: a buttery, crumbly biscuit base, topped with a tangy, intensely lemony filling, and finished with a cloud of fluffy meringue. Sounds heavenly, right? It is!
What sets these squares apart? The incredible balance of flavors and textures. The tartness of the lemon perfectly complements the sweetness of the condensed milk, while the crisp base provides the perfect contrast to the creamy filling and delicate meringue topping. The best part? This recipe is ridiculously quick to whip up. You’ll have a show-stopping dessert ready in a flash, perfect for impressing guests or simply treating yourself after a long day. This recipe evokes feelings of sunshine, happiness, and effortless elegance – a true taste of summer, no matter the season.
You’ll love the ease of preparation, the incredible flavor combination, and the sheer satisfaction of creating something so delicious without any baking involved! Trust me, your taste buds will thank you. Prepare for a delightful explosion of lemon-y goodness in every single bite!

What You’ll Need
Here’s what you’ll need to gather for this simple yet stunning dessert:
- One packet of digestive biscuits, crushed: The foundation of our delightful squares. Choose your favorite brand!
- 1/2 cup melted butter: Provides the perfect binding agent for our biscuit base, creating a wonderfully crumbly texture.
- One tin (385g) condensed milk: The sweet heart of our lemon filling. This provides that rich, creamy texture we all adore.
- 1/2 cup lemon juice (fresh is best): The star of the show! Freshly squeezed lemon juice provides the brightest, most vibrant lemon flavor.
- 1 teaspoon lemon zest: Adds a layer of aromatic complexity and intensifies the lemon flavor.
- 1 cup whipped cream: A dollop of whipped cream adds a touch of lightness and airy texture, perfectly balancing the richness of the filling.
- Mini store-bought meringues (or crushed meringue): The delightful finishing touch! These provide a sweet, crunchy contrast and a classic lemon meringue pie aesthetic.
Step-by-Step Instructions
Let’s get baking… or rather, not baking! This recipe is so easy, even a baking novice can master it.
- Prepare the base: First, crush your digestive biscuits finely. You can do this by placing them in a strong plastic bag and crushing them with a rolling pin, or using a food processor. Tip: Don’t over-crush them; a little texture is nice!
- Combine the base ingredients: In a medium bowl, combine the crushed biscuits with the melted butter. Mix thoroughly until all the crumbs are evenly moistened. Tip: Use your hands – it’s the easiest way to ensure everything’s combined perfectly.
- Press the base into a pan: Press the biscuit mixture firmly into the bottom of an 8×8 inch baking dish or similar sized square dish. Use the back of a spoon or your fingers to create an even layer. Tip: Make sure the base is packed tightly; this will prevent it from crumbling later.
- Prepare the lemon filling: In a separate bowl, whisk together the condensed milk and lemon juice until smooth. Stir in the lemon zest. Tip: Taste the mixture and add a little more lemon juice if you prefer a tarter filling.
- Pour the filling over the base: Gently pour the lemon filling over the biscuit base, spreading it evenly with a spatula. Tip: Avoid over-mixing the filling once the lemon juice is added, as this can make it curdle slightly.
- Chill the pie: Refrigerate the pie for at least 2 hours, or preferably overnight, to allow the filling to set completely. Tip: Patience is key here! The longer it chills, the firmer the filling will become.
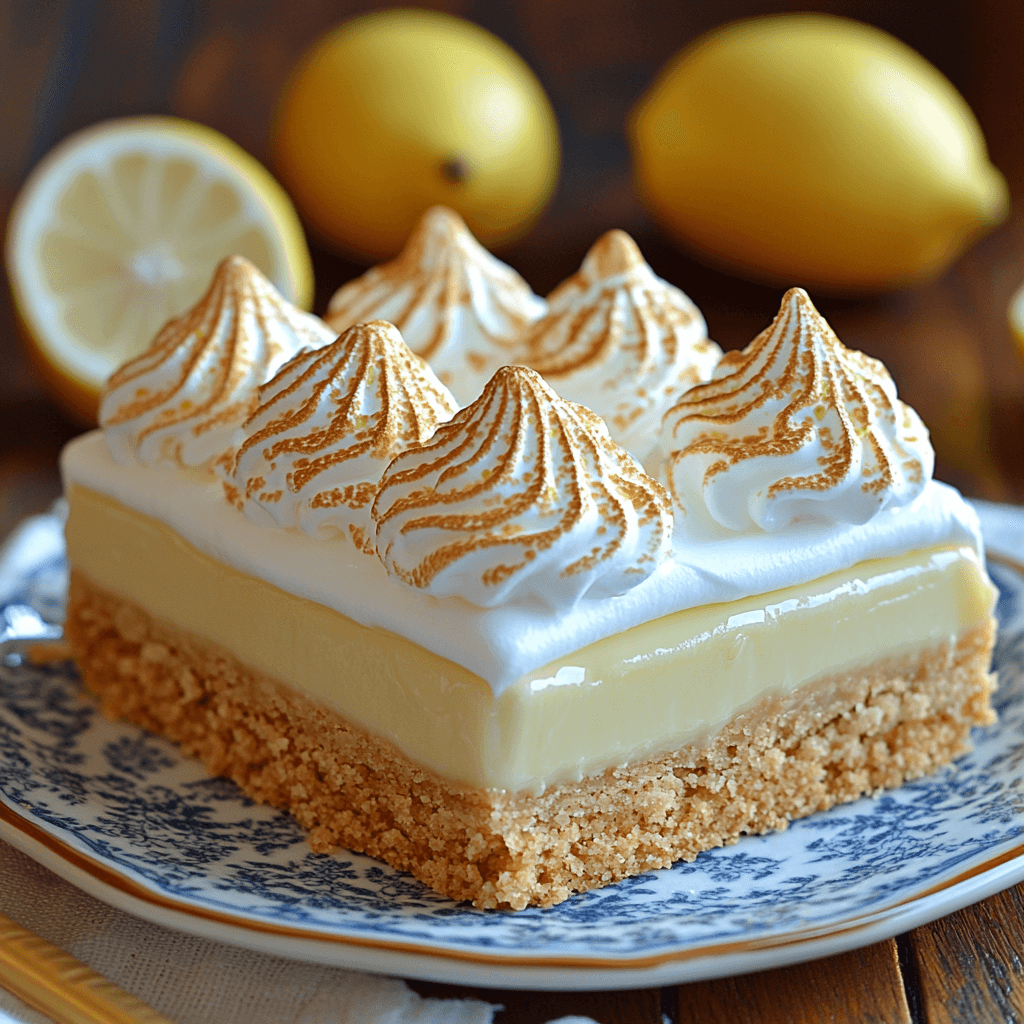
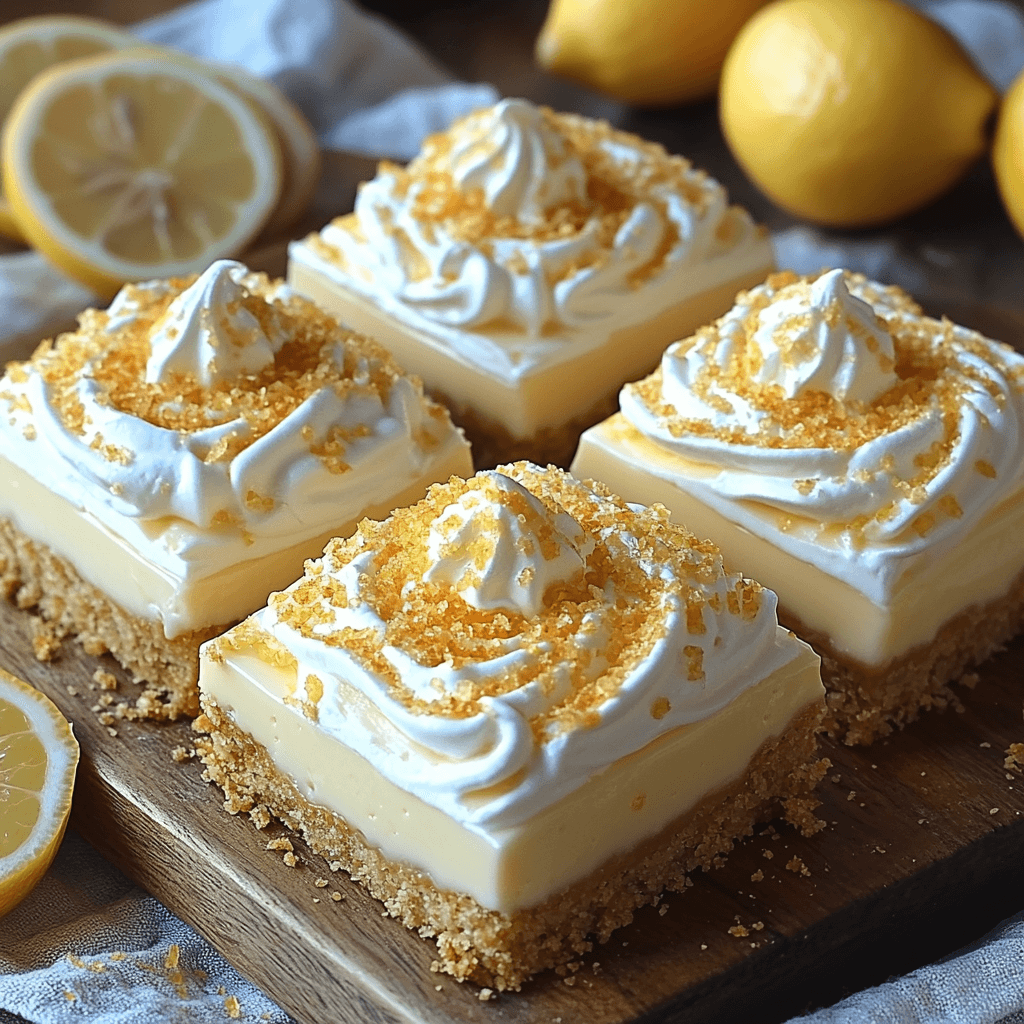
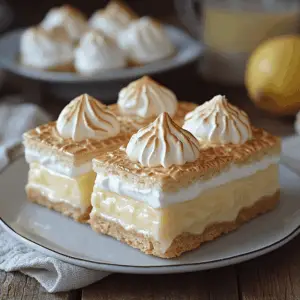
- Top with whipped cream and meringues: Once chilled, top the lemon filling with the whipped cream and arrange the mini meringues on top. Alternatively, you can sprinkle crushed meringue over the top for a different texture. Tip: Use a piping bag for a professional look when adding the whipped cream.
- Serve and enjoy: Cut the pie into squares and serve immediately. The perfect ending to any meal! Tip: Garnish with extra lemon zest for an extra touch of elegance.
Tips for Success
To ensure your No-Bake Lemon Meringue Pie Squares are a resounding success, remember these crucial tips:
Use good quality ingredients, especially the lemon juice. Freshly squeezed juice makes all the difference in taste. Ensure your biscuits are finely crushed for a smooth, even base. Don’t over-mix the lemon filling; gently whisk until combined. Chill the pie thoroughly for the best results. And finally, have fun! Baking (or in this case, no-baking) should be enjoyable.
Variations to Try
Feel free to experiment with this recipe! Try adding a pinch of poppy seeds to the biscuit base for extra texture. For a richer flavor, use a combination of condensed milk and heavy cream in the filling. If you want a less tart filling, reduce the amount of lemon juice slightly. A vegan version is possible by using vegan condensed milk and whipped cream alternatives. For those who love a little kick, add a small amount of finely grated ginger or a dash of cardamom to the filling.
Storing and Reheating
These pie squares are best enjoyed fresh, but leftovers can be stored in an airtight container in the refrigerator for up to 3 days. Freezing is not recommended, as it can affect the texture of the base and filling. If you find your squares have become slightly less firm after a day or two, you can pop them back in the refrigerator for a while to firm up. There’s really no need to reheat this dessert; it’s best served chilled!
Frequently Asked Questions
Q: Can I use different biscuits? A: Absolutely! Any type of buttery biscuit will work well. Graham crackers are a popular alternative.
Q: How long will the pie squares keep? A: Stored properly in the refrigerator, they will keep for up to 3 days. After that, the filling might start to separate.
Q: Can I make the pie ahead of time? A: Yes! The pie is best if chilled for at least 2 hours, or even overnight, to allow the filling to set properly. This allows for better flavor development and a firmer consistency.
Q: What if my filling curdles? A: Over-mixing the filling after adding the lemon juice can cause curdling. If this happens, don’t worry too much; it won’t greatly affect the taste. Next time, try whisking more gently.
Q: Are these squares gluten-free? A: Not unless you use gluten-free digestive biscuits. Check the packaging of your biscuits to ensure they meet your dietary requirements.
The Final Word
These No-Bake Lemon Meringue Pie Squares are a delightful treat – easy to make, bursting with flavor, and perfect for any occasion. The combination of the buttery crust, tangy lemon filling, and fluffy meringue is simply irresistible. Give this recipe a try and experience the joy of a delicious dessert without the baking hassle! Let me know in the comments how yours turned out, and don’t forget to rate the recipe! Happy baking (or rather, happy *no-baking*)!
Lemon Meringue Pie Squares (No Bake!)
Equipment
- Mixing bowls Several for different stages of preparation.
- 8×8 inch baking dish To assemble the pie squares.
Ingredients
Crust
- 1 packet Digestive biscuits Crushed
- 0.5 cup Melted butter
Lemon Filling & Topping
- 1 tin (385g) Condensed milk
- 0.5 cup Lemon juice Fresh is best
- 1 tsp Lemon zest
- 1 cup Whipped cream
- Mini Store-bought meringues Or crushed meringue
Instructions
- Crush the digestive biscuits into fine crumbs.
- Combine the crushed biscuits with the melted butter in a bowl and mix well.
- Press the biscuit mixture into the bottom of an 8×8 inch baking dish to form the crust.
- In a separate bowl, whisk together the condensed milk, lemon juice, and lemon zest until smooth.
- Pour the lemon filling over the biscuit crust and spread evenly.
- Refrigerate for at least 2 hours to allow the filling to set.
- Once set, top with whipped cream and mini meringues.
- Cut into squares and serve chilled.