Introduction
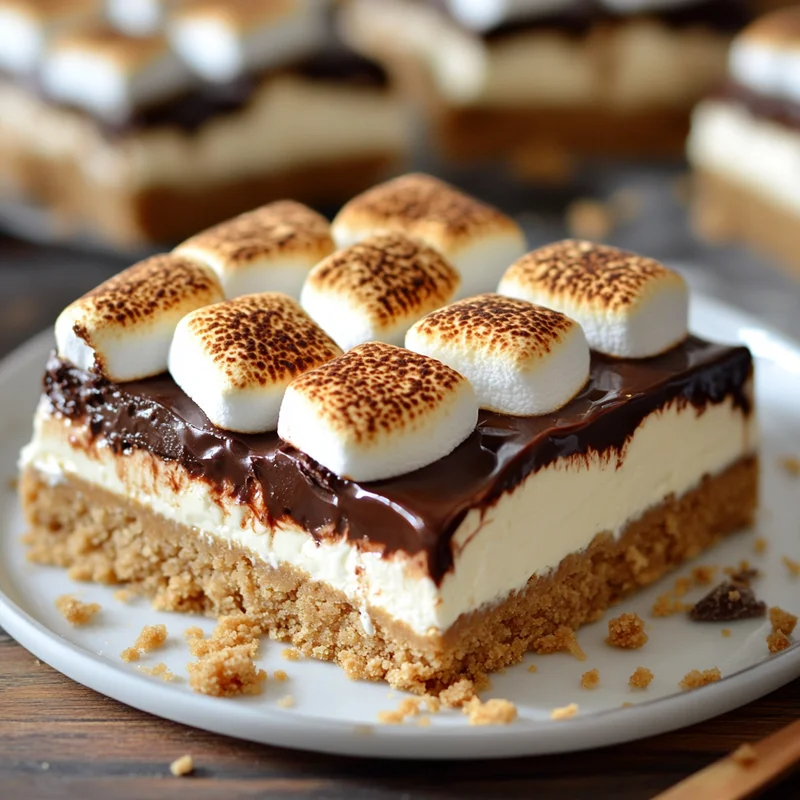
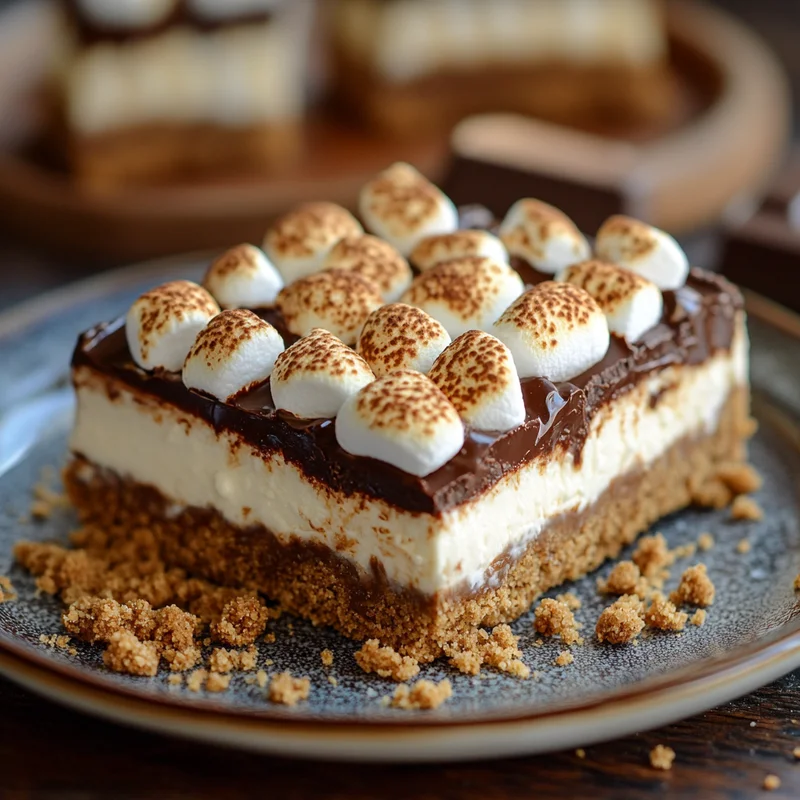
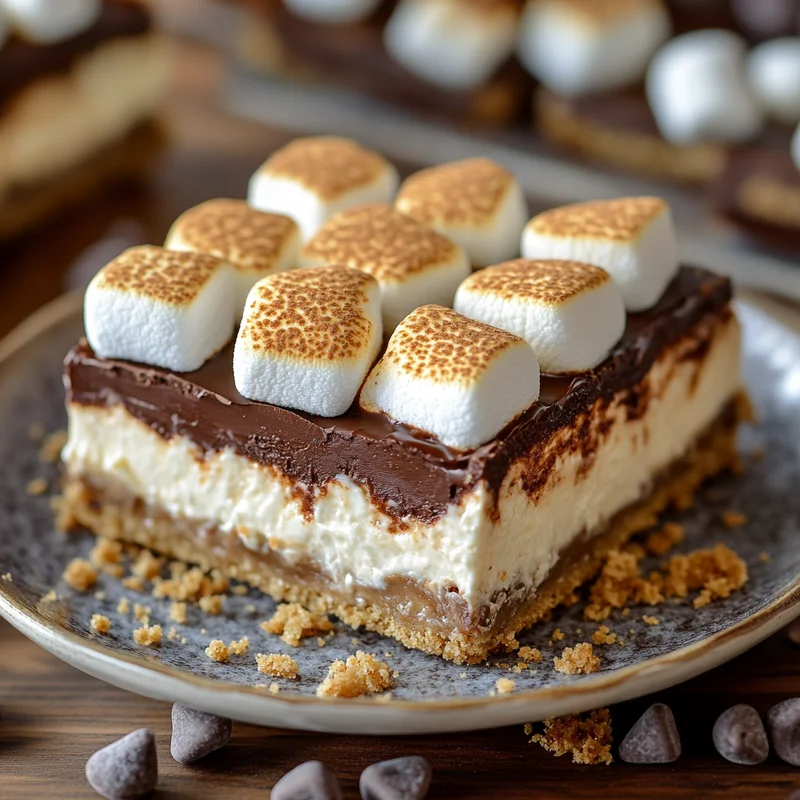
Oh, honey, let me tell you about a dessert that brings back all the best cozy memories! Remember sitting around a crackling campfire, toasting marshmallows until they’re perfectly golden (or maybe a little char-grilled, we don’t judge!) and squishing them between graham crackers with melty chocolate? Pure magic, right? Well, imagine capturing all that gooey, chocolatey, marshmallowy goodness in a creamy, dreamy cheesecake bar. And even better? You don’t even need to turn on your oven!
These No-Bake S’mores Cheesecake Bars are seriously a game-changer. They’re ridiculously easy to whip up, perfect for when you need a showstopper dessert but are short on time, or just when a serious s’mores craving hits. Trust me, once you try these, they’ll be on repeat in your kitchen!
Why You’ll Love This Recipe
Okay, so besides the fact that they taste like pure joy, here are a few more reasons these bars are about to become your go-to:
- Fast: No baking means less time in a hot kitchen and more time enjoying!
- Easy: Simple steps, minimal equipment needed. Perfect for beginners!
- Giftable: Package them up and share the s’mores love with friends and neighbors.
- Crowd-pleasing: Who doesn’t love s’mores and cheesecake? It’s a guaranteed hit!
Ingredients
Gathering your ingredients is the first step to s’mores heaven. Here’s what you’ll need:
- Graham Cracker Crust:
- 1 1/2 cups graham cracker crumbs: You can buy pre-crushed or crush your own crackers. Either way works great!
- 1/4 cup granulated sugar: Just a touch for sweetness in the crust.
- 8 tbsp unsalted butter, melted: This binds those crumbs together into the perfect base.
- Marshmallow Cheesecake:
- 24 oz cream cheese, softened: Make sure it’s really softened at room temperature. This is key to a smooth filling!
- 2 tbsp heavy whipping cream: Adds a little extra richness and helps with texture.
- 2 cups miniature marshmallows: The star of the filling show!
- 1 tsp vanilla extract: Enhances all those sweet flavors.
- 1/2 cup powdered sugar: Sweetens the cheesecake filling without being grainy.
- Milk Chocolate Ganache:
- 9.3 oz milk chocolate bars (6 – 1.55 oz bars): Your favorite milk chocolate works perfectly. Chop it up if using larger bars.
- 1/3 cup heavy whipping cream: Warmed up, this turns chocolate into luscious ganache.
- Topping:
- 2 cups miniature marshmallows: For that classic s’mores topping!
How to Make It
Alright, let’s get these delicious bars put together. It’s simpler than you think!
- First, let’s tackle the Graham Cracker Crust. Grab a 9×13 inch baking pan and line it with parchment paper, leaving some overhang on the sides – this makes lifting the finished bars out SO much easier. In a medium bowl, stir together the graham cracker crumbs and granulated sugar. Pour in the melted butter and stir until the crumbs are evenly moistened and look like wet sand.
- Pour the crumb mixture into your prepared pan. Use the bottom of a glass or a flat measuring cup to press the crumbs firmly and evenly into the bottom of the pan. Make sure you get a nice, compact layer. Pop this in the fridge while you make the filling.
- Now, the Marshmallow Cheesecake filling! Make sure your cream cheese is soft. In a large bowl, beat the softened cream cheese with an electric mixer until it’s smooth and creamy, with no lumps. Beat in the 2 tbsp heavy whipping cream until combined.
- In a separate microwave-safe bowl, place the 2 cups of miniature marshmallows for the filling. Microwave them in 15-20 second increments, stirring in between, until they are completely melted and smooth. Be careful, they get hot quickly!
- Add the melted marshmallows, vanilla extract, and powdered sugar to the cream cheese mixture. Beat again until everything is just combined and smooth. Try not to overmix at this stage.
- Retrieve the chilled crust from the fridge. Pour the marshmallow cheesecake filling over the crust and spread it out evenly with a spatula. Return the pan to the fridge to chill for at least 4 hours, or ideally until firm, which might take 6-8 hours. I usually like to chill it overnight to be safe!
- Once the bars are firm, it’s Ganache time! Chop your milk chocolate bars into small pieces and place them in a heatproof bowl. Heat the 1/3 cup heavy whipping cream in a small saucepan or the microwave until it’s hot but not boiling. Pour the hot cream over the chopped chocolate. Let it sit for 5 minutes to melt the chocolate, then whisk gently until the ganache is completely smooth and glossy.
- Pour the slightly cooled ganache over the chilled cheesecake layer and spread it evenly.
- Immediately sprinkle the remaining 2 cups of miniature marshmallows over the warm ganache.
- Return the pan to the fridge to chill again for at least another 1-2 hours, allowing the ganache to set.
- When you’re ready to serve, use the parchment paper overhang to lift the entire slab out of the pan. Place it on a cutting board. For nice, clean slices, run a sharp knife under hot water, dry it, and then make your cuts. Repeat heating and drying the knife between each slice.
Substitutions & Additions
Feeling creative? Here are some fun ways to switch things up:
- Crackers: Not a graham cracker fan? Try using crushed Biscoff cookies or even chocolate graham crackers for the crust!
- Chocolate: Swap milk chocolate for dark chocolate or even white chocolate in the ganache for a different flavor profile.
- Mix-ins: Fold mini chocolate chips or chopped peanuts into the cheesecake filling for extra texture and flavor.
- Topping: Instead of just marshmallows, sprinkle some extra graham cracker crumbs, chopped chocolate, or even toasted pecans on top! For that ultimate s’mores look, you could briefly broil the top marshmallows until golden brown (keep a close eye on them!).
Tips for Success
Here are a few little pointers I’ve picked up to make sure your bars are absolutely perfect:
- Soften That Cream Cheese: I cannot stress this enough! Cold cream cheese leads to lumps, and no one wants lumpy cheesecake. Take it out of the fridge at least an hour or two beforehand.
- Don’t Overmix: Once you add the melted marshmallows and sugar to the cream cheese, mix just until combined. Overmixing can sometimes incorporate too much air and affect the set.
- Chill Time is Crucial: I know it’s hard to wait, but don’t rush the chilling! Giving each layer time to set properly ensures your bars hold their shape beautifully when you slice them.
- Lining the Pan: The parchment paper overhang is your best friend here. It makes removing the whole thing a breeze for easy cutting.
How to Store It
These bars are best stored covered tightly with plastic wrap or in an airtight container in the refrigerator. They’ll keep well for 4-5 days. I haven’t tried freezing the whole bars, but the cheesecake filling component usually freezes well, though the texture might change slightly upon thawing. The ganache and marshmallows might also be affected by freezing/thawing cycles.
FAQs
Got questions? I’ve got answers!
- Can I make this ahead of time? Absolutely! These bars are perfect for making a day or even two ahead of time. Just keep them covered in the fridge until you’re ready to slice and serve.
- Do I have to use miniature marshmallows? Miniature marshmallows melt easier and incorporate more smoothly into the filling, but you could chop up larger marshmallows if that’s all you have on hand.
- Why is my ganache too thick/thin? If it’s too thick, stir in another tablespoon of warm cream. If it’s too thin, add a few more chopped chocolate pieces and let it sit before whisking again.
- How do I get clean slices? Warming your knife under hot water and drying it before each cut is the trick!

Easy No-Bake S'mores Cheesecake Bars: Your New Favorite Dessert!
Equipment
- 9x13 inch baking pan
- Parchment paper
- Medium bowl
- Large bowl
- Electric mixer
- Microwave-safe bowl
- Small saucepan Optional, can use microwave
- Heatproof bowl
- Spatula
- Cutting board
- Sharp knife
Ingredients
Graham Cracker Crust
- 1.5 cup graham cracker crumbs You can buy pre-crushed or crush your own crackers.
- 0.25 cup granulated sugar
- 8 tbsp unsalted butter melted
Marshmallow Cheesecake
- 24 oz cream cheese softened
- 2 tbsp heavy whipping cream
- 2 cup miniature marshmallows for the filling
- 1 tsp vanilla extract
- 0.5 cup powdered sugar
Milk Chocolate Ganache
- 9.3 oz milk chocolate bars 6 - 1.55 oz bars; chopped up if using larger bars
- 0.33 cup heavy whipping cream
Topping
- 2 cup miniature marshmallows for the topping
Instructions
- First, let's tackle the Graham Cracker Crust. Grab a 9x13 inch baking pan and line it with parchment paper, leaving some overhang on the sides – this makes lifting the finished bars out SO much easier. In a medium bowl, stir together the graham cracker crumbs and granulated sugar. Pour in the melted butter and stir until the crumbs are evenly moistened and look like wet sand.
- Pour the crumb mixture into your prepared pan. Use the bottom of a glass or a flat measuring cup to press the crumbs firmly and evenly into the bottom of the pan. Make sure you get a nice, compact layer. Pop this in the fridge while you make the filling.
- Now, the Marshmallow Cheesecake filling! Make sure your cream cheese is soft. In a large bowl, beat the softened cream cheese with an electric mixer until it's smooth and creamy, with no lumps. Beat in the 2 tbsp heavy whipping cream until combined.
- In a separate microwave-safe bowl, place the 2 cups of miniature marshmallows for the filling. Microwave them in 15-20 second increments, stirring in between, until they are completely melted and smooth. Be careful, they get hot quickly!
- Add the melted marshmallows, vanilla extract, and powdered sugar to the cream cheese mixture. Beat again until everything is just combined and smooth. Try not to overmix at this stage.
- Retrieve the chilled crust from the fridge. Pour the marshmallow cheesecake filling over the crust and spread it out evenly with a spatula. Return the pan to the fridge to chill for at least 4 hours, or ideally until firm, which might take 6-8 hours. I usually like to chill it overnight to be safe!
- Once the bars are firm, it's Ganache time! Chop your milk chocolate bars into small pieces and place them in a heatproof bowl. Heat the 1/3 cup heavy whipping cream in a small saucepan or the microwave until it's hot but not boiling. Pour the hot cream over the chopped chocolate. Let it sit for 5 minutes to melt the chocolate, then whisk gently until the ganache is completely smooth and glossy.
- Pour the slightly cooled ganache over the chilled cheesecake layer and spread it evenly.
- Immediately sprinkle the remaining 2 cups of miniature marshmallows over the warm ganache.
- Return the pan to the fridge to chill again for at least another 1-2 hours, allowing the ganache to set.
- When you're ready to serve, use the parchment paper overhang to lift the entire slab out of the pan. Place it on a cutting board. For nice, clean slices, run a sharp knife under hot water, dry it, and then make your cuts. Repeat heating and drying the knife between each slice.
Notes
- Crackers: Try using crushed Biscoff cookies or chocolate graham crackers for the crust.
- Chocolate: Swap milk chocolate for dark chocolate or white chocolate in the ganache.
- Mix-ins: Fold mini chocolate chips or chopped peanuts into the cheesecake filling.
- Topping: Add extra graham cracker crumbs, chopped chocolate, or toasted pecans. Briefly broil top marshmallows for a toasted look (watch closely!).
Tips for Success:
- Soften That Cream Cheese: Take it out at least an hour or two beforehand to avoid lumps.
- Don't Overmix: Once melted marshmallows and sugar are added, mix just until combined to avoid incorporating too much air.
- Chill Time is Crucial: Allow each layer ample time to set for clean slices.
- Lining the Pan: Parchment paper overhang makes removal easy.
Storage:
- Store covered tightly in the refrigerator for 4-5 days.
- Freezing the whole bars is not recommended, but the cheesecake filling component may freeze well (texture might change). Ganache and marshmallows may also be affected by freezing/thawing.
FAQs:
- Can be made 1-2 days ahead of time.
- Miniature marshmallows melt easier, but chopped larger ones can be used.
- Adjust ganache consistency: Add warm cream if too thick, add more chocolate if too thin.
- Use a warm, dry knife for clean slices.