Introduction
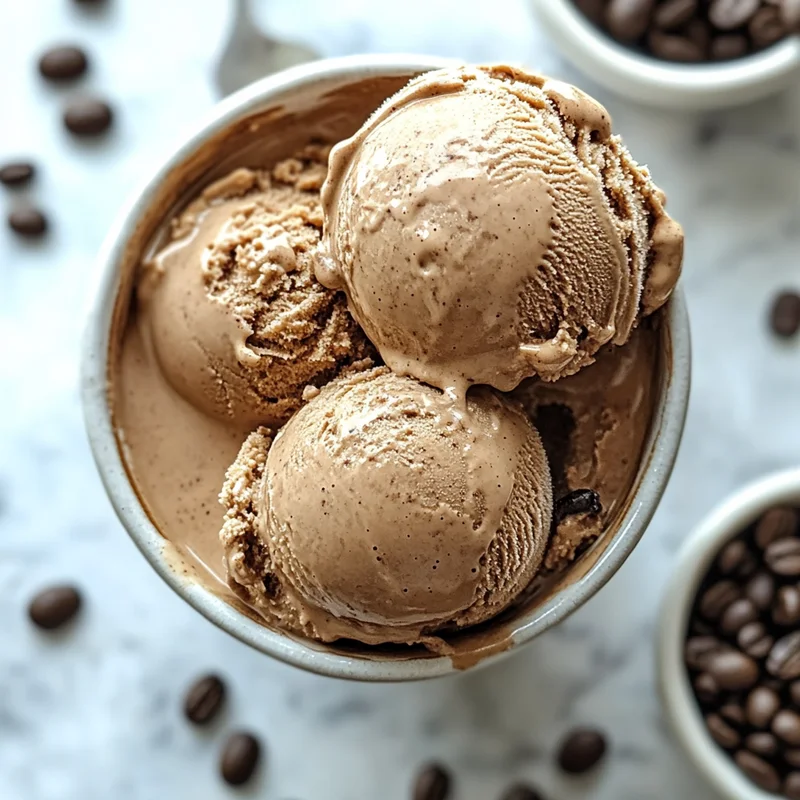
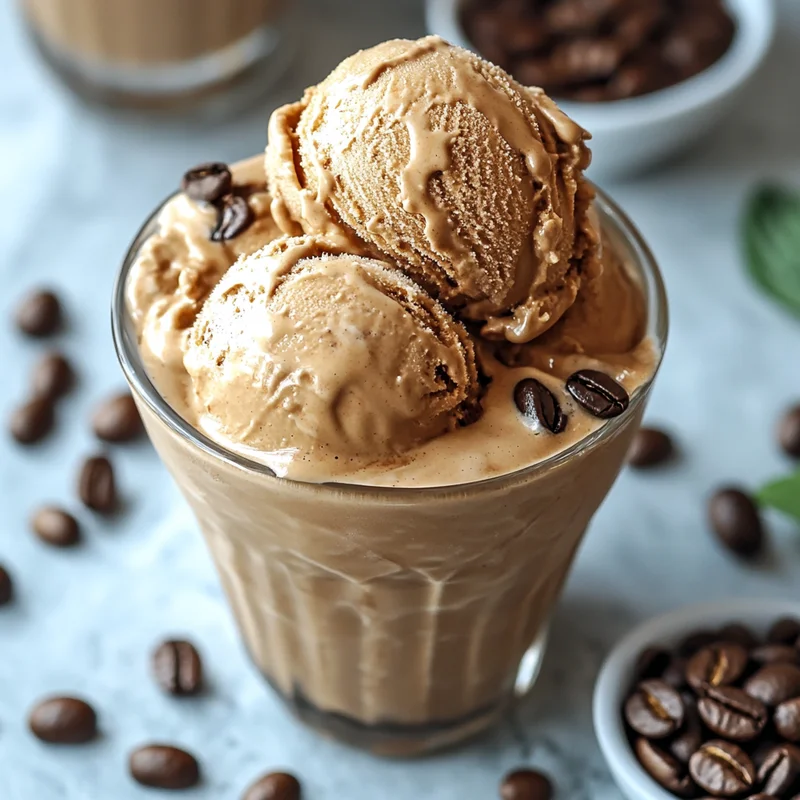
Oh my goodness, friends! If there’s one thing that screams “happy summer day” or just a cozy evening treat, it’s a big scoop of homemade ice cream, right? There’s something so special about making it yourself, and honestly, it feels like a little hug in a bowl. Now, imagine combining that creamy goodness with the rich, bold flavor of cold brew coffee and the tropical dreaminess of coconut milk. Sounds amazing? It is! And guess what? You don’t need any fancy equipment for this one. Seriously, if you can stir and freeze, you can make this absolutely delightful Cold Brew Coconut Milk Ice Cream. It’s dairy-free, vegan, uses just four simple ingredients, and comes together in a flash. Get ready to fall in love!
Why You’ll Love This Recipe
- Crazy Easy: Seriously, just mix and freeze. No churning required!
- Dairy-Free & Vegan: Perfect for those with dietary restrictions or anyone looking for a delicious alternative.
- Only 4 Ingredients: You probably have most of them in your pantry already!
- Rich Coffee Flavor: The cold brew gives it a smooth, deep coffee taste without bitterness.
- Perfectly Sweet & Creamy: The coconut milk provides a lovely texture and the coconut sugar adds a wonderful depth of sweetness.

Ingredients
Here’s what you’ll need for this simple magic:
- 2 cups Full-Fat Coconut Milk: Make sure it’s the full-fat kind from a can for the best creamy texture. Give the can a good shake before opening!
- 1/2 cup Cold Brew Coffee: Use your favorite store-bought or homemade cold brew. The stronger, the better for that coffee punch!
- 1/3 cup Coconut Sugar: I love coconut sugar here for its slightly caramel notes, but you can definitely use other granulated sugars.
- 1 tsp Vanilla Extract: A little splash of vanilla just rounds everything out beautifully.
How to Make It
Get ready for the easiest ice cream recipe ever! It’s almost too simple to be true.
- Get Everything Chilly: Start with your coconut milk and cold brew already chilled in the fridge. This helps everything freeze faster and prevents ice crystals.
- Combine the Goodness: In a medium bowl or even directly in the container you plan to freeze it in, whisk together the cold coconut milk, cold brew coffee, coconut sugar, and vanilla extract. Whisk well until the coconut sugar is mostly dissolved. It might take a minute or two.
- Pour and Cover: Pour the mixture into a freezer-safe container. A loaf pan or a shallow container works great as it helps it freeze faster. Cover the surface directly with plastic wrap (this prevents ice crystals!) and then cover the container with a lid or foil.
- Freeze Away: Pop it into the freezer. For best results and a smoother texture without an ice cream maker, try to stir or whisk the mixture every 30-60 minutes for the first 2-3 hours. This helps break up ice crystals as they form. If you forget or can’t do this, it will still freeze, but might be a bit icier.
- Freeze Until Firm: Let it freeze completely, which usually takes at least 6-8 hours, or preferably overnight, until it’s scoopable.
- Scoop and Enjoy! Let it sit out at room temperature for a few minutes to soften slightly before scooping. Then, dive in and enjoy your homemade cold brew coconut milk ice cream!
Substitutions & Additions
This recipe is super forgiving and a fun base for getting creative!
- Sweetener: Don’t have coconut sugar? Regular granulated sugar, maple syrup (start with a little less, maybe 1/4 cup, and taste), or agave nectar will work. Keep in mind liquid sweeteners might make it slightly softer.
- Coffee: While cold brew is best for its smooth flavor, you could use strongly brewed and completely cooled regular coffee in a pinch.
- Coconut Milk: Other plant-based milks like cashew or almond milk won’t be as creamy. For a non-vegan version, you could use heavy cream, but the freezing process might change slightly.
- Add-Ins: Swirl in some melted vegan chocolate or a little peanut butter during the last hour of freezing. Or fold in some chopped nuts, chocolate chips, or toasted coconut flakes before the final freeze!
Tips for Success
A few little pointers to make sure your ice cream turns out perfectly:
- Chill Everything First: I know I mentioned it, but seriously, starting with cold ingredients makes a difference.
- Whisking is Key (for no-churn): If you want that really smooth texture, don’t skip those hourly stirs in the first few hours of freezing. It incorporates air and breaks up ice crystals.
- Cover it Right: Pressing plastic wrap directly onto the surface of the mixture before covering the container is the best way to prevent a layer of ice from forming on top.
- Give it Time: Don’t rush the final freezing step. Overnight is usually ideal for it to firm up properly.
How to Store It
Keep your delicious cold brew coconut milk ice cream in an airtight freezer-safe container in the freezer. Properly stored, it should stay good for up to 1-2 months, though I doubt it will last that long!
FAQs
Got questions? Let’s tackle a few common ones!
Q: Do I absolutely need an ice cream maker for this recipe?
A: Nope! That’s the beauty of it. It’s specifically designed as a no-churn recipe. Just follow the freezing and stirring steps.
Q: Can I use hot coffee instead of cold brew?
A: Please don’t! You need to use cold brew coffee that has been fully cooled. Hot coffee will mess with the texture and might even curdle the coconut milk, plus it won’t have the same smooth, less acidic flavor profile as cold brew.
Q: Is this recipe truly vegan?
A: Yes, as written, using coconut milk, cold brew coffee, coconut sugar (which is typically vegan), and vanilla extract, this recipe is completely vegan and dairy-free.
Q: My ice cream is too hard to scoop! What did I do wrong?
A: Homemade no-churn ice cream can sometimes freeze quite solid. It’s usually just a matter of letting it sit out at room temperature for 5-10 minutes (or a little longer) before scooping. Running your scoop under hot water can also help!

Easy No-Churn Cold Brew Coconut Milk Ice Cream (Vegan!)
Equipment
- bowl Medium
- Whisk
- Freezer-safe container Loaf pan or shallow container recommended
- Plastic wrap
- Lid or foil For container
- Scoop
Ingredients
Ingredients
- 2 cups Full-Fat Coconut Milk From a can, well-shaken and chilled
- 0.5 cup Cold Brew Coffee Chilled, strong preferred
- 0.33 cup Coconut Sugar Or other granulated sugar
- 1 tsp Vanilla Extract
Instructions
- Start with your coconut milk and cold brew already chilled in the fridge. This helps everything freeze faster and prevents ice crystals.
- In a medium bowl or even directly in the container you plan to freeze it in, whisk together the cold coconut milk, cold brew coffee, coconut sugar, and vanilla extract. Whisk well until the coconut sugar is mostly dissolved. It might take a minute or two.
- Pour the mixture into a freezer-safe container. A loaf pan or a shallow container works great as it helps it freeze faster. Cover the surface directly with plastic wrap (this prevents ice crystals!) and then cover the container with a lid or foil.
- Pop it into the freezer. For best results and a smoother texture without an ice cream maker, try to stir or whisk the mixture every 30-60 minutes for the first 2-3 hours. This helps break up ice crystals as they form. If you forget or can't do this, it will still freeze, but might be a bit icier.
- Let it freeze completely, which usually takes at least 6-8 hours, or preferably overnight, until it's scoopable.
- Let it sit out at room temperature for a few minutes to soften slightly before scooping. Then, dive in and enjoy your homemade cold brew coconut milk ice cream!
Notes
Whisking/stirring every 30-60 minutes during the first 2-3 hours of freezing helps create a smoother texture by breaking up ice crystals.
Covering the surface directly with plastic wrap before the lid/foil prevents ice from forming on top.
Allow sufficient freezing time, preferably overnight.
To store: Keep in an airtight freezer-safe container for up to 1-2 months.
If ice cream is too hard, let it sit at room temperature for 5-10 minutes or run scoop under hot water before scooping.
Do not use hot coffee; use chilled cold brew or strongly brewed and cooled coffee.