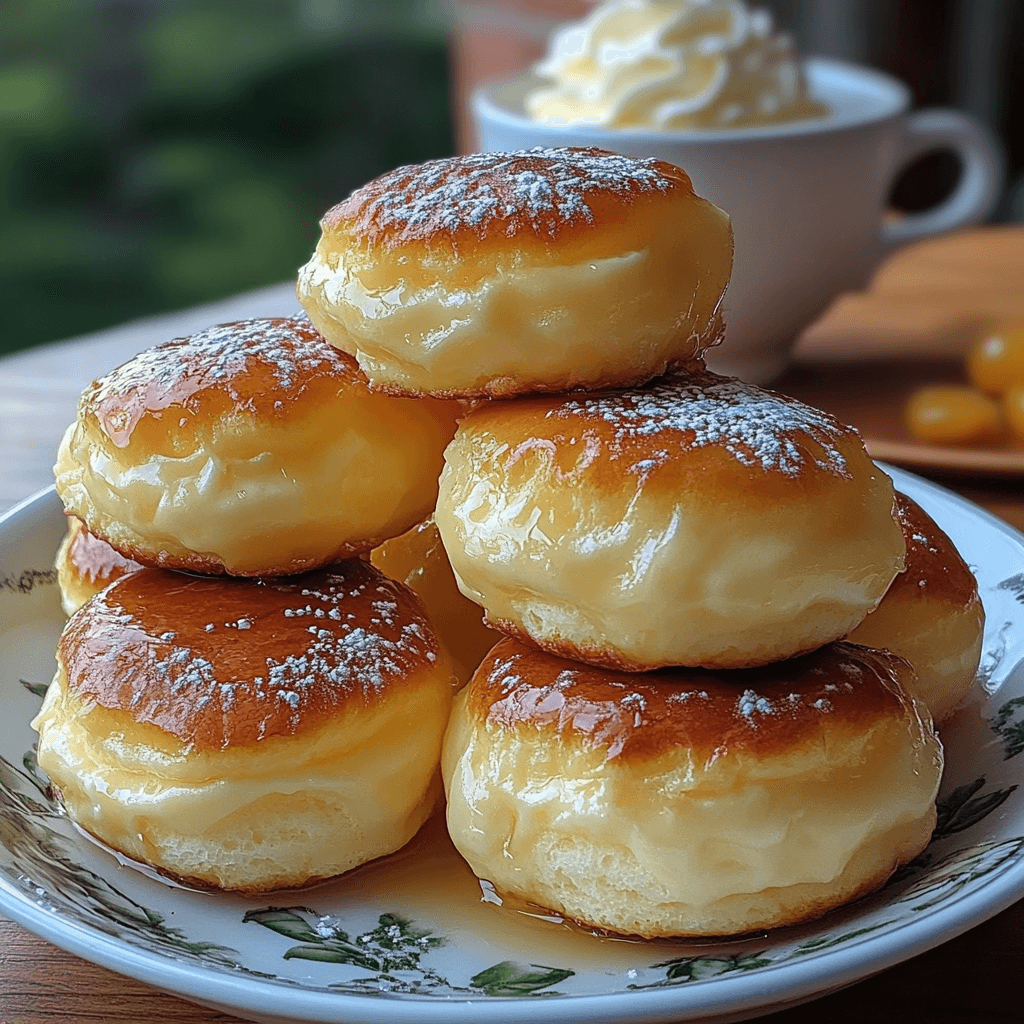
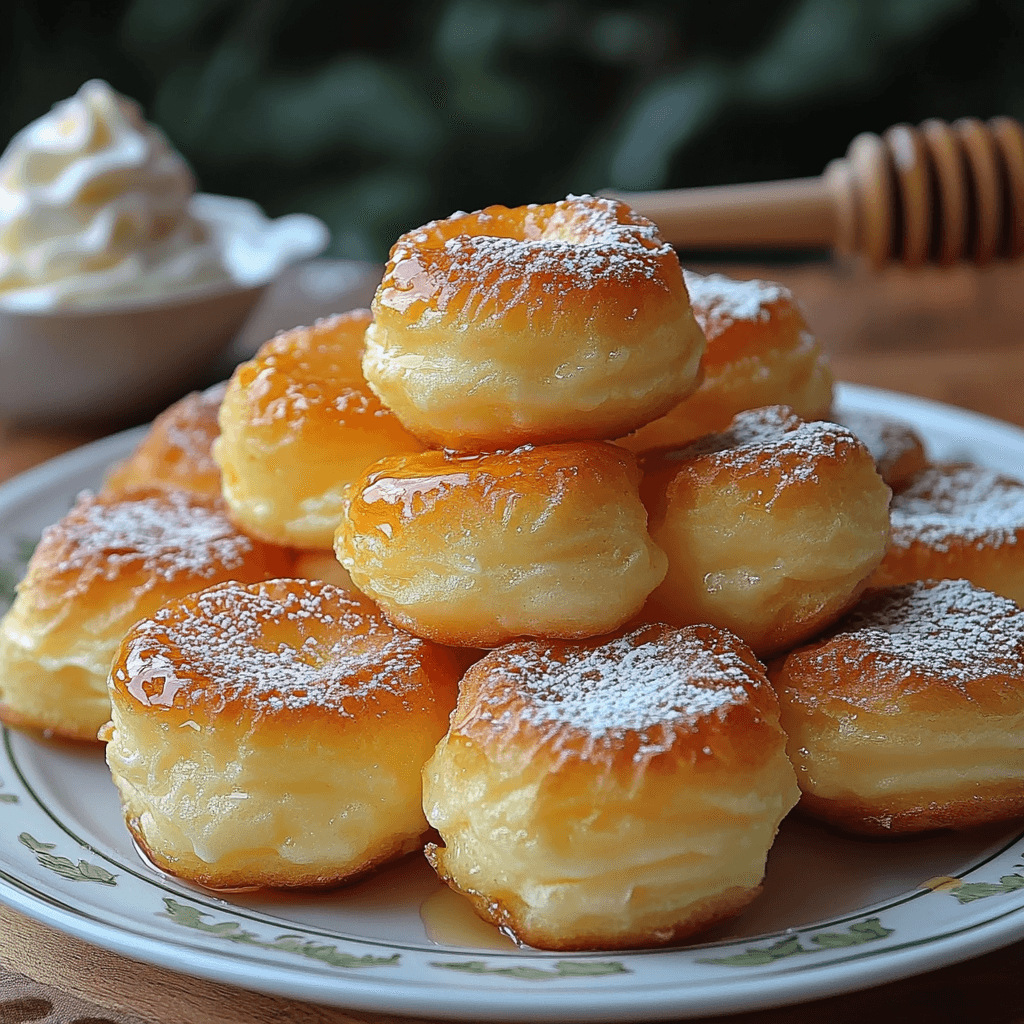
Are you craving a treat that’s both light and indulgent, with a crispy outside and a soft, airy interior? Look no further than Nun’s Puffs! These delectable pastries are the perfect balance of textures and flavors, and when topped with honey, whipped cream, or fresh fruit, they are an irresistible delight. Whether you’re hosting a special event or simply treating yourself, Nun’s Puffs are sure to be a hit. Let’s dive into why these pastries are so loved and how you can make them at home!
Why You’ll Love This “Nun’s Puffs”?
Nun’s Puffs are a classic example of pastry perfection. They feature a unique combination of crispness and fluffiness, offering an addictive bite that melts in your mouth. The outside of each puff is slightly crispy, while the inside is light, airy, and soft, creating a perfect contrast in texture. Drizzled with honey and topped with whipped cream or fresh fruit, these puffs become an even more irresistible treat!
What makes them especially wonderful is how versatile they are. You can serve them as a sweet breakfast, an afternoon snack, or a stunning dessert at a dinner party. With their light texture and sweetness, they pair beautifully with coffee, tea, or a fresh fruit salad. They are incredibly simple to make and don’t require any complex techniques, making them a fantastic option for both beginner and seasoned bakers alike.

What You’ll Need
Making Nun’s Puffs is a breeze with just a few essential ingredients. Here’s what you’ll need to get started:
Ingredients (Makes about 12 puffs):
- 1 stick butter (½ cup) 🧈
- 1 cup milk 🥛
- ¾ cup all-purpose flour 🍞
- 4 eggs 🥚
- ½–1 tablespoon sugar (optional) 🍯
- Sugar for sprinkling ✨
- Honey for serving 🍯
- Whipped cream/fruit (optional, for topping)
These ingredients come together to create a batter that’s rich yet light, which results in a beautifully textured pastry. The optional sugar will add a bit of sweetness to the dough itself, but the real magic happens when you top these puffs with honey and whipped cream or fresh fruit.
Step-by-Step Instructions
Making Nun’s Puffs is an easy and enjoyable process. Follow these simple steps for a successful batch of delicious pastries:
1. Preheat the Oven:
Preheat your oven to 375°F (190°C). Grease or line a muffin tin with paper liners to ensure the puffs don’t stick to the tin and come out easily once baked.
2. Prepare the Dough:
In a medium saucepan, melt the butter and milk together over medium heat. Stir occasionally to ensure the butter melts evenly and the milk heats through. Bring the mixture to a simmer but not a full boil.
Once the milk and butter are heated, add the flour all at once and stir vigorously with a wooden spoon. Continue stirring until the mixture pulls away from the sides of the pan and forms a ball of dough (this should take about 2-3 minutes). This process is crucial because it helps develop the right consistency for your puffs.
3. Add the Eggs:
Remove the pan from heat and let the mixture cool for a minute. This step is important because adding the eggs to hot dough could cause them to cook prematurely. Once the dough has cooled slightly, add the eggs one at a time, mixing well after each addition. The dough will begin to look smooth and glossy as you continue to mix.
At this point, add sugar if you’re using it. Stir the sugar into the dough until it is fully incorporated.
4. Scoop the Dough:
Using a spoon or an ice cream scoop, drop dollops of dough into the prepared muffin tin. Be sure to fill the cups about 2/3 full to give the dough space to rise as it bakes. This will ensure each puff is light and airy.
5. Bake:
Place the muffin tin in the oven and bake for 25–30 minutes, or until the puffs are golden brown and puffed up. The puffs should also be slightly crisp on the outside. Do not open the oven door for the first 20 minutes of baking. This will allow the puffs to rise properly without being disturbed by the cool air from the oven.
6. Serve:
Once baked, remove the puffs from the oven and let them cool slightly. While they’re still warm, sprinkle with sugar for an extra touch of sweetness.
To finish, drizzle with honey and top with whipped cream or fresh fruit, such as berries or sliced peaches, for added flavor and visual appeal. Serve immediately for the best experience!
Tips for Success
Making Nun’s Puffs is a straightforward process, but here are a few tips to ensure your puffs come out perfect every time:
- Stir the Dough Vigorously: When you add the flour to the butter and milk mixture, be sure to stir it well. This helps develop the structure of the dough, which is key for achieving the perfect puff.
- Don’t Overmix the Eggs: Once you add the eggs, mix just until they are fully incorporated. Overmixing can cause the puffs to become too dense.
- Avoid Opening the Oven: For the best rise, avoid opening the oven door during the first 20 minutes of baking. This will allow the puffs to stay warm and keep their puffed shape.
- Serve While Warm: Nun’s Puffs are best enjoyed fresh and warm. The honey and whipped cream will melt slightly, adding to the fluffy texture and flavor.
Variations to Try
Nun’s Puffs are a wonderfully versatile treat. While they are delicious on their own, there are plenty of ways to customize them. Here are a few fun variations to try:
- Chocolate Drizzle: For a more decadent treat, drizzle some melted chocolate over the top of the puffs instead of or in addition to the honey.
- Berry Compote: Instead of fresh fruit, make a quick berry compote by simmering mixed berries with sugar. Spoon the compote over the puffs for a tangy contrast to the sweetness.
- Lemon Zest: Add some lemon zest to the dough for a fresh citrus flavor. This pairs especially well with the honey drizzle.
- Spices: Add a pinch of cinnamon or nutmeg to the dough for a warm, spiced flavor. This variation is perfect for fall or winter.
- Nuts: Top the Nun’s Puffs with chopped pistachios or almonds for a bit of crunch and added flavor.
Storing and Reheating
Nun’s Puffs are best enjoyed fresh, but if you have leftovers, don’t worry! You can store them for later.
How to Store:
- Let the puffs cool completely before storing them in an airtight container.
- At room temperature: They will stay fresh for up to 2 days.
- In the refrigerator: You can store them in the fridge for up to 5 days, but they may lose some of their crispness.
How to Reheat:
- In the oven: To restore some crispiness, reheat the puffs in the oven at 350°F (175°C) for about 5 minutes.
- In the microwave: For a quick reheat, microwave the puffs for 10-15 seconds. They won’t be as crispy as when freshly baked, but they will still be delicious.
Frequently Asked Questions
Can I make the dough ahead of time?
Yes! You can prepare the dough up to 24 hours in advance and store it in the refrigerator. Just scoop the dough into the muffin tin before baking, and they’ll bake up perfectly.
Can I freeze Nun’s Puffs?
Yes, Nun’s Puffs freeze well. After baking, let them cool completely and place them in a single layer on a baking sheet. Once frozen, transfer them to a freezer-safe bag. When you’re ready to enjoy them, simply reheat in the oven at 350°F (175°C) for 10-15 minutes.
Can I make these without eggs?
Eggs are an essential ingredient in Nun’s Puffs to give them structure and lift. Unfortunately, there isn’t a good substitute for eggs in this recipe, but you can experiment with egg replacers if needed.
The Final Word
Nun’s Puffs are a perfect balance of crispiness and fluffiness, and they make an ideal treat for almost any occasion. Whether you’re looking for a sweet snack, a show-stopping dessert, or something special for a breakfast gathering, these pastries deliver on every front. With simple ingredients, easy-to-follow instructions, and endless topping possibilities, Nun’s Puffs are sure to become a favorite in your baking repertoire.
So, what are you waiting for? Gather your ingredients, preheat the oven, and get ready to enjoy these delicious, airy pastries with a touch of honey and whipped cream. They’re a treat your friends and family won’t soon forget!