Introduction
Hey there, friend! Let’s talk cookies, shall we? There’s just something so special about baking up a batch, especially when it’s for a holiday. My kitchen gets extra cozy when I’m whipping up treats that bring back happy memories of backyard BBQs, fireworks popping, and gathering with loved ones. And if there’s one cookie that screams “celebration” and “fun,” it’s a crinkle cookie!
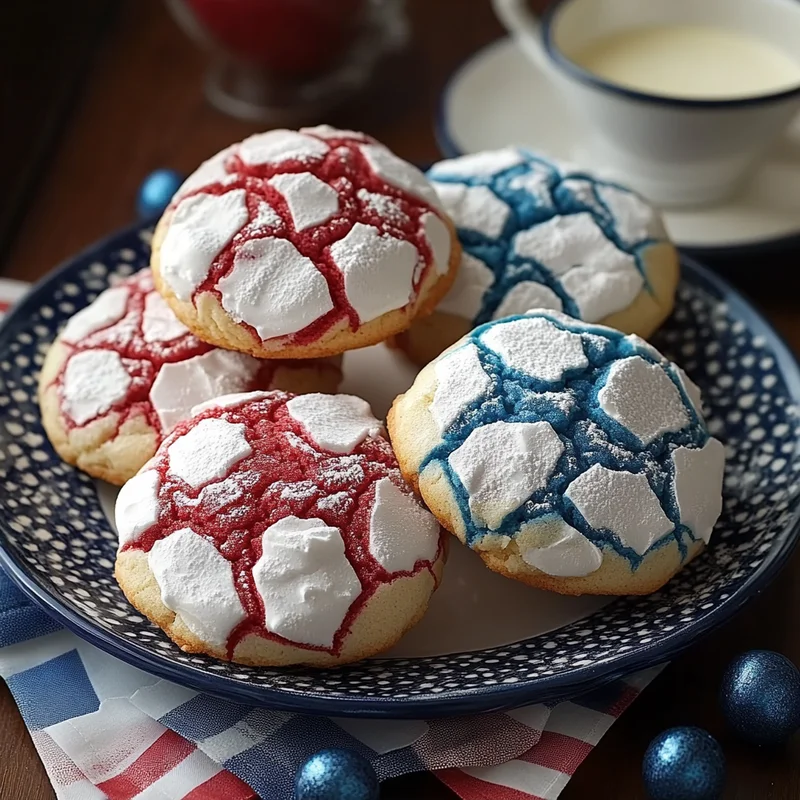
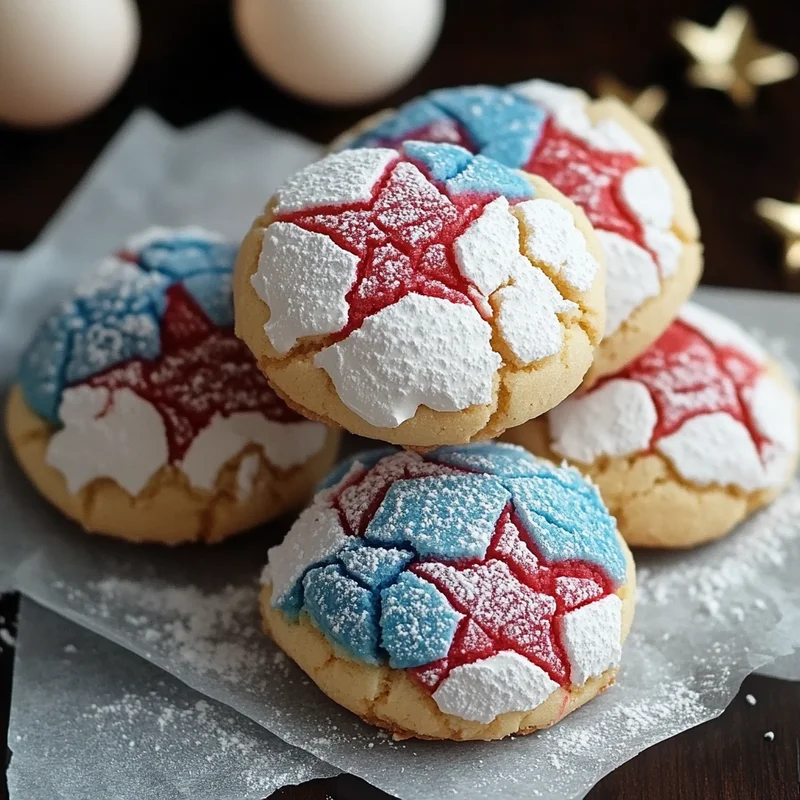
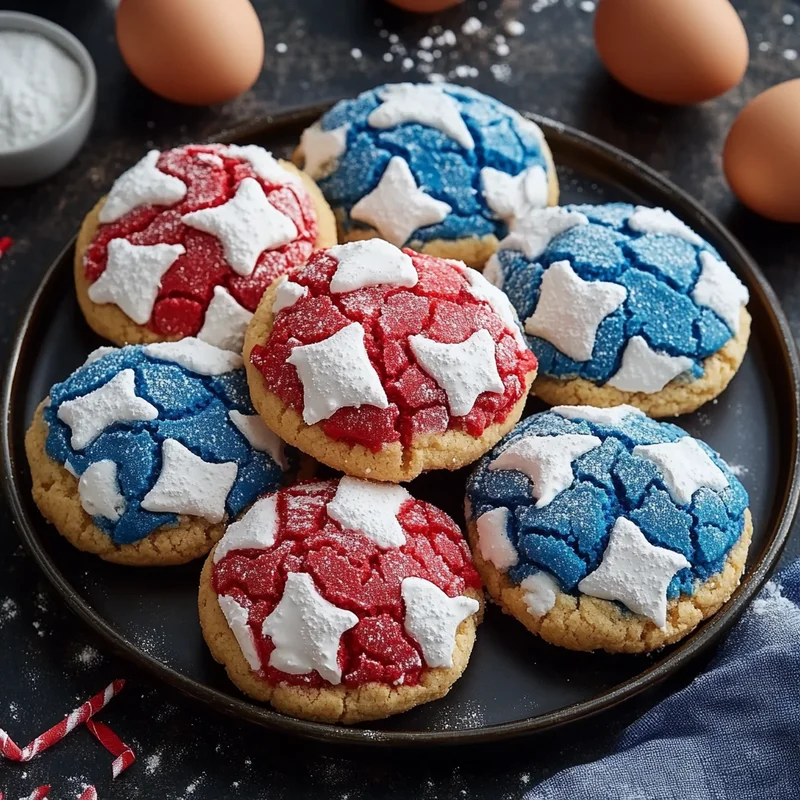
But these aren’t just any crinkle cookies. We’re making them red, white, and blue for a super fun patriotic twist! Perfect for the 4th of July, Memorial Day, or really, any day you want to feel a little extra festive. This recipe is wonderfully simple, comes together quickly, and the result is this stunning, crinkly cookie that’s soft, buttery, and oh-so-delicious. Trust me, you’re going to want these in your cookie jar all summer long.
Why You’ll Love This Recipe
- Fast: No crazy complicated steps or endless waiting around.
- Easy: Perfect for beginners or baking with little helpers.
- Giftable: They look so impressive, they make the perfect homemade gift!
- Crowd-pleasing: Who can resist a soft, sweet, patriotic cookie?
Ingredients
Here’s what you’ll need to gather from your pantry. Simple, classic stuff!
- 2 cups All-purpose flour: Our reliable base for these tender cookies.
- 2 tsp Baking powder: This helps give them a nice lift and contributes to the crinkle.
- 1/2 tsp Salt: Just a pinch to balance out the sweetness.
- 1/2 cup Unsalted butter, room temperature: This is key! Softened butter creams beautifully and gives us that lovely rich base.
- 1 cup Granulated sugar: For sweetness and that classic cookie texture.
- 2 large Eggs: Helps bind everything together.
- 2 tsp Vanilla extract: Always adds that comforting, classic cookie flavor. Use a good quality one if you can!
- Red gel food coloring: Gel coloring is best for vibrant color without adding too much liquid.
- Blue gel food coloring: Same reason as the red!
- 1 cup Powdered sugar: This is what gives us that beautiful, stark white crinkle coating!
How to Make It
Okay, let’s get baking! Follow these steps and you’ll have a batch of patriotic perfection in no time.
First things first, preheat your oven to 350°F (175°C) and line baking sheets with parchment paper. This makes clean-up a breeze!
In a medium bowl, whisk together the flour, baking powder, and salt. Set this aside for a moment.
Now, in a large bowl (or the bowl of your stand mixer), cream together the softened butter and granulated sugar until it’s light and fluffy. This should take a couple of minutes. Make sure that butter is truly soft! If it’s too cold, your cookies won’t have the best texture.
Beat in the eggs one at a time, then stir in the vanilla extract. Scrape down the sides of the bowl to make sure everything is getting mixed in.
Gradually add the dry ingredients to the wet ingredients, mixing on low speed just until everything is combined. Don’t overmix! We want tender cookies.
Now for the fun, patriotic part! Divide the dough into two equal portions. Leave one portion as it is (this will be our white!). Add the red gel food coloring to one portion and the blue gel food coloring to the other. Start with a little bit of coloring and add more until you get the vibrant shades you like. I usually use the tip of a toothpick for gel coloring and swirl it in.
Cover both bowls of dough and chill them in the refrigerator for at least 1-2 hours. This step is important! Chilling makes the dough much easier to handle and helps the cookies hold their shape and crinkle properly.
Once chilled, it’s time to roll! Put your powdered sugar in a shallow bowl. Now for the little twist: take small pieces of each color dough (white, red, and blue – or just red and blue for a stronger look!), about a teaspoon or so of each, and gently roll them together between your palms to form a little ball. You don’t need to swirl them perfectly; just let the colors blend a little. Roll each combined ball generously in the powdered sugar, making sure it’s completely coated. The thicker the coat, the more defined the crinkle!
Place the coated balls about 2 inches apart on your prepared baking sheets.
Bake for 8-10 minutes, or until the edges are set but the centers still look soft. They shouldn’t get much color on top. As they bake, they’ll spread and the powdered sugar coating will crack, creating those signature crinkles!
Let the cookies cool on the baking sheet for a few minutes before transferring them to a wire rack to cool completely. Admire those beautiful crinkles!
Substitutions & Additions
Want to mix things up? Here are a few ideas:
- Colors: Swap the red and blue for other colors! Green and red for Christmas, pastels for Easter, or team colors for game day!
- Extracts: Instead of or in addition to vanilla, try a touch of almond extract, lemon extract, or even a little peppermint extract for a festive twist.
- Sprinkles: You could gently press some patriotic sprinkles into the tops of the balls before baking (but after rolling in powdered sugar) for extra sparkle.
- Chocolate: Add a handful of white chocolate chips to the dough for extra richness, though this might slightly affect the crinkle.
Tips for Success
Here are a few pro-tips to make sure your cookies turn out perfectly:
- Room Temperature Butter: I can’t stress this enough! Butter that’s too cold won’t cream properly, and melted butter will make your dough greasy. It should be soft enough to easily indent with your finger.
- Chill Time is Key: Don’t skip or shorten the chilling! It makes the dough firm enough to roll and essential for the crinkle effect.
- Roll Liberally in Powdered Sugar: Be generous! The thick coating is what creates the beautiful crackle when the cookie spreads.
- Don’t Overbake: These cookies are best when they are soft and slightly chewy. Pull them out when the edges are set but the tops still look a little soft.
- Prep Ahead: You can make the dough (even colored!) and chill it for up to 2-3 days before rolling and baking. Perfect for getting a head start!
How to Store It
Once completely cooled, store these patriotic crinkle cookies in an airtight container at room temperature. They’ll stay nice and fresh for about 3-5 days. If you stack them, you might lose a little of the powdered sugar coating, so you can place a sheet of parchment paper between layers if you like.
FAQs
Got questions? I’ve got answers!
Why do they crinkle?
The crinkle effect happens because the outside of the cookie ball, coated thickly in powdered sugar, sets faster than the inside while baking. As the inside continues to spread, it pushes through the set, sugary shell, causing it to crackle and create those beautiful fissures.
Can I use liquid food coloring?
While you can use liquid food coloring, I highly recommend gel coloring for this recipe. Liquid coloring can add too much moisture to the dough, potentially affecting the texture, and you need more of it to get vibrant colors.
How long do I need to chill the dough?
At least 1-2 hours is best. If you’re short on time, pop it in the freezer for about 30-40 minutes, keeping a close eye on it. The dough should be firm enough to easily roll into balls without being sticky.
Can I freeze the dough?
Yes! You can freeze the dough (colored or plain) wrapped tightly in plastic wrap and placed in a freezer bag for up to 3 months. Thaw it in the refrigerator overnight before rolling and baking. You can also roll the balls, coat them in powdered sugar, and freeze them on a baking sheet. Once frozen, transfer to a freezer bag. Bake from frozen, adding a minute or two to the baking time.

Butter-Rich Red, White, and Blue Patriotic Crinkle Cookies
Equipment
- Medium bowl
- Large bowl or the bowl of your stand mixer
- Stand Mixer optional
- Baking sheets
- Parchment paper for lining baking sheets
- shallow bowl for powdered sugar
- Wire rack for cooling
Ingredients
Dough
- 2 cups All-purpose flour Our reliable base for these tender cookies.
- 2 tsp Baking powder This helps give them a nice lift and contributes to the crinkle.
- 0.5 tsp Salt Just a pinch to balance out the sweetness.
- 0.5 cup Unsalted butter room temperature: This is key! Softened butter creams beautifully and gives us that lovely rich base.
- 1 cup Granulated sugar For sweetness and that classic cookie texture.
- 2 large Eggs Helps bind everything together.
- 2 tsp Vanilla extract Always adds that comforting, classic cookie flavor. Use a good quality one if you can!
- Red gel food coloring Gel coloring is best for vibrant color without adding too much liquid.
- Blue gel food coloring Same reason as the red!
- 1 cup Powdered sugar This is what gives us that beautiful, stark white crinkle coating!
Instructions
- Preheat your oven to 350°F (175°C) and line baking sheets with parchment paper. This makes clean-up a breeze!
- In a medium bowl, whisk together the flour, baking powder, and salt. Set this aside for a moment.
- Now, in a large bowl (or the bowl of your stand mixer), cream together the softened butter and granulated sugar until it's light and fluffy. This should take a couple of minutes. Make sure that butter is truly soft! If it's too cold, your cookies won't have the best texture.
- Beat in the eggs one at a time, then stir in the vanilla extract. Scrape down the sides of the bowl to make sure everything is getting mixed in.
- Gradually add the dry ingredients to the wet ingredients, mixing on low speed just until everything is combined. Don't overmix! We want tender cookies.
- Now for the fun, patriotic part! Divide the dough into portions for coloring (e.g., into three portions). Leave one portion as it is (this will be our white!). Add the red gel food coloring to one portion and the blue gel food coloring to another. Start with a little bit of coloring and add more until you get the vibrant shades you like. I usually use the tip of a toothpick for gel coloring and swirl it in.
- Cover the bowls of dough and chill them in the refrigerator for at least 1-2 hours. This step is important! Chilling makes the dough much easier to handle and helps the cookies hold their shape and crinkle properly.
- Once chilled, it's time to roll! Put your powdered sugar in a shallow bowl.
- Now for the little twist: take small pieces of each color dough (white, red, and blue – or just red and blue for a stronger look!), about a teaspoon or so of each, and gently roll them together between your palms to form a little ball. You don't need to swirl them perfectly; just let the colors blend a little.
- Roll each combined ball generously in the powdered sugar, making sure it's completely coated. The thicker the coat, the more defined the crinkle!
- Place the coated balls about 2 inches apart on your prepared baking sheets.
- Bake for 8-10 minutes, or until the edges are set but the centers still look soft. They shouldn't get much color on top. As they bake, they'll spread and the powdered sugar coating will crack, creating those signature crinkles!
- Let the cookies cool on the baking sheet for a few minutes before transferring them to a wire rack to cool completely. Admire those beautiful crinkles!
Notes
- Use room temperature butter; too cold won't cream, melted makes dough greasy.
- Chill time (at least 1-2 hours, up to 2-3 days) is essential for handling and crinkle effect. You can also freeze dough for up to 3 months.
- Roll liberally in powdered sugar for a defined crinkle.
- Don't overbake; cookies should be soft and slightly chewy.
- Dough can be prepped ahead and chilled. Substitutions & Additions:
- Swap colors for other holidays or themes.
- Try almond, lemon, or peppermint extract instead of or with vanilla.
- Add patriotic sprinkles before baking.
- Add white chocolate chips for richness (may affect crinkle slightly). Storing:
- Store cooled cookies in an airtight container at room temperature for 3-5 days. Freezing:
- Freeze dough (colored or plain) wrapped tightly for up to 3 months; thaw in fridge overnight.
- Freeze rolled, coated balls on a baking sheet, then transfer to a freezer bag. Bake from frozen, adding 1-2 minutes to time.