Introduction
Hey there, fellow food lovers! Do you ever feel like your salads, tacos, or sandwiches are missing just a little something? That little pop of bright, tangy flavor that wakes up your taste buds? Well, let me tell you, these quick and easy refrigerator pickled radishes are exactly that something! Growing up, I always loved when my grandma would pull out a jar of something homemade from the fridge – it just felt special. Making your own pickled veggies might sound intimidating, but trust me, it’s one of the simplest kitchen wins you can achieve. You don’t need any fancy canning equipment or hours spent over a hot stove. Just a few simple ingredients and about 15 minutes of your time, and you’ll have a jar of these beautiful, crunchy, slightly spicy pickled radishes ready to elevate anything you put them on. They are seriously a game-changer!
Why You’ll Love This Recipe
- Fast: You can have a batch ready to chill in under 15-20 minutes.
- Easy: No special skills or equipment required, just basic kitchen tools.
- Giftable: Pack them in a pretty jar and you’ve got a thoughtful, homemade gift.
- Crowd-pleasing: Add them to a charcuterie board, serve alongside BBQ, or sprinkle on tacos – everyone loves that tangy crunch!
- Versatile: They pair well with so many different dishes, adding color and flavor.
Ingredients
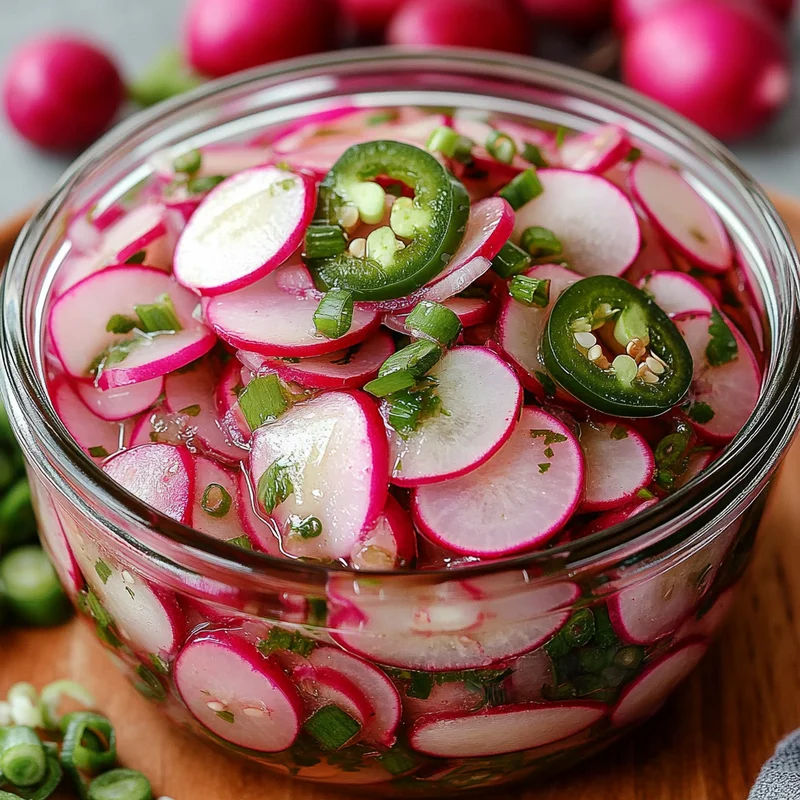
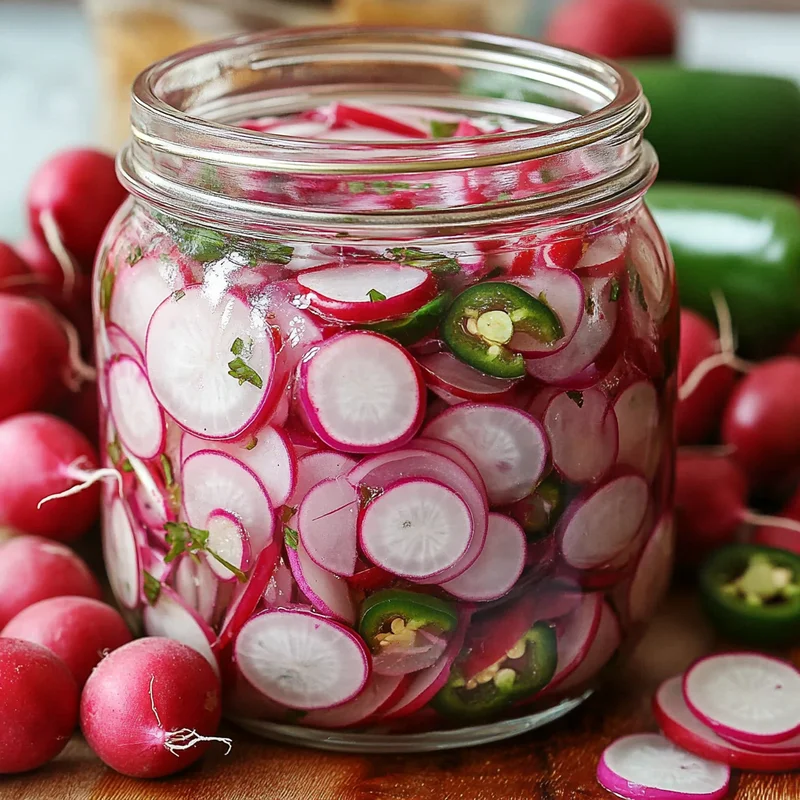
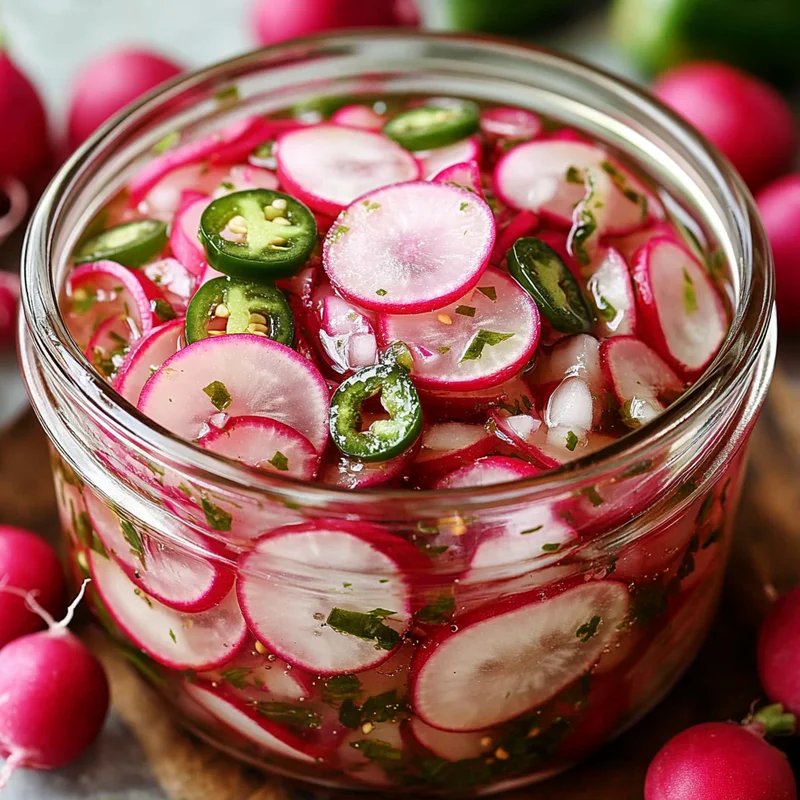
- ½ jalapeño pepper, thinly sliced: This adds just a hint of heat, but you can totally skip it if you prefer no spice! I like leaving the seeds in for a little extra kick, but feel free to remove them.
- 6 cups radishes, sliced into rounds: Look for firm, vibrant radishes. Give them a good wash and trim off the tops and bottoms. Slicing them evenly helps them pickle consistently.
- 2 cups red onion, thinly sliced: Red onion adds another layer of flavor and gorgeous color to the jar.
- 2 ½ cups rice wine vinegar: This is my go-to for a clean, mild tang that lets the radish flavor shine.
- 2 cups water: To dilute the vinegar just enough.
- ½ cup sugar: Don’t worry, this isn’t just for sweetness! It helps balance the acidity of the vinegar.
- 2 teaspoons sea salt: Salt is crucial for flavor and helps draw out some moisture from the veggies.
How to Make It
Alright, let’s get pickling! It’s seriously a breeze.
- First things first, get your radishes and red onion ready. Wash those radishes well and trim off the tops and tails. Then, slice both the radishes and the red onion thinly. You can use a sharp knife or, if you have one, a mandoline for really even slices (just be super careful!).
- Next, slice up that jalapeño if you’re using it. Remember, thin slices are best.
- Grab some clean jars. Wide-mouth jars work best for packing the veggies in and getting them out later. Start layering your sliced radishes, red onion, and jalapeño slices into your clean jars. Pack them in relatively snugly, but don’t cram them so tight that the brine can’t get around them.
- Now, let’s make the brine. In a medium saucepan, combine the rice wine vinegar, water, sugar, and sea salt. Place the saucepan over medium heat.
- Stir the mixture constantly until the sugar and salt are completely dissolved. This only takes a few minutes. You don’t need to boil the heck out of it, just warm it enough to dissolve the solids.
- Once the sugar and salt are dissolved, remove the pan from the heat. Carefully pour the hot brine over the veggies you packed into the jars. Make sure the brine completely covers all the vegetables. If they’re floating a bit, you can gently press them down with a spoon or a small weight if you have one, just to keep them submerged.
- Let the jars sit at room temperature for about 15-20 minutes to cool down a bit.
- Once they’re cool enough to handle, put lids on the jars and transfer them to the refrigerator.
- Now comes the hardest part: waiting! For the best flavor, let them pickle in the fridge for at least 2-3 hours before you start snacking. They’ll be even better after 24 hours!
See? I told you it was easy! Now you have these beautiful, crunchy, tangy radishes ready to jazz up your meals.
Substitutions & Additions
This recipe is super flexible! Feel free to play around and make it your own.
- Vinegar: Don’t have rice wine vinegar? You can substitute with apple cider vinegar or even distilled white vinegar, though the flavor will be a bit sharper.
- Sugar: Honey or maple syrup can work in place of sugar, but they will change the flavor profile slightly.
- Spices: Want to add more complexity? Toss in a few black peppercorns, mustard seeds, coriander seeds, a sprig of fresh dill, or a clove of smashed garlic into the jars before adding the brine.
- Heat Level: Adjust the amount of jalapeño or try a different pepper like a serrano for more heat, or omit it entirely.
- Other Veggies: This brine works wonderfully with other quick-pickling candidates like thinly sliced cucumbers, carrots, or even cauliflower florets.
Tips for Success
- Slice Uniformly: Try to slice your radishes and onions to a similar thickness so they pickle at the same rate. About 1/8 inch thick is usually perfect.
- Use Clean Jars: While not traditional canning, using clean jars is still important for refrigerator pickles to help them last longer. I just run mine through the dishwasher.
- Ensure Veggies are Submerged: Make sure all the veggies are under the brine. Exposure to air can cause them to discolor or spoil faster.
- Patience is Key: They’re edible after a couple of hours, but the flavors really meld and develop after 24 hours in the fridge.
- Taste the Brine (Before Adding to Jars): Once your sugar and salt are dissolved, you can taste the brine and adjust if needed. Want it sweeter? Add a little more sugar. Want it tangier? A splash more vinegar.
How to Store It
These are refrigerator pickles, which means they must be stored in the refrigerator! Keep the jars sealed tightly with lids.
Stored properly in the fridge, these pickled radishes will last for several weeks, typically 3-4 weeks. Always use a clean fork or spoon when taking them out of the jar to avoid introducing bacteria.
You’ll know if they’ve gone bad if they develop mold, smell off, or the brine becomes cloudy and slimy (beyond just being pickling liquid). But honestly, they’re so delicious, they usually get eaten long before that!
FAQs
Got questions? Let’s tackle a few common ones!
Q: How long do I have to wait before eating them?
A: You can taste them after about 2-3 hours, but the best flavor and texture develop after at least 24 hours in the fridge.
Q: How long do they last in the refrigerator?
A: Stored properly, they typically last for 3-4 weeks in the fridge.
Q: What can I eat pickled radishes with?
A: Oh, so many things! Try them on tacos (especially fish or pork), salads, sandwiches, burgers, avocado toast, grain bowls, or alongside grilled meats or BBQ. They’re also great on a cheese or charcuterie board!
Q: Can I omit the jalapeño?
A: Absolutely! The recipe is just as delicious without the heat if you prefer.

Quick & Easy Refrigerator Pickled Radishes
Equipment
- Sharp knife
- Mandoline (optional)
- Clean jars wide-mouth jars recommended
- Medium saucepan
- Spoon
Ingredients
Hauptzutaten
- 0.5 jalapeño pepper thinly sliced; adjust heat level or omit
- 6 cups radishes sliced into rounds
- 2 cups red onion thinly sliced
- 2.5 cups rice wine vinegar
- 2 cups water
- 0.5 cup sugar
- 2 teaspoons sea salt
Instructions
- First things first, get your radishes and red onion ready. Wash those radishes well and trim off the tops and tails. Then, slice both the radishes and the red onion thinly. You can use a sharp knife or, if you have one, a mandoline for really even slices (just be super careful!).
- Next, slice up that jalapeño if you're using it. Remember, thin slices are best.
- Grab some clean jars. Wide-mouth jars work best for packing the veggies in and getting them out later. Start layering your sliced radishes, red onion, and jalapeño slices into your clean jars. Pack them in relatively snugly, but don't cram them so tight that the brine can't get around them.
- Now, let's make the brine. In a medium saucepan, combine the rice wine vinegar, water, sugar, and sea salt.
- Stir the mixture constantly until the sugar and salt are completely dissolved. This only takes a few minutes. You don't need to boil the heck out of it, just warm it enough to dissolve the solids.
- Once the sugar and salt are dissolved, remove the pan from the heat. Carefully pour the hot brine over the veggies you packed into the jars. Make sure the brine completely covers all the vegetables. If they're floating a bit, you can gently press them down with a spoon or a small weight if you have one, just to keep them submerged.
- Let the jars sit at room temperature for about 15-20 minutes to cool down a bit.
- Once they're cool enough to handle, put lids on the jars and transfer them to the refrigerator.
- Now comes the hardest part: waiting! For the best flavor, let them pickle in the fridge for at least 2-3 hours before you start snacking. They'll be even better after 24 hours!