
Introduction
Hey there, my friend! Let’s talk about bringing a little bit of winter magic right into your kitchen, no matter the season. Remember those snowy days growing up? Building snowmen was always the best part! Well, I’ve got a recipe today that captures that same simple joy, but you can pack it right into a lunchbox or serve it up for a fun snack. We’re making the most adorable Snowman Rice Balls, complete with little veggie accessories. Trust me, these are ridiculously easy, super quick, and guaranteed to make anyone smile when they open their lunch!
Why You’ll Love This Recipe
- Fast: These come together in a flash, perfect for busy mornings.
- Easy: Seriously simple steps, no fancy cooking required!
- Giftable: Pack them in a bento box for a special lunch treat for kids (or kids at heart!).
- Crowd-pleasing: Who doesn’t love a cute snowman, especially one you can eat?

Ingredients
Gather ’round, here’s what you’ll need to build your little edible snowmen:
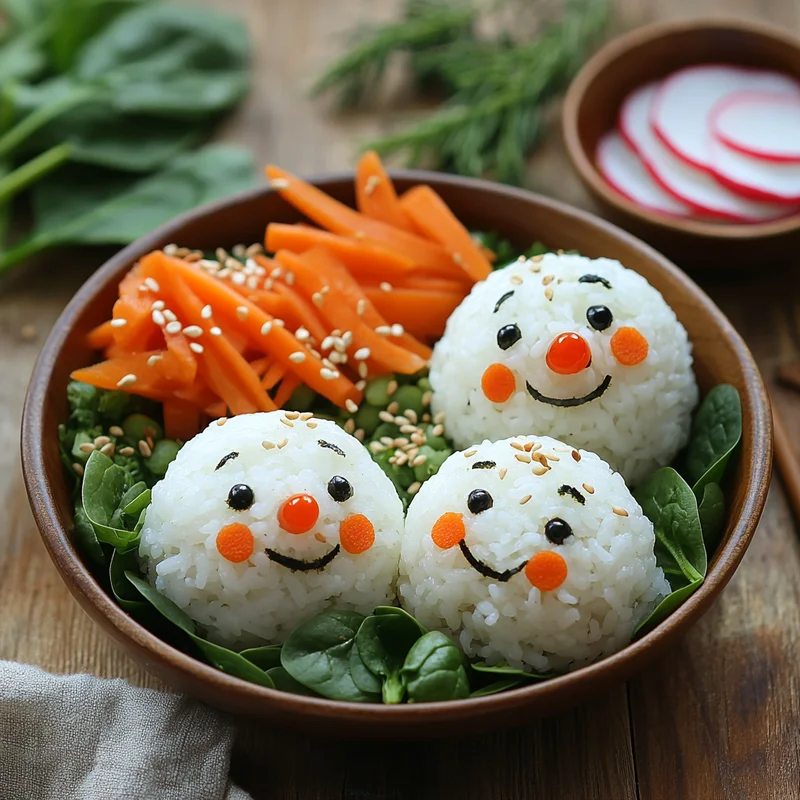
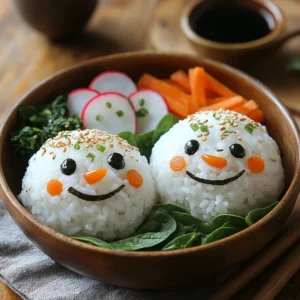
- Cooked Sushi Rice: This is your snowman’s body! Sushi rice works best because it’s nice and sticky, which helps it hold its shape. Make sure it’s cooled slightly so you can handle it.
- Spinach: A little bit of green for scarves, buttons, or maybe tiny leaf arms.
- Carrot: Perfect for those classic snowman noses, or maybe little buttons.
- Nori: Those sheets of dried seaweed are your go-to for eyes, mouths, and little button details.
- Pickled Radish: This often comes in bright colors like pink or yellow, making it fantastic for colorful scarves, hats, or fun accents.
How to Make It
Alright, let’s get sculpting! It’s like playing with edible playdough!
1. First things first, you’ll want to shape your cooled sushi rice. Wet your hands just a little bit – this helps prevent the rice from sticking everywhere. Take a small amount of rice and gently roll or shape it into round balls for the snowman’s body. You’ll usually need two balls per snowman, one slightly larger for the bottom and one smaller for the head. Gently press them together.
2. Now for the fun part – decorations! You’ll use your nori, carrot, spinach, and pickled radish here. You can use small sharp knives or even tiny craft punches (just make sure they are clean and only used for food!) to cut out shapes. Think little circles for eyes and buttons from the nori, tiny triangles from the carrot for noses, thin strips of spinach or pickled radish for scarves, and maybe little rounds from the radish for hats or more buttons. Get creative!
3. Time to bring your snowman to life! Carefully place the cut shapes onto your rice ball bodies. The stickiness of the sushi rice should help them adhere, but if you have trouble, a tiny dab of rice or even a speck of water can act as glue. Arrange the eyes, nose, mouth, buttons, and accessories like scarves or hats. Step back and admire your adorable edible art!
Substitutions & Additions
Want to mix it up or use what you have? No problem!
- Other Veggies: Tiny pieces of red bell pepper for buttons, small dots of corn for a smile, or cucumber skin for details can work.
- Cheese or Ham: Use cookie cutters to make small shapes from thin slices of cheese or ham for more robust decorations.
- Sesame Seeds: Black sesame seeds can make quick and easy eyes.
- Seasoning the Rice: You can lightly season the rice with a tiny bit of rice vinegar, sugar, and salt (like traditional sushi rice seasoning) if you like, but plain is fine too!
Tips for Success
Making these is simple, but a couple of tricks can make it even smoother:
- Keep Hands Damp: Remember that tip about wetting your hands? It’s the best way to keep rice from sticking to you more than to itself!
- Press Gently: When shaping the rice, don’t press too hard, or the rice will get mushy. Gentle pressure is all you need to form the balls.
- Prep Decorations First: It’s easier to cut out all your little shapes before you start shaping the rice. Have them ready on a plate so you can just grab and place.
- Get Kids Involved: This is a fantastic activity for little hands! Let them help shape the rice or place the decorations.
How to Store It
These little guys are best enjoyed fresh, but you can definitely pack them for a lunch later the same day.
If packing for a bento, make sure the bento box is kept cool, ideally in an insulated lunch bag with an ice pack. Rice shouldn’t be left at room temperature for too long. They are best eaten within 3-4 hours if not kept cool, or up to the end of the school/work day if properly chilled. Keep them separated from really wet foods in the bento.
FAQs
Got questions? I’ve got answers!
Q: What kind of rice has to be used?
A: Sushi rice is ideal because of its stickiness, which helps the shapes hold. Medium-grain white rice is the next best option if you can’t find sushi rice.
Q: Can I make the rice the night before?
A: Yes, you can cook the rice ahead of time and store it in the fridge. Let it come closer to room temperature or warm it slightly (then cool it) before shaping, as cold rice can be harder to mold.
Q: How do the decorations stay on?
A: The natural stickiness of the sushi rice usually does the trick! For stubborn pieces, a tiny dab of rice or a drop of water can help them adhere.
Q: I don’t have pickled radish. What else can I use for color?
A: No problem! Thin strips of red bell pepper, blanched asparagus, or even tiny pieces of colorful fruit leather (if you don’t mind a sweet element) can work for colorful details.
Snowman Rice Balls (Bento Box Ready!)
Equipment
- small sharp knives
- tiny craft punches use clean, food-only punches
Ingredients
Main Ingredients
- Cooked Sushi Rice Cooled slightly
- Spinach
- Carrot
- Nori sheets of dried seaweed
- Pickled Radish
Instructions
- First, shape the cooled sushi rice. Wet your hands slightly to prevent sticking. Take a small amount of rice and gently roll or shape it into round balls. You'll need two balls per snowman: one slightly larger for the bottom and one smaller for the head. Gently press them together.
- Decorate using nori, carrot, spinach, and pickled radish. Use small sharp knives or tiny craft punches to cut out shapes like circles for eyes and buttons (from nori), tiny triangles for noses (from carrot), thin strips for scarves (from spinach or pickled radish), and little rounds for hats or buttons (from radish).
- Carefully place the cut shapes onto the rice ball bodies. The stickiness of the sushi rice should help them adhere. If needed, use a tiny dab of rice or a speck of water as glue. Arrange the eyes, nose, mouth, buttons, and accessories.