
Introduction
Oh, hello there, cookie lover! Do you ever get that craving for something rich, chocolatey, and just plain delightful? Something that feels like a warm hug from the inside out? Well, get ready, because I’ve got a recipe that’s going to become your new best friend: Two-Bite Nutella Chocolate Cookies. These little gems are ridiculously easy to whip up, and the flavor is just out of this world. I remember the first time I made these, and my kitchen filled with the most incredible aroma. It was pure magic! And the best part? They’re perfectly sized for a satisfying, guilt-free treat (or maybe not so guilt-free, but who’s counting?).
Why You’ll Love This Recipe
- Fast: From mixing bowl to baked cookie in under 30 minutes!
- Easy: Seriously, if you can stir, you can make these.
- Giftable: Package them up beautifully for a homemade gift that’s always a hit.
- Crowd-pleasing: Whether it’s a bake sale, a party, or just family movie night, everyone adores these cookies.
Ingredients
Let’s gather our goodies. You probably have most of these in your pantry already!
- 1 1/2 cups all-purpose flour: The base of our cookie structure.
- 1/2 cup cocoa powder: For that deep, chocolatey goodness. Use a good quality one for the best flavor!
- 1 teaspoon baking soda: This helps our cookies spread just right.
- 1/2 teaspoon salt: A little salt makes all the flavors pop.
- 1 stick (8 tablespoons) unsalted butter, softened: Make sure it’s soft, not melted, for the creamiest dough.
- 3/4 cup Nutella: The star of the show! Oh, that hazelnut-chocolate bliss.
- 1/3 cup granulated sugar: For a touch of sweetness.
- 1/3 cup dark brown sugar: Adds moisture and a lovely caramel note.
- 1 large egg: To bind everything together.
- 2 tablespoons water: Just a little something to get the dough consistency perfect.
- 1 teaspoon vanilla extract: Enhances all those delicious flavors.
For the Simple Icing:
- 1 cup powdered sugar: The foundation of our sweet glaze.
- 1/2 teaspoon vanilla extract: For extra vanilla goodness.
- 2 tablespoons milk or water: To get the perfect drizzling consistency.
- Yellow food coloring: For a sunny touch!
- Red food coloring: To add a pop of color.
How to Make It
Alright, let’s get our aprons on and make some magic happen!
- Preheat and Prep: First things first, let’s get our oven ready! Preheat it to 350°F (175°C). Then, line your baking sheets with parchment paper. This is my secret weapon for easy cleanup and perfectly non-stick cookies.
- Whisk the Dry Ingredients: In a medium bowl, grab a whisk and combine the flour, cocoa powder, baking soda, and salt. Give them a good whisk until they’re all buddies. Set this bowl aside for now.
- Cream the Stars: In a large bowl, it’s time to cream together the softened butter, that glorious Nutella, granulated sugar, and brown sugar. Use an electric mixer if you have one, or a sturdy whisk and some elbow grease! You want it to get light and fluffy – think airy clouds.
- Add the Wet Ingredients: Now, beat in the egg and vanilla extract. Make sure it’s all nice and combined.
- Combine Everything: Here’s where we bring it all together. Gradually add the dry ingredients you set aside into the wet ingredients. Alternate this with the 2 tablespoons of water. Mix until it’s just combined. Don’t overmix, or your cookies might get tough!
- Roll ’em Up: Time to get your hands a little bit messy (the fun kind of messy!). Roll the dough into nice, neat 1-inch balls. Place them on your prepared baking sheets, making sure to leave about 2 inches between each cookie. They’ll spread a little as they bake.
- Bake to Perfection: Pop those baking sheets into the preheated oven and bake for 9-11 minutes. You’re looking for the edges to be set, but the centers should still be slightly soft to the touch. That’s the secret to a chewy cookie!
- Cool Down: Let the cookies hang out on the baking sheets for a few minutes to cool down a bit before gently transferring them to a wire rack to cool completely. Patience is key here – you don’t want your beautiful icing to melt off!
- Whip Up the Icing: While the cookies cool, let’s make the icing. In a small bowl, whisk together the powdered sugar, vanilla extract, and the milk or water until you have a smooth, drizzle-able consistency.
- Divide and Conquer the Color: Pour your icing into two separate small bowls.
- Color Me Yellow: Add a few drops of yellow food coloring to one bowl and stir until you get a lovely sunny hue.
- Color Me Red: Add a few drops of red food coloring to the other bowl and mix until you have a beautiful red.
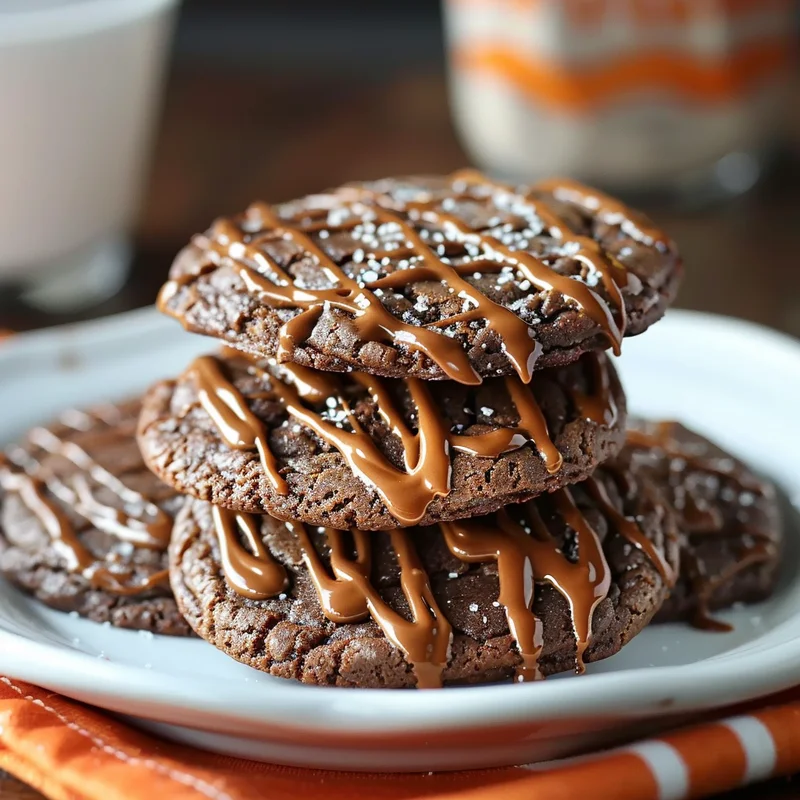
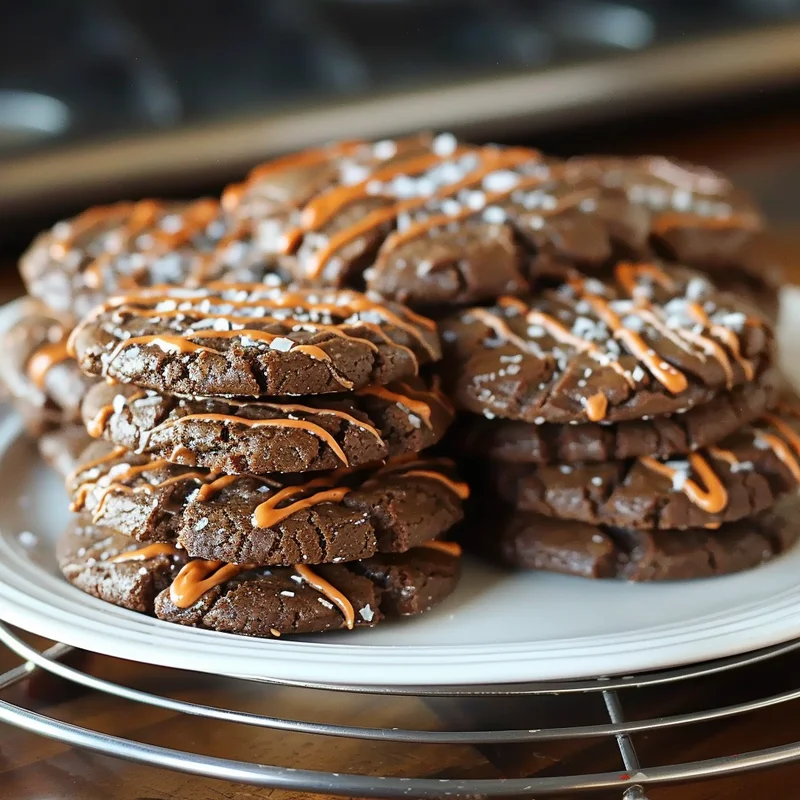
- Decorate and Set: Once your cookies are totally cool (this is important!), it’s time for the fun part! Drizzle or spread the yellow and red icing onto your cookies however you like. Get creative! Let the icing set for a bit before enjoying your masterpieces.
Substitutions & Additions
Feeling adventurous? I love making these cookies my own! Here are some ideas:
- Nut Butter Swap: If you’re not a huge Nutella fan (I can’t imagine why!), you could try a good quality peanut butter or almond butter for a different nutty twist.
- Chocolate Chip Boost: Fold in a handful of mini chocolate chips into the dough for an extra chocolatey punch.
- Sprinkle Power: Before baking, press a few sprinkles onto the tops of the dough balls for some festive flair.
- Different Extracts: Try a touch of peppermint extract or almond extract in the dough for a new flavor profile.
- Cookie Size: Feel free to make them bigger or smaller, just adjust the baking time accordingly.
Tips for Success
A few little tricks to ensure your cookies turn out perfectly every single time:
- Butter Softness is Key: Make sure your butter is truly softened. If it’s too cold, you won’t get that creamy, fluffy texture when creaming. If it’s melted, your cookies will spread too much.
- Don’t Overmix: Once you add the dry ingredients, mix just until combined. Overmixing can develop the gluten in the flour, leading to tougher cookies.
- Cool Completely Before Icing: This is super important! If your cookies are warm, the icing will just melt and slide right off, creating a gooey mess instead of a pretty design.
- Prep Ahead: You can totally make the cookie dough balls a day in advance. Store them in an airtight container in the refrigerator. When you’re ready to bake, just place them on the baking sheet and bake as usual (you might need to add a minute or two to the baking time).
How to Store It
Once these delicious cookies are cooled and the icing has set, store them in an airtight container at room temperature. They should stay wonderfully fresh for about 3-4 days. If you’ve made a big batch (which I often do!), you can also freeze the baked, unfrosted cookies for up to 2-3 months. Just thaw them at room temperature and then add the icing!
FAQs
Got a burning question? Let’s see if I can help!
Q: Can I make these cookies gluten-free?
A: Yes, you absolutely can! I’ve had success using a good quality gluten-free all-purpose flour blend in place of the regular flour. You might need to add a tablespoon or two of extra liquid if the dough seems too dry.
Q: My cookies spread too much. What did I do wrong?
A: This usually happens for a couple of reasons: either your oven wasn’t hot enough, or your butter was too soft (or even melted). Double-check your oven temperature with an oven thermometer and make sure your butter is just softened, not liquid!
Q: How long does the icing last?
A: The icing is best used right after it’s made for the freshest taste and best consistency. If you have leftovers, you can store them in an airtight container in the refrigerator for a day or two, but you might need to add a tiny bit more liquid to loosen it up before using.

Two-Bite Nutella Chocolate Cookies
Equipment
- Oven preheated to 350°F (175°C)
- Baking sheets lined with parchment paper
- Medium bowl
- Whisk
- Large bowl
- Electric mixer optional
- Wire rack
- Small bowl for icing
Ingredients
For the Cookies
- 1.5 cups all-purpose flour The base of our cookie structure.
- 0.5 cup cocoa powder For that deep, chocolatey goodness. Use a good quality one for the best flavor!
- 1 teaspoon baking soda This helps our cookies spread just right.
- 0.5 teaspoon salt A little salt makes all the flavors pop.
- 1 stick unsalted butter softened. Make sure it's soft, not melted, for the creamiest dough.
- 0.75 cup Nutella The star of the show! Oh, that hazelnut-chocolate bliss.
- 0.33 cup granulated sugar For a touch of sweetness.
- 0.33 cup dark brown sugar Adds moisture and a lovely caramel note.
- 1 large egg To bind everything together.
- 2 tablespoons water Just a little something to get the dough consistency perfect.
- 1 teaspoon vanilla extract Enhances all those delicious flavors.
For the Simple Icing
- 1 cup powdered sugar The foundation of our sweet glaze.
- 0.5 teaspoon vanilla extract For extra vanilla goodness.
- 2 tablespoons milk or water To get the perfect drizzling consistency.
- yellow food coloring For a sunny touch!
- red food coloring To add a pop of color.
Instructions
- Preheat oven to 350°F (175°C) and line baking sheets with parchment paper.
- In a medium bowl, whisk together flour, cocoa powder, baking soda, and salt. Set aside.1.5 cups all-purpose flour
- In a large bowl, cream together softened butter, Nutella, granulated sugar, and brown sugar until light and fluffy.1.5 cups all-purpose flour
- Beat in the egg and vanilla extract until combined.1.5 cups all-purpose flour
- Gradually add the dry ingredients to the wet ingredients, alternating with the water. Mix until just combined, do not overmix.1.5 cups all-purpose flour
- Roll the dough into 1-inch balls and place on prepared baking sheets, leaving about 2 inches between cookies.
- Bake for 9-11 minutes, or until edges are set and centers are slightly soft.
- Let cookies cool on baking sheets for a few minutes, then transfer to a wire rack to cool completely.
- To make the icing, whisk together powdered sugar, vanilla extract, and milk or water until smooth and drizzle-able.1.5 cups all-purpose flour
- Divide the icing into two separate bowls.
- Add yellow food coloring to one bowl and stir until desired color is reached.1.5 cups all-purpose flour
- Add red food coloring to the other bowl and stir until desired color is reached.1.5 cups all-purpose flour
- Once cookies are completely cool, drizzle or spread the yellow and red icing onto the cookies. Let the icing set before serving.
Notes
Don't overmix: Once you add the dry ingredients, mix just until combined. Overmixing can develop the gluten in the flour, leading to tougher cookies.
Cool completely before icing: This is super important! If your cookies are warm, the icing will just melt and slide right off, creating a gooey mess instead of a pretty design.
Prep ahead: You can totally make the cookie dough balls a day in advance. Store them in an airtight container in the refrigerator. When you're ready to bake, just place them on the baking sheet and bake as usual (you might need to add a minute or two to the baking time).