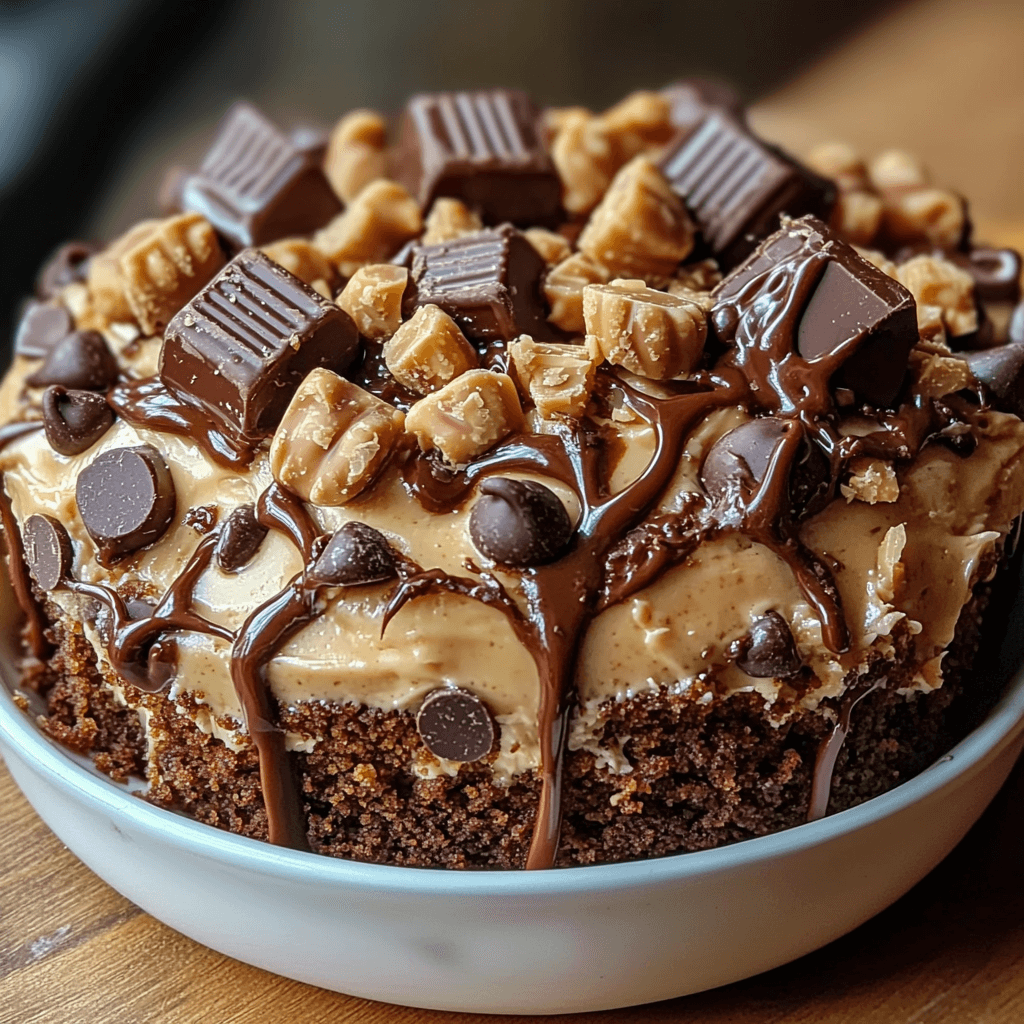
Hey there, fellow dessert enthusiasts! Are you ready to experience a chocolate lover’s dream come true? Prepare yourself for the ultimate indulgence: the Easy Peanut Butter Cup Dump Cake! This recipe isn’t just a cake; it’s a shortcut to pure, unadulterated happiness. Imagine sinking your teeth into a warm, gooey, chocolatey masterpiece, studded with rich peanut butter cups and a delightful peanut butter swirl throughout. That’s exactly what awaits you with this incredibly easy dump cake.
What makes this recipe so special? It’s the perfect blend of textures and flavors. The moist, fudgy chocolate cake base provides the perfect foundation for the creamy peanut butter and the satisfying crunch of the peanut butter cups. It’s a symphony of textures in every bite! But the best part? It’s unbelievably simple to make. Forget about complicated mixing bowls and precise measurements. This dump cake truly lives up to its name: you simply dump the ingredients into a pan and bake! This recipe is perfect for busy weeknights, spontaneous dessert cravings, or impressing guests without spending hours in the kitchen. Trust me, the happy sighs around your table will be worth it. This cake evokes feelings of comfort, joy, and pure chocolatey satisfaction – the ultimate mood booster.

This cake is more than just delicious; it’s friendly. It’s the perfect recipe to share with loved ones, making memories around a shared sweet treat. You’ll taste the love in every bite. So, gather your ingredients, put on some music, and get ready for a truly delightful baking experience. You deserve this!
What You’ll Need
This recipe uses simple ingredients you probably already have in your pantry! Here’s a detailed list:
- 1 box chocolate cake mix: The foundation of our decadent masterpiece. Choose your favorite brand for the best chocolate flavor.
- 1 cup creamy peanut butter: Adds that rich, nutty flavor and creamy texture we all crave. Make sure it’s smooth and creamy for optimal results!
- 1 cup milk: Helps to moisten the cake and create a lovely, tender crumb. Any kind of milk works – whole milk, 2%, or even almond milk in a pinch.
- 1 cup chocolate chips: Because more chocolate is always better! Semi-sweet or milk chocolate chips will both work beautifully.
- 1 cup peanut butter cups, chopped: The star of the show! Chopping them into bite-sized pieces ensures they’re evenly distributed throughout the cake.
- 1/2 cup vegetable oil: Adds moisture and helps create a tender crumb.
- 3 large eggs: Bind the ingredients together and add richness to the cake. Room temperature eggs work best for even baking.
- 1 teaspoon vanilla extract: Enhances the overall flavor and adds a touch of warmth.
- 1 cup powdered sugar (for optional topping): Dust the top with powdered sugar for a beautiful and slightly sweet finish. This step is entirely optional, but highly recommended!
Step-by-Step Instructions
Get ready to be amazed by how easy this recipe is! Preheat your oven to 350°F (175°C). Grease and flour a 9×13 inch baking pan. This prevents sticking and ensures easy removal of your beautiful cake later. Trust me, this step is crucial!
Step 1: Combine the Wet Ingredients In a large bowl, whisk together the creamy peanut butter, milk, vegetable oil, eggs, and vanilla extract until well combined. Make sure there are no lumps of peanut butter hanging around. A whisk or a fork works perfectly.
Step 2: Add the Dry Ingredients Gradually add the chocolate cake mix to the wet ingredients, mixing until just combined. Do not overmix; a few lumps are okay. Overmixing can result in a tough cake.
Step 3: Incorporate the Chocolate Chips and Peanut Butter Cups Gently fold in the chocolate chips and chopped peanut butter cups. Be gentle to avoid crushing the peanut butter cups too much. You want them to remain mostly intact for those delightful bursts of peanut butter and chocolate.
Step 4: Pour and Bake Pour the batter into the prepared baking pan and spread evenly. Make sure it reaches the corners to ensure even baking.
Step 5: Bake to Perfection Bake for 30-35 minutes, or until a wooden skewer inserted into the center comes out with moist crumbs. Don’t overbake! Overbaking will result in a dry cake. Start checking for doneness around the 30-minute mark.
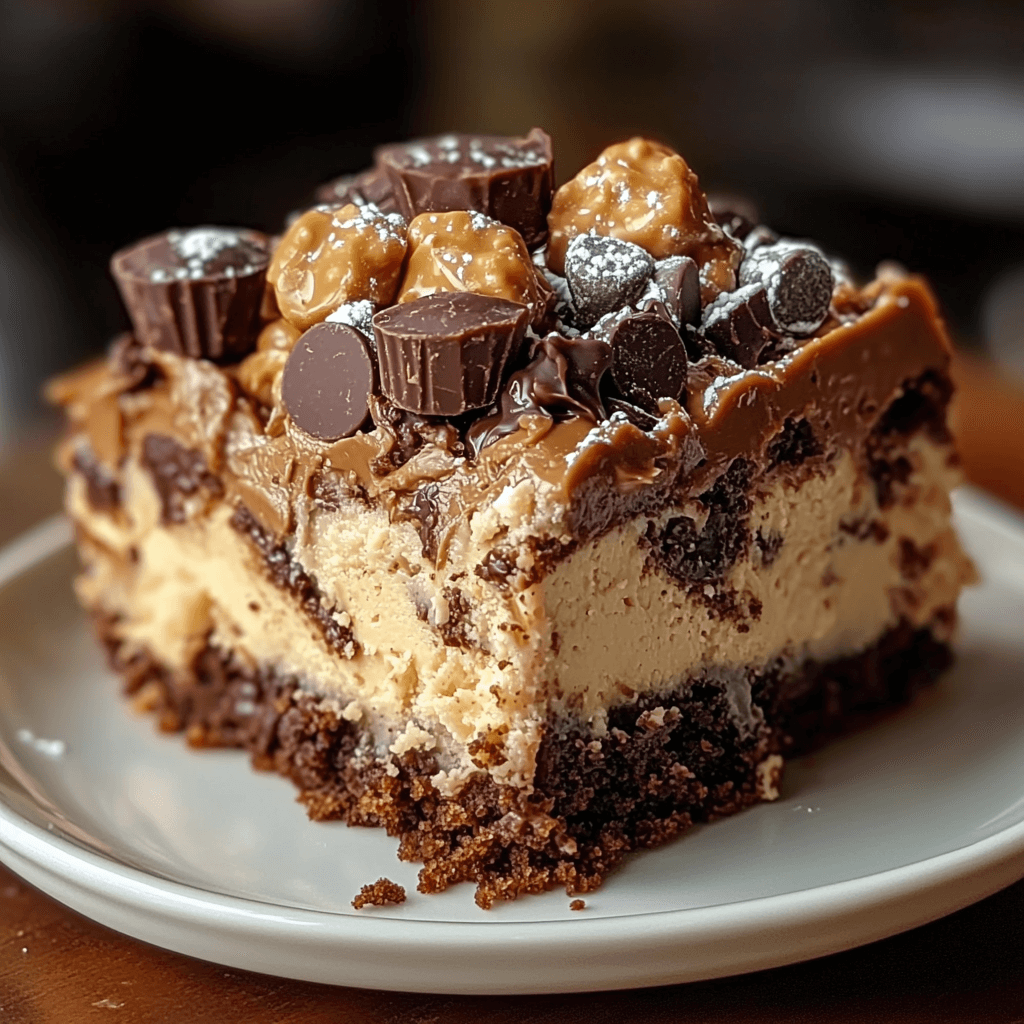
Step 6: Cool and Enjoy Let the cake cool completely in the pan before dusting with powdered sugar (if desired) and slicing into squares. This allows the cake to set and makes it easier to cut.
Pro Tip: For an extra decadent touch, consider adding a dollop of whipped cream or a scoop of vanilla ice cream to each serving. It’s the perfect complement to the rich chocolate and peanut butter flavors.
Tips for Success
To ensure your Peanut Butter Cup Dump Cake turns out perfectly every time, keep these tips in mind:
Don’t overmix the batter. Overmixing can lead to a tough cake. Just mix until the ingredients are combined.
Use room temperature eggs for best results. Room temperature eggs incorporate more easily into the batter, resulting in a smoother texture.
Don’t overbake the cake. Overbaking will result in a dry cake. Start checking for doneness around 30 minutes.
Let the cake cool completely before frosting or serving. This allows the cake to set properly and makes it easier to cut.
If using a different sized pan, adjust the baking time accordingly. A smaller pan will require less baking time, while a larger pan will require more.
Variations to Try
Feeling adventurous? Try these variations to customize your Peanut Butter Cup Dump Cake:
Salted Caramel Swirl: Add a swirl of caramel sauce to the batter before baking for an extra layer of flavor.
Chocolate Peanut Butter Frosting: Top the cooled cake with a rich chocolate peanut butter frosting for an even more decadent treat.
Different Nuts: Substitute chopped pecans or walnuts for some of the peanut butter cups for added texture and flavor.
Gluten-Free Version: Use a gluten-free chocolate cake mix and ensure all other ingredients are gluten-free.
Vegan Option: Use a vegan chocolate cake mix, vegan butter, and flax eggs for a plant-based version. Adjust the milk accordingly for a vegan version.
Storing and Reheating
Store leftover Peanut Butter Cup Dump Cake in an airtight container at room temperature for up to 3 days or in the refrigerator for up to a week. To freeze, wrap the cake tightly in plastic wrap and then foil, and freeze for up to 3 months. To reheat, let it thaw overnight in the refrigerator and then microwave for short bursts until warm. You can also reheat slices in the oven at 350°F for about 5 minutes until heated through. Don’t overheat; this can make the cake dry.
Frequently Asked Questions
Q: Can I use a different type of peanut butter? A: Yes, you can use crunchy peanut butter, but be aware that the texture will be slightly different. The crunchy bits will add a nice textural contrast to the cake.
Q: How long does the cake keep? A: Stored properly in an airtight container at room temperature, the cake will last for up to 3 days. Refrigerated, it will last for up to a week. Frozen, it will last for up to 3 months.
Q: Can I make this cake ahead of time? A: Yes! You can bake the cake a day or two in advance. Store it properly as described above to maintain its freshness and deliciousness.
Q: What if I don’t have vegetable oil? A: You can substitute with melted unsalted butter or another neutral-flavored oil, like canola oil. Just use the same amount.
Q: Can I add other mix-ins? A: Absolutely! Get creative! Consider adding chopped pretzels, toffee bits, or even some espresso powder for an extra flavor boost.
The Final Word
This Easy Peanut Butter Cup Dump Cake is the ultimate comfort dessert – a simple yet incredibly satisfying treat that’s perfect for any occasion. The combination of rich chocolate, creamy peanut butter, and crunchy peanut butter cups is simply irresistible. The ease of preparation makes it ideal for busy weeknights or spontaneous dessert cravings. So, what are you waiting for? Gather your ingredients, put on your apron, and get ready to bake up a batch of happiness! Don’t forget to leave a comment and share your baking experience below – we’d love to hear from you! And if you love this recipe, give it a rating – it helps other chocolate lovers find their perfect dessert!