
Remember those sweet, slobbery greetings from your furry best friend? The ones that make even the toughest days melt away? If you’re anything like me, you adore showering your dog with affection, and what better way to do that than with delicious, homemade treats made with love (and a little bit of pumpkin spice magic)? Today, we’re diving into a recipe that’s so simple, so quick, and so rewarding, you’ll wonder why you didn’t start baking for your pup sooner!
Why You’ll Love This Recipe
- Fast: Whip up a batch in under an hour, from start to finish!
- Easy: No fancy kitchen skills needed – seriously, if you can stir, you can make these!
- Giftable: Package these adorable treats in a cute jar for the dog lovers in your life.
- Crowd-pleasing: Your dog (and probably all their neighborhood pals) will absolutely devour them!
Ingredients
Let’s gather our goodies! These ingredients are not only good for your pup but also super common pantry staples:
- ½ cup pumpkin puree: Make sure it’s pure pumpkin puree, not pumpkin pie filling (that stuff has added sugar and spices!). It’s a great source of fiber for your doggo.
- ¼ cup unsweetened applesauce: Adds a touch of natural sweetness and moisture.
- 3 tablespoons peanut butter: The star of the show for most pups! Opt for all-natural peanut butter without xylitol, as xylitol is toxic to dogs.
- 1 large egg: Acts as a binder to hold all these yummy ingredients together.
- 2 cups whole wheat flour: A hearty and healthy base for our treats. You can also use all-purpose flour if that’s what you have on hand.
- ¼ teaspoon salt: Just a pinch to enhance the flavors.
- ¼ teaspoon baking soda: Helps give the treats a little lift.

How to Make It
Alright, apron on (or just roll up your sleeves!), it’s time to get baking!
- Preheat your oven: Get your oven nice and toasty to 350°F (175°C). It’s always a good idea to have your oven ready to go!
- Mix the wet ingredients: Grab a large bowl. Add your pumpkin puree, applesauce, peanut butter, and the egg. Give it a good stir until everything is beautifully combined. It should look like a lovely, smooth paste.
- Whisk the dry ingredients: In a separate bowl, take your whole wheat flour, salt, and baking soda. Give them a quick whisk together. This helps distribute the baking soda and salt evenly, so you don’t get a surprise bite!
- Combine wet and dry: Now, slowly add your dry ingredients to the wet ingredients. Mix it all up until a dough starts to form. It might seem a little crumbly at first, but keep mixing!
- Knead the dough: Turn the dough out onto a surface that you’ve lightly floured. Gently knead it a few times, just until it all comes together into a nice, workable dough. Don’t over-knead; we’re not making bread here!
- Roll it out: Use a rolling pin to roll out your dough to about ¼-inch thickness. This thickness is perfect for a good crunch.
- Cut out shapes: This is where the fun really begins! Use your favorite cookie cutters to make adorable shapes. Paw prints, bones, hearts – whatever makes you smile (and your dog happy)!
- Prepare for baking: Line a baking sheet with parchment paper. This is a game-changer, trust me, it makes cleanup a breeze! Place your cut-out treats onto the prepared baking sheet.
- Bake to perfection: Pop them into your preheated oven and bake for 20-25 minutes. You’re looking for them to be firm and have a nice, light golden color.
- Cool completely: This is the hardest part – waiting! Let the treats cool completely on the baking sheet before giving them to your pup. They’ll be hot, and nobody likes a burnt tongue!
Substitutions & Additions
Feeling a little adventurous? Here are some ways you can jazz up these already amazing treats:
- Flour Power: If you don’t have whole wheat flour, you can use all-purpose flour, oat flour, or even gluten-free all-purpose flour.
- Spice It Up (Safely!): A tiny pinch of cinnamon or ginger (ensure no nutmeg, as too much can be harmful to dogs) can add a lovely warmth.
- Chewy Treats: If you prefer a chewier treat, bake them for a shorter amount of time, closer to 15-18 minutes.
- Additions: You could mix in a tablespoon of cooked, mashed sweet potato or even a sprinkle of dried parsley for added benefits and flavor.
Tips for Success
A few little pointers to make sure your treat-baking goes off without a hitch:
- Pumpkin Purity: Double-check that you’re using 100% pure pumpkin puree, not pie filling. The difference is significant for your dog’s health!
- Peanut Butter Check: Always, always, always check your peanut butter’s ingredients for xylitol. It’s a lifesaver!
- Dough Consistency: If your dough feels too sticky, add a tablespoon more flour at a time. If it feels too dry, add a teaspoon of water or applesauce.
- Prep Ahead: You can mix the dough, wrap it tightly in plastic wrap, and refrigerate it for a day if you’re short on time.
- Cooling is Key: Don’t skip the complete cooling step. Warm treats can be too soft and might crumble when handled.
How to Store It
Once these goodies are baked and cooled, you’ll want to keep them fresh for your eager pup.
Store your homemade pumpkin dog treats in an airtight container at room temperature for up to a week. For longer storage, pop them into the refrigerator for up to two weeks, or freeze them for up to 3 months! This is great for keeping a stash ready for when your furry friend deserves a special surprise.
FAQs
Can I use canned pumpkin pie filling instead of pumpkin puree?
No, it’s best to avoid pumpkin pie filling. It often contains added sugars, spices like nutmeg, and sometimes xylitol, which can be harmful to dogs.
How long do these treats last?
Stored in an airtight container at room temperature, they’ll last about a week. For longer freshness, refrigerate them for up to two weeks or freeze them for up to three months.
Are these treats safe for puppies?
Yes, these treats are generally safe for puppies, but always introduce any new food slowly and in moderation. Ensure your puppy is old enough to handle solid food safely.
Can I make these treats gluten-free?
Absolutely! You can substitute the whole wheat flour with a gluten-free all-purpose flour blend. You might need to adjust the liquid slightly depending on the blend you use.
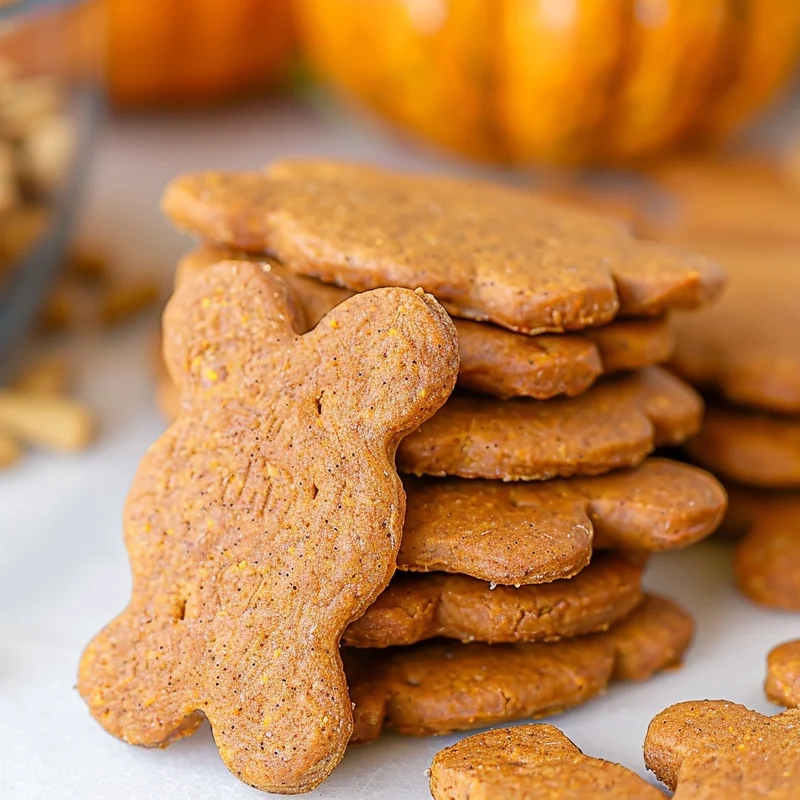
Homemade Pumpkin Dog Treats
Easy and delicious homemade pumpkin dog treats that your pup will go crazy for, made with simple pantry staples.
- Oven
- Large bowl
- Separate bowl
- Rolling Pin
- Cookie cutters
- Baking Sheet
- Parchment paper
Wet Ingredients
- 0.5 cup pumpkin puree (100% pure pumpkin puree, not pumpkin pie filling)
- 0.25 cup unsweetened applesauce
- 3 tablespoons peanut butter (All-natural, without xylitol)
- 1 large egg
Dry Ingredients
- 2 cups whole wheat flour (Or all-purpose flour)
- 0.25 teaspoon salt
- 0.25 teaspoon baking soda
- Preheat your oven to 350°F (175°C).
- In a large bowl, combine pumpkin puree, applesauce, peanut butter, and egg until smooth.
- In a separate bowl, whisk together whole wheat flour, salt, and baking soda.
- Gradually add the dry ingredients to the wet ingredients and mix until a dough forms.
- Lightly flour a surface and knead the dough a few times until workable.
- Roll out the dough to about ¼-inch thickness.
- Cut out shapes using cookie cutters.
- Line a baking sheet with parchment paper and place the cut-out treats on it.
- Bake for 20-25 minutes, or until firm and lightly golden.
- Let the treats cool completely on the baking sheet before serving.
Store in an airtight container at room temperature for up to a week, in the refrigerator for up to two weeks, or freeze for up to 3 months.