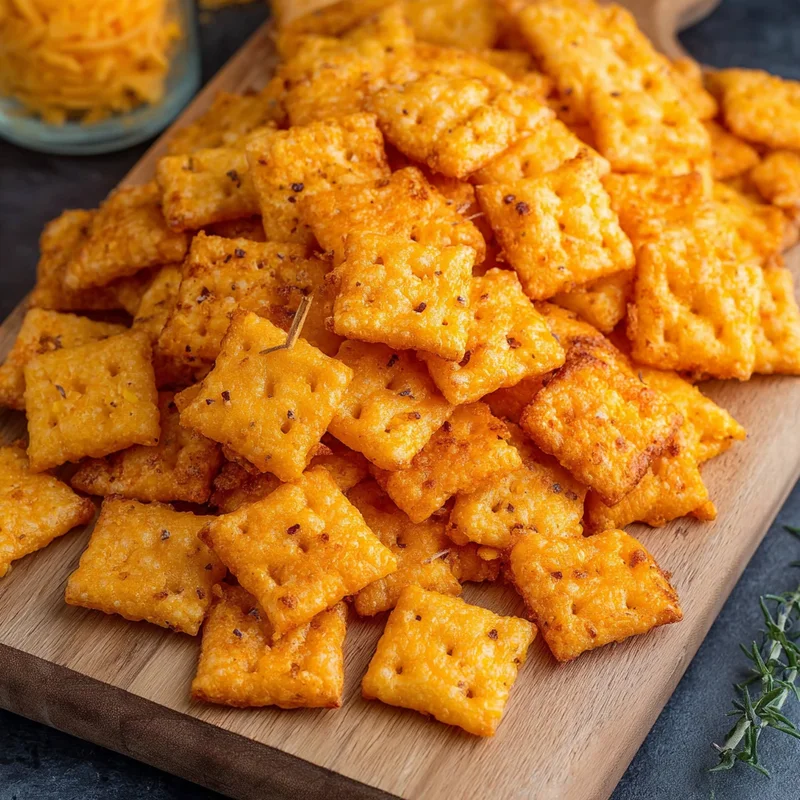
Introduction
Remember those little cheesy crackers that were always in the pantry? The ones that made snack time instantly better? I sure do! There’s something so nostalgic about those classic crunchy squares. Well, get ready to feel that joy all over again, because today we’re making Homemade Cheez-Its from scratch! And trust me, they are ridiculously easy and unbelievably delicious. You’ll be surprised at how quickly you can whip up a batch of these cheesy delights, perfect for a quick afternoon pick-me-up or to impress your friends at your next gathering.
Why You’ll Love This Recipe
- Fast: You can have these cheesy wonders ready in under an hour, including chilling time!
- Easy: Seriously, if you can press a button on a food processor, you can make these.
- Giftable: Package them up in a cute tin or bag – they make the most amazing homemade gift!
- Crowd-pleasing: From toddlers to grandparents, everyone goes nuts for these cheesy squares.
Ingredients
Gather up these simple ingredients, and let’s get baking! The magic really happens with just a few pantry staples.
- 8 ounces shredded sharp cheddar cheese: This is the star of the show! Sharp cheddar gives you that robust cheese flavor we all crave. Make sure it’s shredded – it blends so much better.
- 4 tablespoons (½ stick) salted butter, softened: Softened butter is key for a smooth dough. Salted butter adds a little extra flavor boost.
- ½ teaspoon seasoning salt: Think Lawry’s! It adds a lovely savory depth that’s hard to beat.
- ½ teaspoon garlic powder: Because everything is better with a little garlic, right?
- 1 cup all-purpose flour, spooned and leveled: Just your everyday flour works perfectly here. Spoon it into your measuring cup and level it off to get the right amount.
- 2-3 tablespoons ice water: This is what brings our dough together. Using ice water helps keep the butter from melting too much, which is important for that perfect crisp.
How to Make It
Let’s get our hands (a little bit) cheesy! This is where the fun begins.
- Step 1: The Cheesy Base. Grab your food processor! Toss in the shredded cheddar cheese, the softened butter, the seasoning salt, and the garlic powder. Pulse it all together until it looks like coarse crumbs. It’s like making a cheesy sandcastle, but way more delicious.
- Step 2: Add the Flour. Now, sprinkle in the flour. Pulse it just a few times until everything is barely combined. We don’t want to overwork the dough at this stage.
- Step 3: Bring it Together. Time for that ice water! Add it one tablespoon at a time, pulsing between each addition. You’re looking for the dough to start clumping together. As soon as it starts to form a cohesive ball, stop! Seriously, don’t go too long here – we want tender crackers, not tough ones.
- Step 4: Chill Out. Turn the dough out onto a lightly floured surface. Gently bring it together into a ball. Then, flatten it into a disc, wrap it up snug in plastic wrap, and pop it into the fridge for at least 30 minutes. This chilling step is super important for making it easy to roll out.
- Step 5: Preheat and Prep. While your dough is chilling, preheat your oven to 350°F (175°C). Line a couple of baking sheets with parchment paper. This makes cleanup a breeze and ensures your Cheez-Its don’t stick.
- Step 6: Roll it Out. Get your dough from the fridge. On a lightly floured surface, roll it out to about 1/8-inch thick. Aim for an even thickness so they bake up uniformly.
- Step 7: Get Square! Now for the fun part – cutting! You can use a knife or a pizza cutter to slice the dough into small squares. If you happen to have a tiny square cookie cutter, even better!
- Step 8: Arrange on the Sheets. Carefully place your little cheesy squares onto the prepared baking sheets. Give them a little breathing room so they can bake up perfectly.
- Step 9: Bake to Golden. Pop those baking sheets into your preheated oven and bake for 12-15 minutes. You’re looking for them to be golden brown around the edges and feel slightly firm to the touch.
- Step 10: Cool Down. Let the Cheez-Its cool on the baking sheets for a few minutes. This helps them set up. Then, gently transfer them to a wire rack to cool completely. The waiting is the hardest part, I know!
Substitutions & Additions
Want to mix things up? These crackers are super versatile!
- Cheese: Feel free to experiment with other cheeses! Monterey Jack, Colby, or even a spicy Pepper Jack would be delicious.
- Spices: A pinch of cayenne pepper for a kick, some onion powder, or a sprinkle of dried herbs like rosemary or chives can add a new dimension.
- Flour: While all-purpose is great, you could try a blend with some whole wheat flour for a nuttier flavor.
- Make them “fancy”: Brush the tops with a little melted butter and sprinkle with flaky sea salt before baking for an extra special touch.
Tips for Success
A few little secrets to make your Homemade Cheez-Its absolutely perfect.
- Don’t Overmix: This is the most important tip! Overmixing the dough can lead to tough crackers. Just mix until it just starts to come together.
- Even Rolling: Try your best to roll the dough to an even thickness. This ensures all your crackers bake at the same rate.
- Prep Ahead: You can make the dough ahead of time and keep it wrapped in the fridge for up to 2 days. Just let it soften slightly before rolling.
- Batch Baking: If you’re making a large batch, you can cut out all your squares and keep them on parchment paper in the fridge until you’re ready to bake.
How to Store It
Once your glorious Homemade Cheez-Its are completely cool, store them in an airtight container at room temperature. They’ll stay nice and crispy for about 3-5 days. If they start to lose their crunch, you can pop them in a low oven (around 250°F/120°C) for a few minutes to refresh them!
FAQs
Got questions? I’ve got answers!
Q: Can I use pre-shredded cheese?
A: While you can, I highly recommend shredding your own cheddar from a block. Pre-shredded cheese often has anti-caking agents that can affect the texture of your crackers. It truly makes a difference!
Q: My dough is too crumbly, what did I do wrong?
A: It might need a tiny bit more liquid. Add another tablespoon of ice water, very slowly, and pulse until it just comes together. Remember, don’t overmix!
Q: How do I get them super crispy?
A: Make sure you roll the dough thinly (about 1/8 inch) and don’t overbake them. They will crisp up more as they cool. You can also try baking them a minute or two longer if they seem a little soft right out of the oven.

Homemade Cheez-Its
Equipment
- Food processor
- Plastic wrap
- Baking sheets
- Parchment paper
- Rolling Pin
- Knife or pizza cutter
- Wire rack
Ingredients
Hauptzutaten
- 8 ounces shredded sharp cheddar cheese Make sure it's shredded
- 4 tablespoons salted butter Softened
- 0.5 teaspoon seasoning salt Think Lawry's!
- 0.5 teaspoon garlic powder
- 1 cup all-purpose flour Spoon and leveled
- 2 tablespoons ice water 2-3 tablespoons, add gradually
Instructions
- In a food processor, combine shredded cheddar cheese, softened butter, seasoning salt, and garlic powder. Pulse until it resembles coarse crumbs.
- Add the flour to the food processor and pulse a few times until barely combined.
- Gradually add ice water, one tablespoon at a time, pulsing between additions, until the dough starts to clump together and form a cohesive ball. Be careful not to overmix.
- Turn the dough onto a lightly floured surface, gently bring it into a ball, and flatten it into a disc. Wrap in plastic wrap and chill in the refrigerator for at least 30 minutes.
- Preheat oven to 350°F (175°C) and line baking sheets with parchment paper.
- On a lightly floured surface, roll out the chilled dough to about 1/8-inch thickness.
- Cut the dough into small squares using a knife or pizza cutter.
- Arrange the squares onto the prepared baking sheets, leaving some space between them.
- Bake for 12-15 minutes, or until golden brown around the edges and slightly firm.
- Let the crackers cool on the baking sheets for a few minutes, then transfer them to a wire rack to cool completely.