Introduction
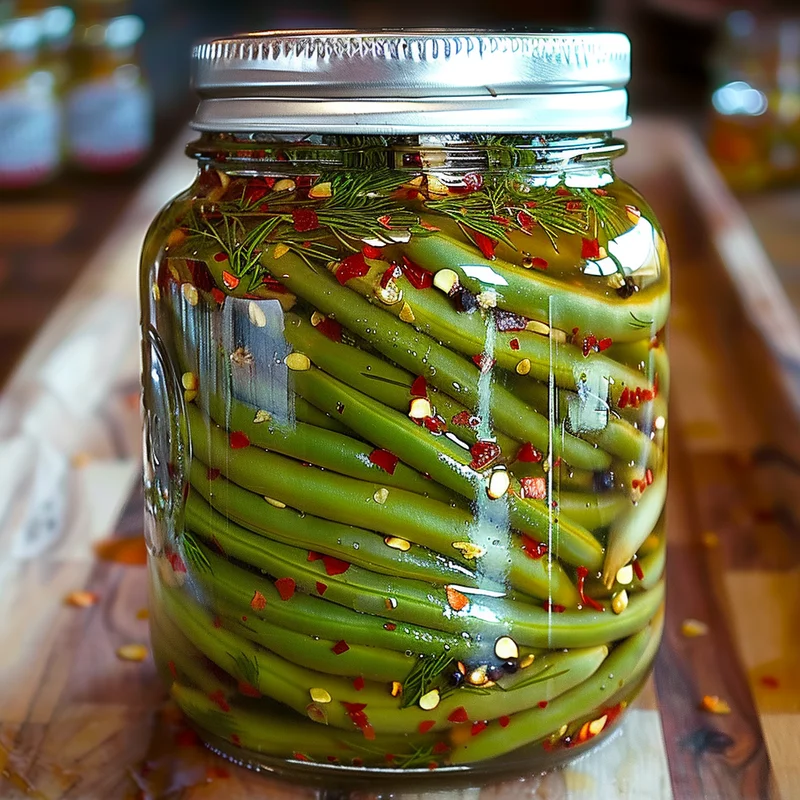
Remember those summer days, picking beans straight from the garden? There’s something so special about fresh, crisp green beans, and when you can capture that perfect snap with a kick of spice and a hint of dill, well, that’s pure magic! Today, we’re diving into a recipe that’s going to bring a burst of flavor and a delightful crunch to your kitchen: Spicy Dilly Beans. These aren’t your average pickled beans; they’re a vibrant, zesty treat that’s incredibly easy to make and will have everyone asking for the recipe. Get ready to transform simple green beans into a gourmet snack that’s perfect for gifting or just treating yourself!
Why You’ll Love This Recipe
- Fast to Make: While canning takes a little time, the prep is super speedy!
- Incredibly Easy: Even if you’re new to canning, this recipe is foolproof.
- Perfect for Gifting: Imagine handing over a beautiful jar of these spicy delights – instant hit!
- Crowd-Pleasing: They’re the perfect appetizer, side dish, or even a healthy snack that everyone will rave about.
Ingredients
Gathering your ingredients is half the fun! Here’s what you’ll need:
- 3 pounds fresh green beans: Look for nice, firm beans that snap when you break them. That’s the key to a great crunch!
- 2 ½ cups white vinegar: This provides the essential tang and acts as our preservative.
- 2 ½ cups water: To dilute the vinegar and create the perfect brine.
- 4 tablespoons pickling salt: It’s important to use pickling salt (also called canning salt) because it doesn’t contain anti-caking agents that can make your brine cloudy.
- 5 medium cloves garlic: Peel them and get them ready to add that savory depth.
- 5 teaspoons dill seed: This is where the “dilly” comes from! It gives that classic, aromatic dill flavor.
- 5 teaspoons red chile flakes: For that lovely little kick of heat. You can adjust this to your spice preference!
How to Make It
Alright, let’s get our hands dirty and create some deliciousness!
- Prep Your Beans: Start by giving your fresh green beans a good wash. Then, trim off the little stem ends. You can leave them whole or trim them into bite-sized pieces, whatever you prefer!
- Make the Brine: Grab a large pot and combine the white vinegar, water, and pickling salt. Pop it on the stove over medium-high heat. Stir it gently until the salt is completely dissolved. Once it’s bubbling and boiling, let it simmer for just a minute.
- Pack Your Jars: Now for the canning jars. Make sure they’re sterilized – this is super important for safe canning. I like to wash them in hot, soapy water and then give them a quick rinse or even pop them in the dishwasher. Pack the green beans into the jars as tightly as you can without squishing them. Think of it like packing a beautiful bouquet!
- Flavor Boost: For each jar, tuck in one peeled garlic clove, a teaspoon of dill seed, and a teaspoon of those red chile flakes. It’s like giving each jar its own little flavor packet!
- Pour the Brine: Carefully ladle the hot brine over the green beans, making sure to cover them completely. Leave about half an inch of space at the top of the jar – this is called headspace, and it’s important for a good seal. If you see any air bubbles trapped, gently poke them out with a non-metallic utensil, like a chopstick or a plastic utensil.
- Seal ‘Em Up: Wipe the rims of your jars clean with a damp cloth. This removes any stray bits of brine or beans that could prevent a proper seal. Then, screw on the lids and bands until they’re fingertip-tight.
- Water Bath Time: Get a large pot or a water canner ready with water. Once the water is boiling, carefully place your filled jars into the boiling water bath. Make sure the water covers the jars by at least an inch. Let them process (boil) for 10 minutes.
- Cool and Store: Once the processing time is up, carefully remove the jars from the water bath and place them on a wire rack or a folded towel on your counter. Let them cool completely – this can take several hours. You’ll hear little popping sounds as the lids seal! Once they’re cool, check that the lids are concave (curved down) – that means they’ve sealed! Store them in a cool, dark place.
Substitutions & Additions
These Spicy Dilly Beans are fantastic as is, but here are some fun ways to customize them:
- Spice Level: Love it extra spicy? Amp up the red chile flakes! Prefer a milder kick? Use half the amount or switch to mild chile flakes.
- Herbs: Feel free to add a sprig of fresh dill to each jar along with the dill seed for an extra burst of fresh dill flavor. A bay leaf can also add a subtle earthy note.
- Garlic: If you’re a big garlic fan, you can add a second clove to each jar.
- Vinegar: While white vinegar is standard, you could experiment with apple cider vinegar for a slightly different flavor profile, though white vinegar is recommended for optimal clarity and flavor in pickling.
Tips for Success
A few pointers to ensure your Spicy Dilly Beans turn out perfectly:
- Sterilization is Key: Don’t skip sterilizing your jars and lids. This is crucial for preventing spoilage and ensuring your pickles are safe to eat.
- Use Pickling Salt: As mentioned, regular table salt can make your brine cloudy. Stick with pickling or canning salt for the best results.
- Proper Headspace: Too little headspace can cause siphoning (liquid escaping the jar) during processing, and too much can prevent a proper seal. Half an inch is the magic number!
- Check Your Seals: After cooling, press the center of the lid. If it doesn’t flex up and down, it’s sealed. If a lid doesn’t seal, refrigerate that jar and eat it within a few weeks.
- Prep Ahead: You can wash and trim your beans a day or two in advance and store them in the refrigerator in a plastic bag.
How to Store It
Once your jars have cooled and sealed, store them in a cool, dark pantry or cupboard. They’ll keep beautifully for at least a year. Once a jar is opened, always refrigerate it and enjoy the deliciousness within a few weeks.
FAQs
How long do Spicy Dilly Beans need to sit before eating?
For the best flavor, I like to let them sit for at least a week after canning to allow the flavors to meld. They’ll be safe to eat sooner, but the taste really deepens with a little time!
Can I skip the water bath canning?
While you can make these and store them in the refrigerator, omitting the water bath processing means they are not shelf-stable and must be kept refrigerated. For long-term storage at room temperature, water bath canning is essential.
What do I do with the leftover brine?
The brine is packed with flavor! While it’s designed for pickling, you can use a tiny bit in salad dressings or marinades. However, since it’s intended for canning, it’s best not to reuse it for other pickling projects.
How can I tell if a jar has gone bad?
Always check the seal before opening. If the lid is popped up, or if you notice any mold, off-odors, or discoloration, discard the jar immediately. When in doubt, throw it out!
Spicy Dilly Beans
Equipment
- Large pot for making brine and for water bath canning
- Canning jars sterilized
- Wire rack for cooling jars
- plastic bag for storing beans if prepped ahead
Ingredients
Main ingredients
- 3 pounds fresh green beans Look for nice, firm beans that snap when you break them. Trim off the little stem ends. Can be left whole or trimmed into bite-sized pieces.
- 2.5 cups white vinegar provides the essential tang and acts as our preservative.
- 2.5 cups water To dilute the vinegar and create the perfect brine.
- 4 tablespoons pickling salt also called canning salt; does not contain anti-caking agents that can make your brine cloudy.
- 5 medium cloves garlic peeled
- 5 teaspoons dill seed gives that classic, aromatic dill flavor.
- 5 teaspoons red chile flakes For that lovely little kick of heat. Can adjust to spice preference.
Instructions
- Prep Your Beans: Start by giving your fresh green beans a good wash. Then, trim off the little stem ends. You can leave them whole or trim them into bite-sized pieces, whatever you prefer!3 pounds fresh green beans
- Make the Brine: Grab a large pot and combine the white vinegar, water, and pickling salt. Pop it on the stove over medium-high heat. Stir it gently until the salt is completely dissolved. Once it's bubbling and boiling, let it simmer for just a minute.3 pounds fresh green beans
- Pack Your Jars: Make sure they're sterilized – this is super important for safe canning. I like to wash them in hot, soapy water and then give them a quick rinse or even pop them in the dishwasher. Pack the green beans into the jars as tightly as you can without squishing them. Think of it like packing a beautiful bouquet!3 pounds fresh green beans
- Flavor Boost: For each jar, tuck in one peeled garlic clove, a teaspoon of dill seed, and a teaspoon of those red chile flakes. It's like giving each jar its own little flavor packet!3 pounds fresh green beans
- Pour the Brine: Carefully ladle the hot brine over the green beans, making sure to cover them completely. Leave about half an inch of space at the top of the jar – this is called headspace, and it's important for a good seal. If you see any air bubbles trapped, gently poke them out with a non-metallic utensil, like a chopstick or a plastic utensil.3 pounds fresh green beans
- Seal 'Em Up: Wipe the rims of your jars clean with a damp cloth. This removes any stray bits of brine or beans that could prevent a proper seal. Then, screw on the lids and bands until they're fingertip-tight.
- Water Bath Time: Get a large pot or a water canner ready with water. Once the water is boiling, carefully place your filled jars into the boiling water bath. Make sure the water covers the jars by at least an inch. Let them process (boil) for 10 minutes.
- Cool and Store: Once the processing time is up, carefully remove the jars from the water bath and place them on a wire rack or a folded towel on your counter. Let them cool completely – this can take several hours. You'll hear little popping sounds as the lids seal! Once they're cool, check that the lids are concave (curved down) – that means they've sealed! Store them in a cool, dark place.