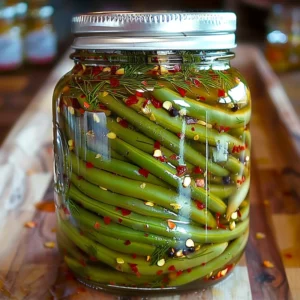
Spicy Dilly Beans
Transform simple green beans into a gourmet snack that's perfect for gifting or just treating yourself! These Spicy Dilly Beans offer a vibrant, zesty treat with a delightful crunch and a kick of spice.
Equipment
- Large pot for making brine and for water bath canning
- Canning jars sterilized
- Wire rack for cooling jars
- plastic bag for storing beans if prepped ahead
Ingredients
Main ingredients
- 3 pounds fresh green beans Look for nice, firm beans that snap when you break them. Trim off the little stem ends. Can be left whole or trimmed into bite-sized pieces.
- 2.5 cups white vinegar provides the essential tang and acts as our preservative.
- 2.5 cups water To dilute the vinegar and create the perfect brine.
- 4 tablespoons pickling salt also called canning salt; does not contain anti-caking agents that can make your brine cloudy.
- 5 medium cloves garlic peeled
- 5 teaspoons dill seed gives that classic, aromatic dill flavor.
- 5 teaspoons red chile flakes For that lovely little kick of heat. Can adjust to spice preference.
Instructions
- Prep Your Beans: Start by giving your fresh green beans a good wash. Then, trim off the little stem ends. You can leave them whole or trim them into bite-sized pieces, whatever you prefer!3 pounds fresh green beans
- Make the Brine: Grab a large pot and combine the white vinegar, water, and pickling salt. Pop it on the stove over medium-high heat. Stir it gently until the salt is completely dissolved. Once it's bubbling and boiling, let it simmer for just a minute.3 pounds fresh green beans
- Pack Your Jars: Make sure they're sterilized – this is super important for safe canning. I like to wash them in hot, soapy water and then give them a quick rinse or even pop them in the dishwasher. Pack the green beans into the jars as tightly as you can without squishing them. Think of it like packing a beautiful bouquet!3 pounds fresh green beans
- Flavor Boost: For each jar, tuck in one peeled garlic clove, a teaspoon of dill seed, and a teaspoon of those red chile flakes. It's like giving each jar its own little flavor packet!3 pounds fresh green beans
- Pour the Brine: Carefully ladle the hot brine over the green beans, making sure to cover them completely. Leave about half an inch of space at the top of the jar – this is called headspace, and it's important for a good seal. If you see any air bubbles trapped, gently poke them out with a non-metallic utensil, like a chopstick or a plastic utensil.3 pounds fresh green beans
- Seal 'Em Up: Wipe the rims of your jars clean with a damp cloth. This removes any stray bits of brine or beans that could prevent a proper seal. Then, screw on the lids and bands until they're fingertip-tight.
- Water Bath Time: Get a large pot or a water canner ready with water. Once the water is boiling, carefully place your filled jars into the boiling water bath. Make sure the water covers the jars by at least an inch. Let them process (boil) for 10 minutes.
- Cool and Store: Once the processing time is up, carefully remove the jars from the water bath and place them on a wire rack or a folded towel on your counter. Let them cool completely – this can take several hours. You'll hear little popping sounds as the lids seal! Once they're cool, check that the lids are concave (curved down) – that means they've sealed! Store them in a cool, dark place.
Notes
For the best flavor, let them sit for at least a week after canning to allow the flavors to meld. If a lid doesn't seal, refrigerate that jar and eat it within a few weeks. Once a jar is opened, always refrigerate it and enjoy the deliciousness within a few weeks. When in doubt, throw it out!