Easy Cinnamon Sugar Donut Sweet Bread
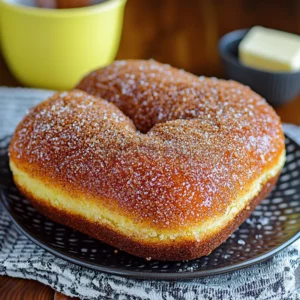
Imagine the warm, cozy feeling of biting into a freshly baked donut, but in the comforting, sliceable form of a loaf of bread. That's exactly what this Cinnamon Sugar Donut Sweet Bread delivers! It takes everything you love about those classic cinnamon-sugar-coated treats and turns it into an incredibly easy, unbelievably moist loaf that's perfect for sharing... or, let's be honest, for keeping all to yourself.
Equipment
- Loaf pan standard 9x5 inch
- Electric mixer optional
- Wire rack
- Large bowl
- Medium bowl
- Small bowl
- Liquid measuring cup
Ingredients
Batter
- 0.25 cup Oil Any neutral oil like vegetable or canola
- 0.25 cup Unsalted Butter softened
- 1 cup Granulated Sugar
- 1 tsp Vanilla Extract
- 2 large Eggs room temperature
- 1.5 cups All-purpose Flour
- 1 tsp Baking Powder
- 0.5 tsp Salt
- 0.5 cup Buttermilk
- 0.5 tsp Molasses
- 0.5 tsp Cinnamon for the batter
Topping
- 0.5 cup Unsalted Butter melted
- 0.25 cup Light Brown Sugar packed
- 0.25 cup Granulated Sugar for the topping
- 0.5 tsp Cinnamon for the topping
Instructions
- Preheat your oven to 350°F (175°C). Grease and flour a standard 9x5 inch loaf pan, or line it with parchment paper for easy removal.
- In a large bowl, cream together the softened butter, oil, and granulated sugar (1 cup) until light and fluffy. This should take 2-3 minutes with an electric mixer, or a bit longer by hand.
- Beat in the vanilla extract. Then, add the eggs one at a time, mixing well after each addition until fully incorporated. Scrape down the sides of the bowl as needed.
- In a separate medium bowl, whisk together the all-purpose flour, baking powder, and salt.
- In a small bowl or liquid measuring cup, whisk together the buttermilk, molasses, and 1/2 tsp cinnamon (batter).
- Alternately add the dry ingredients and wet ingredients to the butter mixture, starting and ending with the dry. So, add about a third of the flour mixture, mix on low speed just until combined, then half of the buttermilk mixture, mix just combined, another third of the flour, the rest of the buttermilk, and finally the rest of the flour. Mix just until no dry streaks remain. Be careful not to overmix!
- Pour the batter into your prepared loaf pan and smooth the top.
- Now, let's make the magical topping! In a small bowl, whisk together the melted butter, light brown sugar, granulated sugar (1/4 cup), and 1/2 tsp cinnamon (topping) until well combined.
- Pour this topping evenly over the batter in the pan. It might sink a little, and that's totally fine!
- Bake for 50-65 minutes, or until a toothpick inserted into the center of the bread comes out clean (avoid poking directly into the topping layer if possible, try the bread part underneath). The top will be golden brown and bubbly.
- Let the bread cool in the pan on a wire rack for about 15-20 minutes before carefully lifting it out (using the parchment paper slings if you used them).
- Transfer the bread to the wire rack to cool completely before slicing.
Notes
Substitutions & Additions:
- Milk: If you absolutely don't have buttermilk or the ingredients for the substitute, whole milk can work, but the texture might be slightly less tender.
- Spices: Feel free to add a pinch of nutmeg or cardamom to the batter or topping for extra warmth.
- Add-ins: Stir in ½ cup of chopped pecans or walnuts for a little crunch. Mini chocolate chips would also be delicious!
- Glaze: For an extra layer of donut-y goodness, whisk together ½ cup powdered sugar with 1-2 tablespoons of milk or cream and drizzle it over the cooled bread.
- Butter: While the recipe calls for unsalted, you can use salted butter and just omit the added ½ tsp salt in the batter ingredients.
Tips for Success:
- Room Temperature Ingredients: Softened butter, room temp eggs, and buttermilk emulsify better, leading to a smoother batter and a more even bake.
- Don't Overmix: Once you add the flour, mix just until everything is combined. Overmixing develops the gluten too much, resulting in a tougher bread.
- Spoon & Level Flour: Don't scoop flour directly from the bag; gently spoon the flour into your measuring cup and level off the excess with a straight edge.
- Checking for Doneness: Ovens vary! Start checking around the 50-minute mark. A toothpick inserted into the center should come out clean or with just a few moist crumbs attached, not wet batter. If the top is browning too quickly, you can tent the loaf loosely with foil during the last 10-15 minutes of baking.
- Cooling Time: Letting it cool in the pan for 15-20 minutes is important before transferring it to the rack. It allows the bread to firm up slightly, making it easier to remove without breaking.
Storage:
- Room Temperature: Store the cooled bread in an airtight container or wrap it tightly in plastic wrap for 2-3 days.
- Refrigerator: Can be kept in the fridge for up to a week, but best enjoyed at room temperature or slightly warmed.
- Freezer: Once completely cooled, wrap tightly in plastic wrap, then aluminum foil or a freezer-safe bag. Lasts up to 3 months. Thaw overnight at room temperature. Individual slices can be frozen and toasted.